Creating a Chat Bot
Creating a Chat Bot with the Node Bot Framework
Learn how to create a chat bot using the Node Bot Framework.
anchorIntroduction
anchorIn this tutorial you'll create a Webex Bot using the Webex Node Bot Framework and the Webex Bot Starter kit. The Node Bot Framework lets developers focus primarily on how the bot will interact with users in Webex, by writing "handlers" for various message or membership events in spaces where the bot has been added. The Webex Bot Starter is an example app that demonstrates use of the Bot Framework.
anchorPrerequisites
anchorTo install or run the chat bot server locally or on a remote host you will need:
- A GitHub account
- Git (https://git-scm.com/downloads)
- Node.js (https://nodejs.org/en/download/)
Alternatively, you can remix and configure an existing Glitch project to quickly spin up a new server. See Deploy the Server using Webhooks for details.
anchorProvision a Bot
anchorTo get started you first need to provision a Bot in the Developer Portal. This involves providing a name, icon and description for your bot. In return you are provided with a bot access token that the Node Bot Framework server uses to make API calls on the bot's behalf.
To provision a bot:
Open the New Bot form on the Developer Portal.
Enter a name, username, and description for your bot, and select a bot icon.
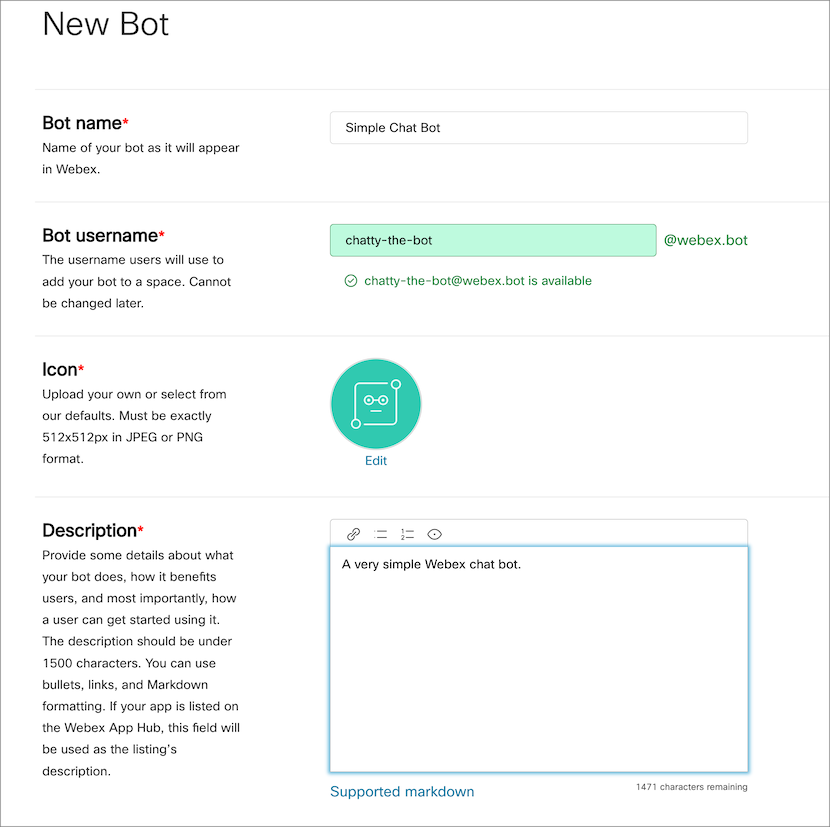
Click Add Bot.
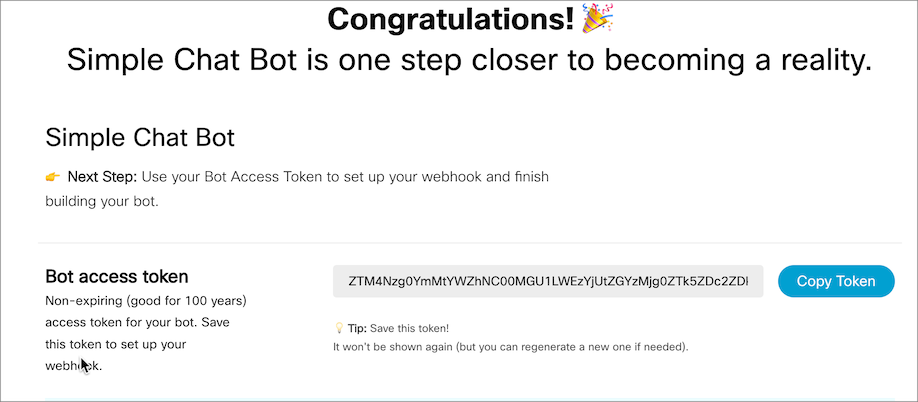
A bot access token is generated. Copy and save this token for later use.
anchorRun the Starter App Using Websockets
anchorYou can run the Node Bot server in "websocket" mode on your local system, without having to deploy a public service (or configure reverse proxies required for webhooks running on your local system). If the configuration object you pass to the Framework constructor function doesn't contain a webhookUrl field, the framework falls back automatically to websockets. Even if you don't intend to use websockets in your production bot service, it provides a quick way to start creating and testing.
You will need the bot access token generated previously to complete this section.
To run the starter app in websocket mode:
Clone the Webex Bot Starter repository.
git clone https://github.com/WebexSamples/webex-bot-starter.gitRename
config-template.jsontoconfig.json. This file contains configuration options for the Node Bot Framework.Replace the contents of config.json with the following, replacing
<BOT_ACCESS_TOKEN>with your bot's access token.{ "token": "<BOT_ACCESS_TOKEN>" }Start the server (also installs packages):
npm start
...
Starting framework, please wait...
Listening for webex teams events...
framework is all fired up! [Press CTRL-C to quit]
anchorAdd the Bot to a Space
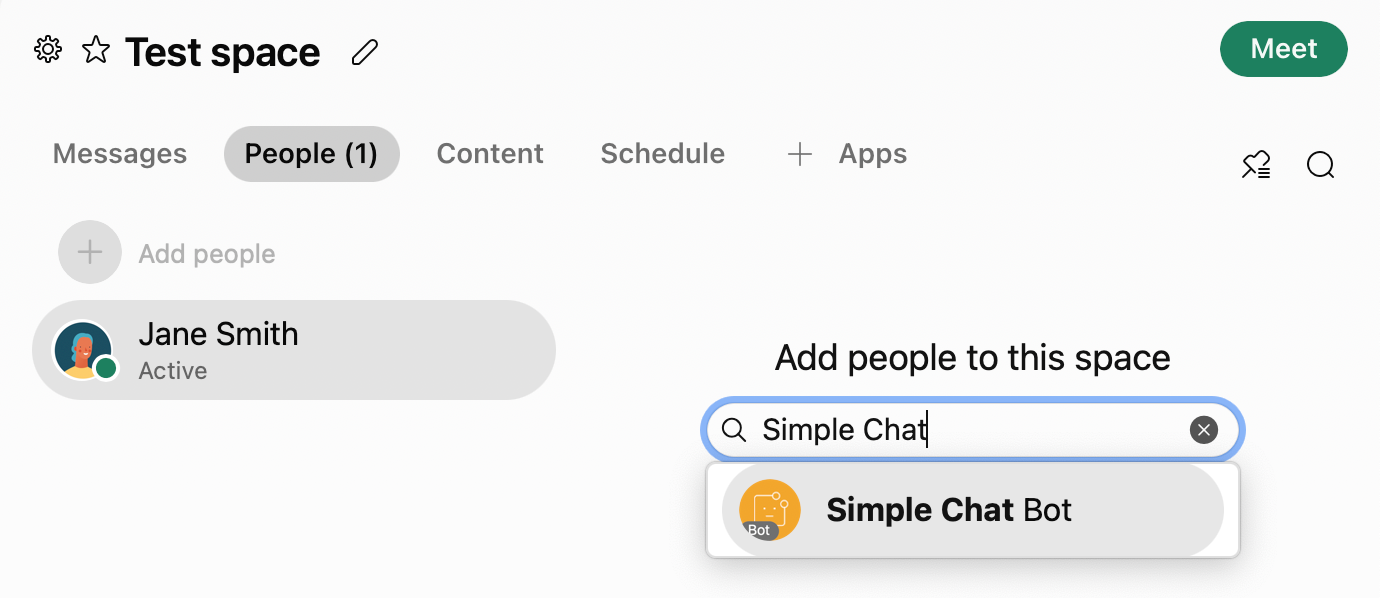
anchorOf course, to use the bot you created you need to add it to a space. You add a bot to a space just as you would add a person. You can lookup the bot by its "friendly" name or username (bot@)
Notice that when the bot is added to the space it introduces itself and provides some hints for how to use it, including a help command.
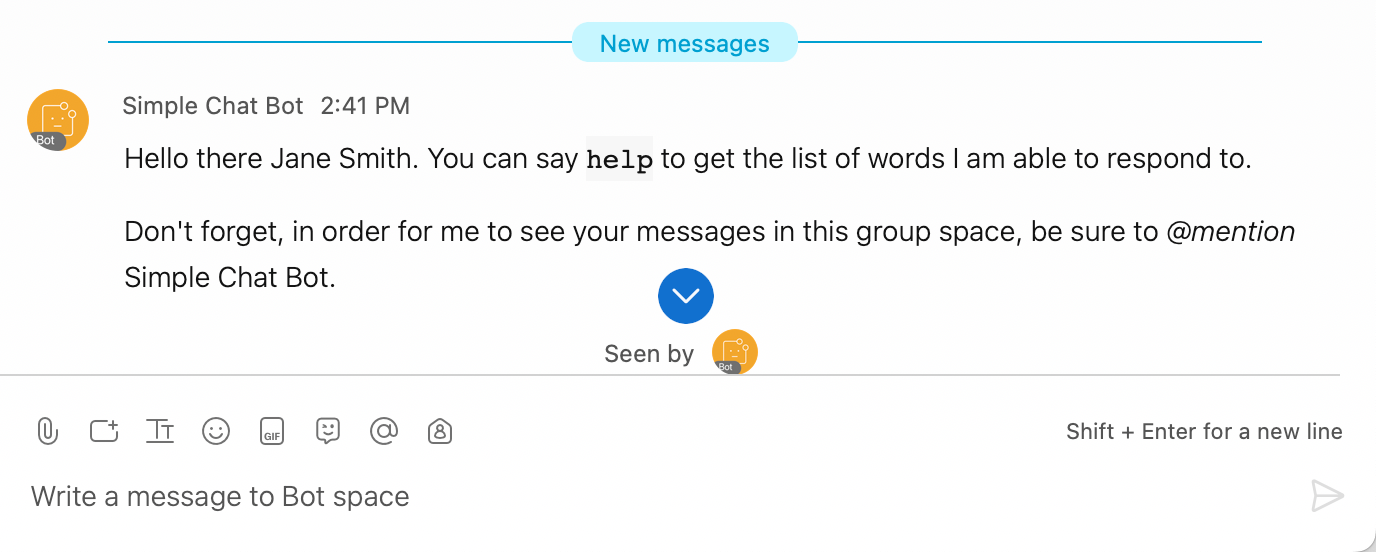
To get a list of commands supported by the starter bot, send it a message by mentioning it by name (@botname) followed by "help".
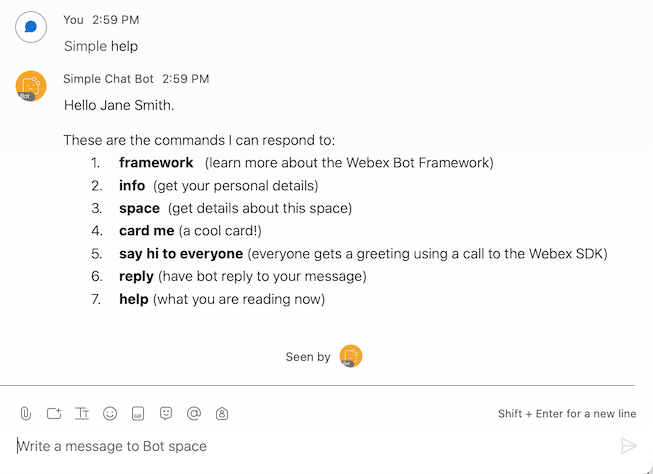
If your bot name contains multiple words ("Simple Chat Bot", for example) only the first word in the name is used to tag it (@Simple, for example).
anchorProcess Incoming Messages
anchorMost of the Node Bot Framework's functionality is based on the framework.hears( ) function. This function lets you define phrases or patterns the bot should respond to, and what actions to take in response. The code below shows the basic pattern for setting up a framework.hears() function.
framework.hears(<phrase>, function(bot, trigger) {
  bot.<command>
    .then(function(returnedValue) {
      // do something with returned value
    })
    .catch(function(err) {
      // handle errors
    });
});
<phrase>— A string or regex pattern. If a string, the string is matched against the first word in the room message. message. If a regex pattern is used, it is matched against the entire message text.bot— An instance of the Bot class associated with the Webex space that triggered theframework.hears()call. You use this object to send messages to a room, reply in-line to a message, send direct messages and more.trigger— Provides details about the person, room, and message that caused the function to trigger.bot.<command>— The bot method to execute.then— (Optional) Invoked once the previous command is executed successfully.catch— (Optional) Invoked if any errors occur, either when executing the original command or in any of the chained 'then' functions.
For example, the following example listens for the phrase "hello". In response the bot sends "Hello trigger.person.displayName property.
framework.hears("hello", function(bot, trigger) {
  bot.reply(`Hello ${trigger.person.displayName}.`)
});
You can use a regular expression to match multiple phrases.
framework.hears(/hello|hi|hey/i, function(bot, trigger) {
  bot.say(`Hello ${trigger.person.displayName}.`)
});
If multiple hears() handlers matches a given phrase or regex pattern, each handler is invoked in the order that it's defined in the source. This is useful for handling unexpected input.
anchorHandling Unexpected Input
anchorIf the user sends your bot a command that isn't programmed to respond to, it's good practice to provide a "catch all" hears() function. To do this you define a hears() function after all other hears() functions that matches any string (/.*/gim), and a state variable that indicates if the a phrase has already been handled. This works because if multiple hears() handlers match the same phrase or expression then the framework calls them in the order they are defined.
For example, the following shows the basic logic and structure to provide catch all message handler.
// Initialize state variable
var responded = false;
framework.hears('hello', function(bot, trigger) {
  bot.say(`Hi ${trigger.person.displayName}`)
  // Set state variable to true
  responded = true;
});

// This will always match
framework.hears(/.*/gim, function(bot, trigger) {
  // Respond with a 'sorry' message if there wasn't a match
  if (!responded) {
    bot.say('Sorry, I don\'t know how to respond to "%s"', trigger.message.text);
  }
  // Set state variable to false
  responded = false;
});
The catch-all handler must be the last handler defined in the source file or you will get unexpected results.
anchorMake a Webex API Call
anchorEach bot instance provides a reference to a Webex JavaScript SDK instance that your app can use to make calls against that SDK. For instance, you could use memberships.list() to get a list of members in a space so you can send each a direct message using the bot.dm() method, as shown below.
To send a DM to each user in a space:
Open index.js in the starter bot project.
Add the following code that listens for a
pokecommand.framework.hears("poke", function (bot, trigger) { responded = true; // Use the webex SDK to get the list of users in this space bot.webex.memberships.list({roomId: bot.room.id}) .then((memberships) => { for (const member of memberships.items) { if (member.personId === bot.person.id) { // Skip myself! continue; } // Get name of poker let pokerName = (member.personDisplayName) ? member.personDisplayName : member.personEmail; bot.dm(member.personId, `You got poked by ${pokerName}`); } }) .catch((e) => { console.error(`Call to sdk.memberships.get() failed: ${e.messages}`); }); });Save your changes and restart the Node server (
npm start).
Once the server indicates it's listening for Webex events, send a "poke" message to the space and tag the bot by name. The bot will send a DM to each member in the space.
anchorDeploy the Bot using Webhooks (Optional)
anchorYou've already seen it's easy to deploy a bot using websockets with the Bot Framework. Alternatively, the framework can also receive events using webhooks. Webhooks must reachable on an open port of a publicly accessible URL (note that websockets do not have this requirement). The Bot Framework makes it easy to switch between webhooks or websockets with a simple configuration change. To initiate the framework using webhooks, add a webhookUrl field to the framework configuration object.
// framework options
var config = {
  webhookUrl: 'https://www.example.com/bothook',
  token: 'Tm90aGluZyB0byBzZWUgaGVyZS4uLiBNb3ZlIGFsb25nLi4u'
};
A slightly modified version of the Node Starter Bot is available on Glitch that you can remix as your own. You just need to assign values to environment variables for your bot access token and webhook URL. See the project's README for setup instructions. The bot will behave identically to when it's using websockets.

To use webhooks with the Node Bot Server running locally, you need to install HTTP tunneling software such as NGrok to forward webhook requests to the locally running instance. For instructions on setting up NGrok see Setting up a Local Web Server from the Blog From Zero to Webex Chatbot in 15 Minutes.