Create Spaces, add participants, post messages from Postman
Create Spaces, add participants, post messages from Postman
This tutorial describes ways to integrate with Webex from code to automate various tasks.
anchorObjectives
anchorIn this tutorial, you will learn to integrate with Webex from code to automate various tasks such as:
- Creating new persistent chat spaces
- Adding participants to existing spaces
- Posting messages to a space
By leveraging the same Webex REST APIs, you will then be in good position to take it to the next stage to configure, monitor and secure your Webex organization, or create collaborative applications that create Enterprise workflows and enhance Customer experiences.
anchorPre-requisites
anchorYou'll need a Webex account to take the steps of this tutorial. If you don't have a Webex account yet, there's never been a better time to sign up. Simply sign-up, and create an account. Check your inbox for a 'You have a Webex account' message, and click the 'Create Password' verification link in it.
We will use the Postman REST client to create HTTP queries against the Webex API. After downloading Postman and installing on your laptop, we recommend you create a Postman account so that your work and collections can be saved to the cloud.
anchorStep 1: 'Webex for Developers' documentation
anchorIf you are new to Webex APIs, Webex for Developers is the place you'll want to start from: the portal exposes the reference documentation for the REST API, and the developer SDKs available to extend Webex.
Login at Webex for Developers.
Note that you will not need to create a separate developer account. The same user account lets you access both Webex clients and 'Webex for Developers'
Once logged in, grab a temporary developer access token for your account by navigating to the Accounts and Authentication section of the Getting Started page:
Copy your developer access token and save it in a safe place, as you'll be using the token in later steps of this tutorial:
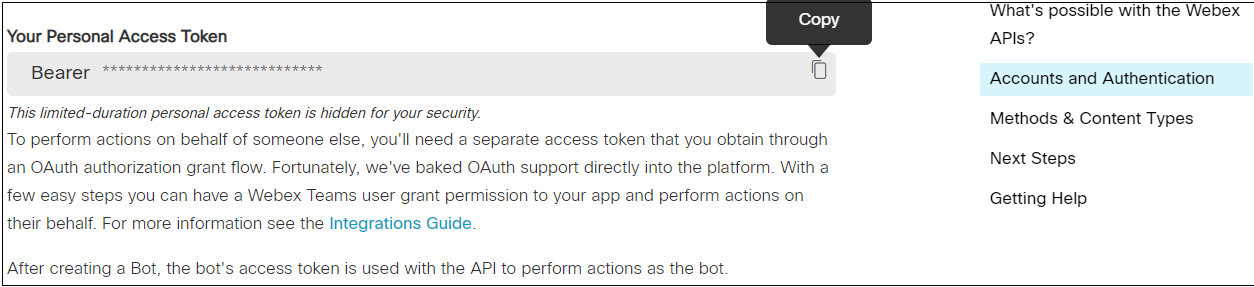
Note that your developer access token is provided for test purposes only - never use it in production.
The token expires 12 hours after being generated, or upon logging out of 'Webex for Developers'. If your personal token is compromised, simply logout and sign in again on the developer portal to invalidate any previous tokens.
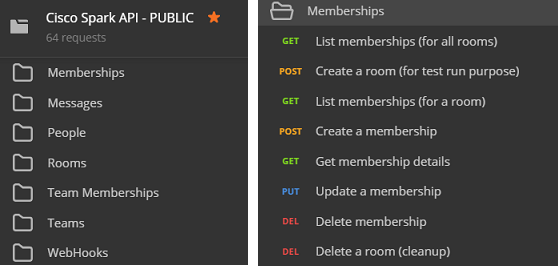
On that same page, scroll down and click the '+' icon next to Full API Reference in the left navigation panel to expand the API references. Check the various API resources entries in the table of contents:
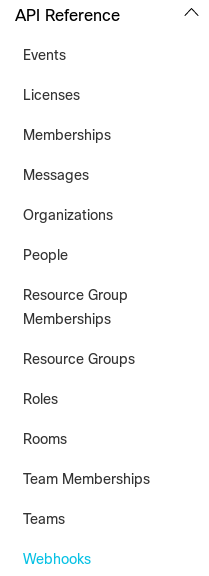
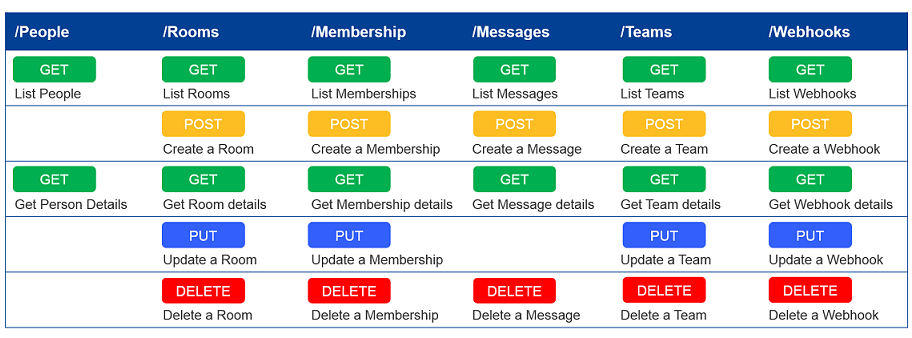
These resources let you interact with spaces and receive notifications as users interact in Webex. The table below gives you a quick overview of some of the basic features offered by the Webex API resources:
Scroll down the API reference items and click on Rooms to access the documentation for the API used for managing spaces. The following is the URL we will use for accessing it from the REST client:
https://webexapis.com/v1/roomsNote: Webex rooms were renamed spaces. However, the Webex API still uses the
/roomsresource, and room identifiers properties namedroomId. Throughout these tutorials, you may see the 'Space' and 'Room' terms used interchangeably.The 'Webex for Developers' API documentation is interactive: click the 'List Rooms' method on the Rooms page to view documentation for the API resource and try out sample requests. Make sure Try It mode is enabled to send HTTP requests and get instant responses from the Webex REST API right in your browser:

anchorStep 2: Listing spaces from Postman
anchorWebex users rely on persistent spaces to collaborate with other users by instant message, voice, video, and file sharing.
To begin with, we will use Postman to fetch the list of spaces to which your user belongs, by sending a query to the /rooms resource:
Launch Postman (click Reset if necessary to clear out any previous info)
In Postman, construct a REST GET request for the
/roomsresource- In the field marked Enter request URL, enter
https://webexapis.com/v1/rooms - Select GET in the HTTP method drop-down menu
- Click the Headers tab
- Under Key enter
Authorization - In the same row, under Value enter
Bearerfollowed by a space and your access token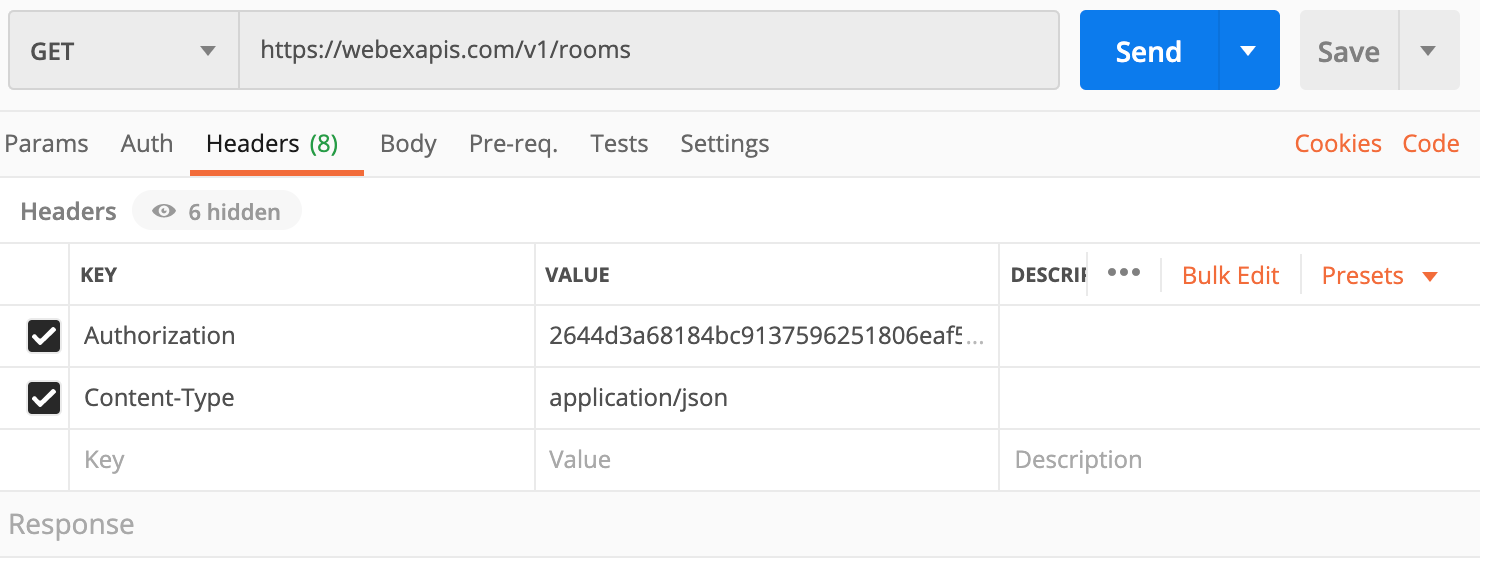
- In the field marked Enter request URL, enter
Click the Send button
If the request is successful, the response displays JSON-formatted data corresponding to your Webex spaces. Each space has an
idname-value pair: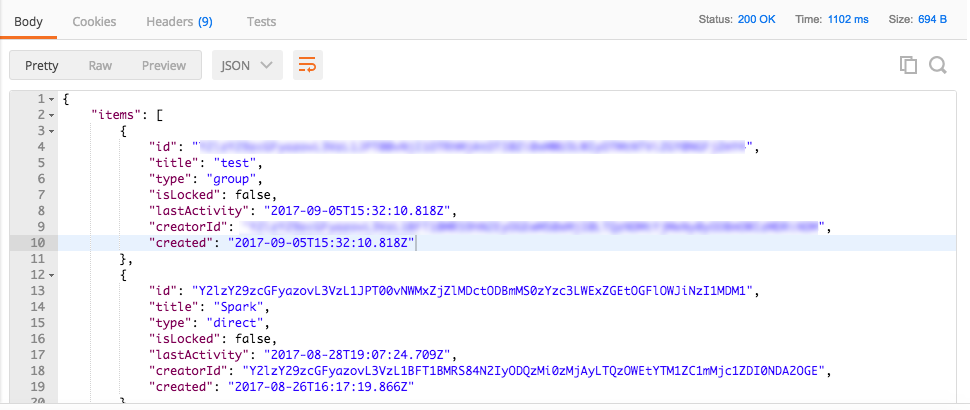
anchorStep 3: Creating Spaces
anchorCreating a new Webex space uses the same /rooms REST resource, but this time it uses the HTTP POST method. Also, it requires some extra information about the space, such as its title, represented as JSON data in the request body. For example:
{
    "title": "Test Space"
}
In Postman, construct a REST POST request for the
/roomsresource- In the field marked Enter request URL here, enter
https://webexapis.com/v1/rooms - In the request method drop-down box, select POST
- Select the Headers tab. Under Key enter
Authorization - Under Value, enter
Bearerfollowed by a space character and your access token - Click the row below to add a second header. For the Key name, enter
Content-Type. For the Value, enterapplication/json: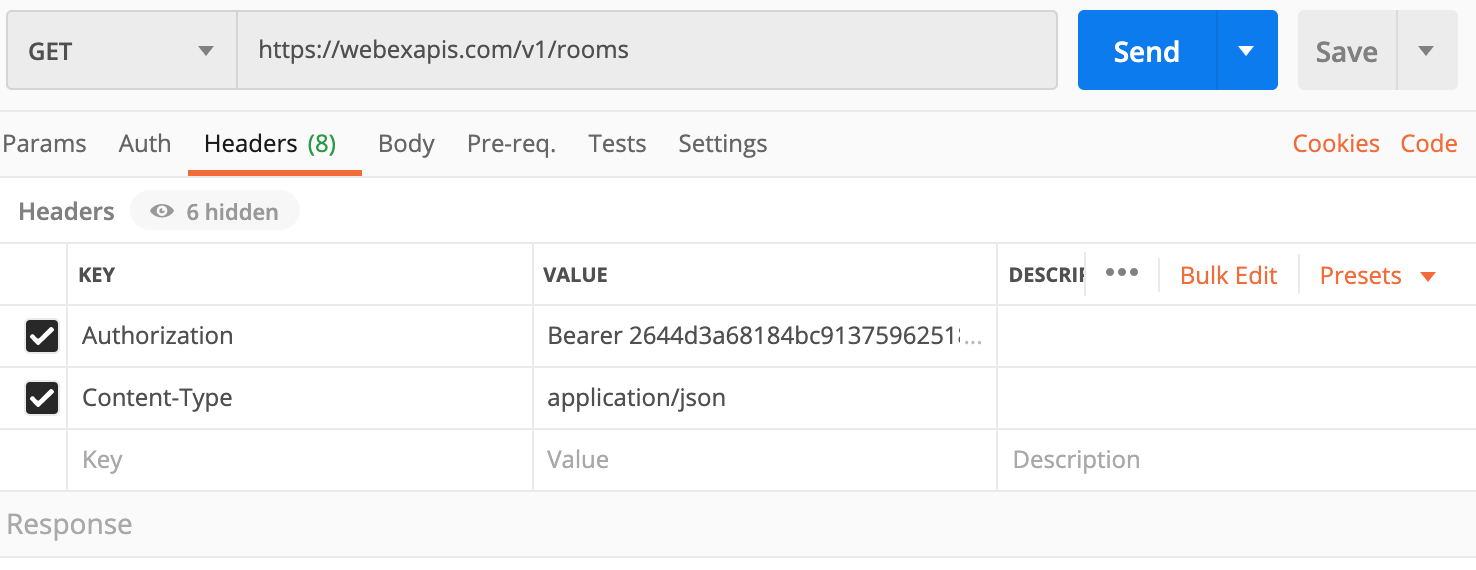
- Select the Body tab (next to the Headers tab), and select the
rawradio button. In the large body text box below, paste the JSON-formatted title of the space (the brackets and name-value pair shown above):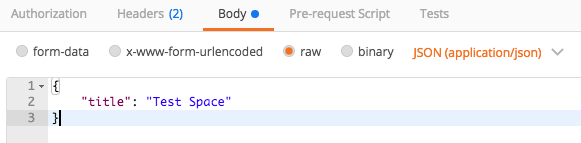
- In the field marked Enter request URL here, enter
Click the Send button to launch the request
If the request was successful, the response displays JSON-formatted data about the newly created space in the response, including its
id. You can also see the new space in Webex: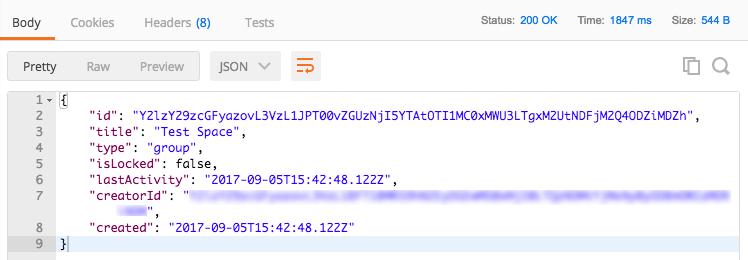
Make a note of this space's id. You will use it in the following steps to add a participant and post a message to the space. You can use this note-box page as a temporary placeholder
anchorStep 4: Adding users to a space
anchorA collaboration space is persistent, as is the list of users who are members of that space. When you create a space, you are the only user in it. To collaborate, you must add other users to a space.
Users are called members of a space. To add a user to a space, send an HTTP POST request to the /memberships resource. Include JSON-formatted membership information in the request's payload body, as shown below. Replace everything inside the quotes on the right side, including the curly brackets, with your values. The {room_id} will be what you copied and saved earlier and the {new_user_email} will be your personal email (or a bot email such as toFrench@webex.bot).
Example JSON body
{
  "roomId" : "{room_id}",
  "personEmail" : "{new_user_email}",
  "isModerator" : false
}
Note: This step requires a second email address. If you have a second email address available, you can create an additional account, or simply add a bot such as
toFrench@webex.bot
Have the following information ready:
- The email address of a second registered user
- The
idof the space created in Step 3 - Your developer access token
In Postman, construct a REST POST request for the
/membershipsresource:- In the field marked Enter request URL here enter
https://webexapis.com/v1/memberships - From the request method dropdown box, select POST
- Select the Headers tab
- Under Key, enter
Authorization - Under Value, enter
Bearerfollowed by a space and your access token - Add a second header where the name is
Content-Typeand value isapplication/json:
- Click the Body tab, and select
raw - In the large body text box, paste the JSON membership data shown above. Replace
{room_id}with your new space'sid, and replace{new_user_email}with the email address of the second user account. (Make sure to preserve the double quotes shown):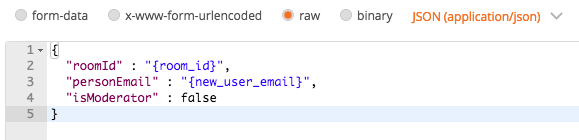
- In the field marked Enter request URL here enter
Click the Send button.
If the request is successful, the response displays JSON-formatted data that describes the new membership, including a unique
idfor the new member, and acreatedtimestamp. In the Webex client, the space should now reflect that a new user has been added.
Note: The Cisco Webex API documentation for managing Space Members is available at https://developer.webex.com/docs/api/v1/memberships
anchorStep 5: Posting messages
anchorAs the final step, we will post a new message to a space using the Webex API's /messages resource using HTTP POST.
Note: For more details about the /messages API Resource, check: https://developer.webex.com/docs/api/v1/messages
In the request payload's body, include some JSON-formatted data that represents the text of the new message:
{
  "roomId": "{room_id}",
  "text": "Hello World!"
}
Have the following information ready:
- The
idof the Webex space created in Step 3 - Your Webex access token
- The
In Postman, construct a REST POST request for the
/messagesresource:- In the field marked Enter request URL, put the URL for the Webex API
/messagesresource: https://webexapis.com/v1/messages - From the request method drop-down box, make sure POST is selected
- Select the Headers tab, under Key, enter
Authorization - Under Value, enter
Bearerfollowed by a space character and your access token - Add a second header whose name is
Content-Typeand whose value isapplication/json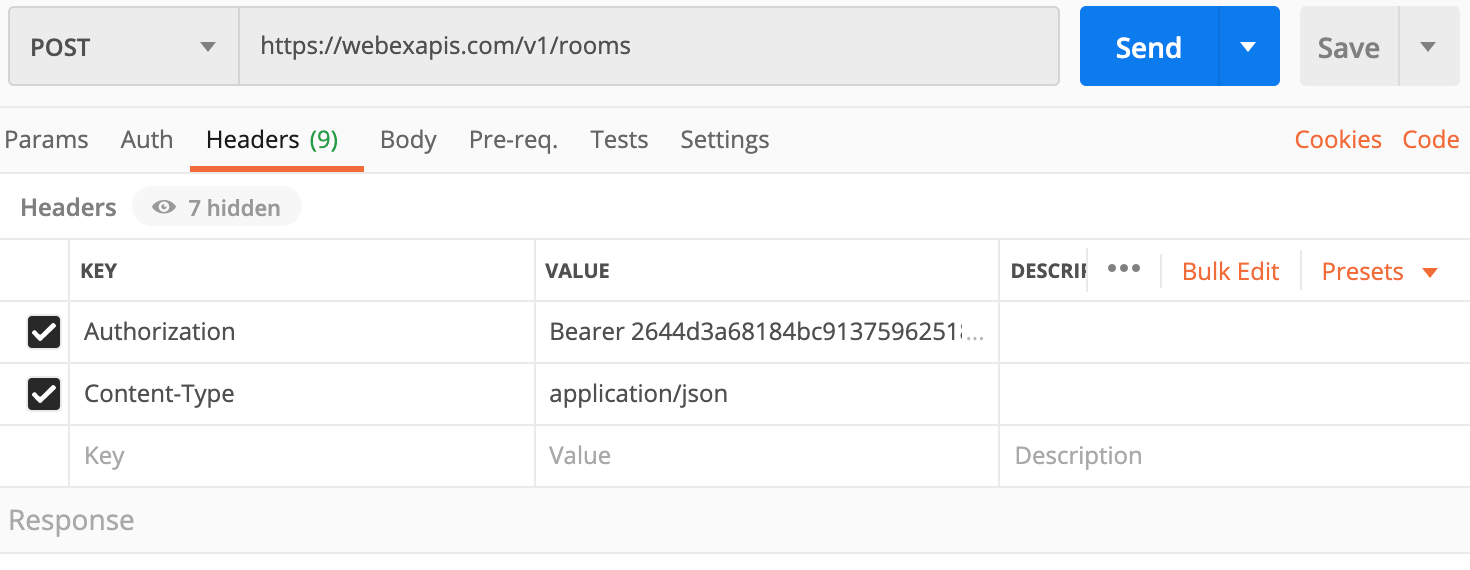
- Select the Body tab, and make sure
rawis selected. In the large body text box, paste the JSON data shown above. Be sure to replace{room_id}with the spaceidsaved in step 3 (but make sure the quotes remain as shown):
- In the field marked Enter request URL, put the URL for the Webex API
Click the Send button to launch the request
If the request is successful, the response should display JSON-formatted data describing the new message, such as the message's unique
id, and acreatedtimestampOpen your Webex client, and check that the space displays the new message!
Markdown formatted messages
Using the Markdown markup syntax, Webex clients can render rich text across all platforms - mobile, desktop and web.
Visit https://developer.webex.com/docs/basics#formatting-messages to check out the possibilities offered. By replacing the "text" property in the previous JSON body to "markdown", you will be able to post enriched messages: bold, italic, links, ordered and unordered lists, block quotes, in-line code, code blocks, and @mentions:
{
  "roomId": "{room_id}",
  "markdown": "This API is really **awesome**\n\n>You bet!"
}
Going further
In this tutorial, we only scratched the surface of the Postman REST client capabilities. We encourage you to explore code generation and hidden treasures with Postman!
If you want to give these a try, follow the instructions on GitHub to import a scripted Postman collection for Webex, and access the full set of Webex APIs in a single location: