Introduction to Webex Apps
Introduction to Webex Apps
This tutorial provides an introduction to Webex's extensibility.
In this introduction to the Webex REST API, you will use the interactive documentation to experience Webex programmability. The tutorial will then go through a few use-cases, and drill into the fundamentals of Webex Apps.
anchorPrerequisites
anchorYou will need a free Webex user account to complete this tutorial. If you're not a Webex user yet, sign up.
anchorAbout Webex Extensibility
anchorNOTE: Webex rooms were renamed Spaces. However, the REST API still uses the /rooms resource, and you may see the 'Space' and 'Room' terms used interchangeably.
Extending Webex enables you to create applications that:
- Automate tasks such as creating spaces, posting messages, or adding participants to an existing space.
- Perform actions in response to events in Webex such as participants being added to spaces, or new messages being created.
To automate tasks, custom applications use the Webex REST API.
The API enables you to interact with Webex's main concepts:
- Rooms: Create, update or delete spaces.
- Teams: Create, update or delete teams.
- People: Look for Webex users.
- Messages: Create or delete Messages.
- Memberships and Team Memberships: Add, remove participants from spaces and teams, and promote participants as moderators.
Moreover, your application can register Webhooks to be notified of various events, such as new messages being posted, or users joining or leaving spaces.
The documentation listed above enables you to interact with the Webex API straight from your Web browser. Because you will use the interactive documentation throughout these tutorials, you will start by exploring it here. Moreover, doing so will help demonstrate these extensibility concepts!*
anchorREST API Documentation
anchorDocumentation for the Webex REST API is available at Cisco Webex for Developers.
Navigate to 'Webex for Developers' site in the browser.
Log in using your Webex credentials. If you don’t have a Webex account, get one by clicking Sign up.
Once logged in, you can get a temporary developer access token for your account by navigating to the of the Getting Started page.
Copy your developer access token and place it in a safe place, as you'll be using it in future steps of this tutorial:

IMPORTANT: Your developer access token is provided for test purposes only - never use it in production. It expires 12 hours after being generated, or upon logging out of 'Webex for Developers' site. If your personal token is compromised, simply logout and sign in again on the developer portal to invalidate any previous tokens.
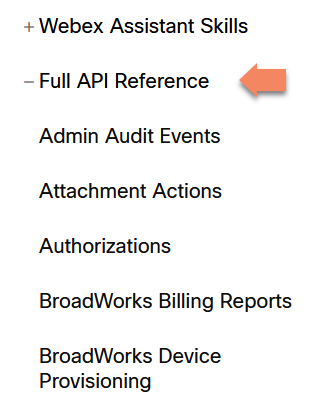
In the left navigation pane, go to Webex API and expand theFull API Reference section.
This action displays Webex API categories such as people, rooms (aka spaces), memberships, messages, teams, and so on.

In the next step, you’ll use this documentation to create a new space.
anchorInvoking the REST API
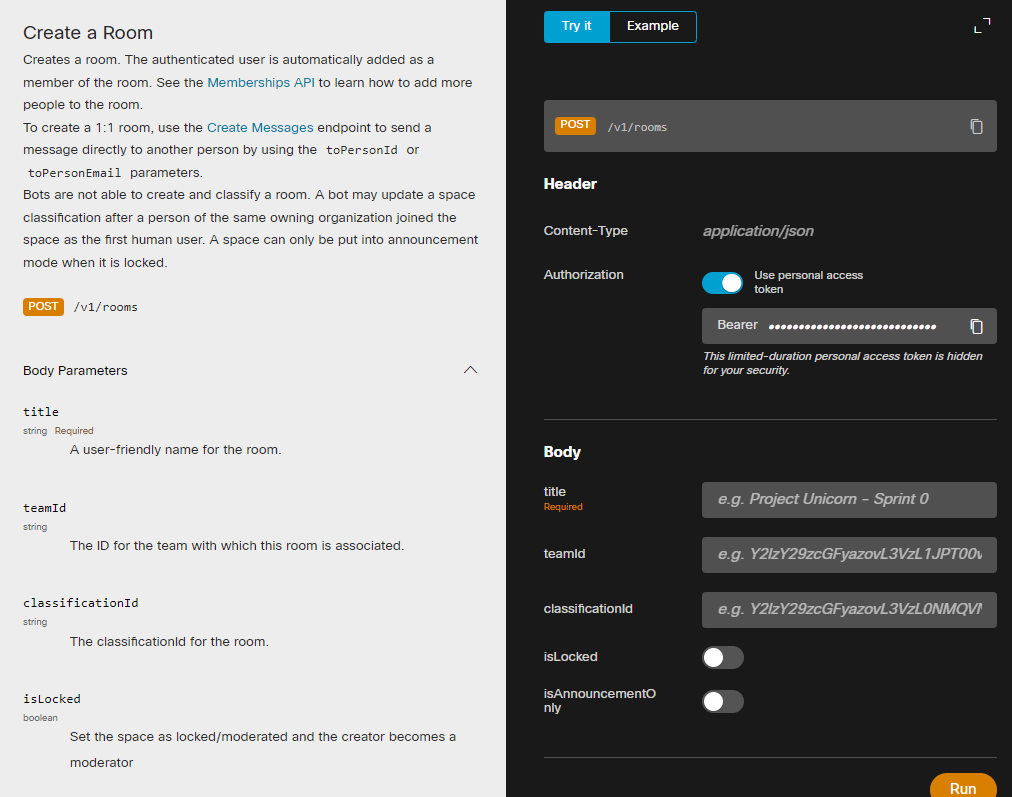
anchorNavigate to Full API Reference>Rooms resource in the left-hand navigation pane.
In the left nav, click POST Create a Room.
Activate the documentation's Try It mode.

Edit the title of the Room and click Run.
The right pane displays the request sent to the Webex API and the response received.

Note the request and response, because the request contains your access token, it is sent on your behalf.
Let’s examine the response. The
200 / OKdisplayed in green is called the HTTP status code in the REST API terminology. It gives you instant feedback about the success or failure of your API call.The main HTTP status codes are '2xx' for success, '4xx' for client errors, and '5xx' for server errors. If you scroll down the page, the documentation shows various HTTP status code you may encounter.
Also, observe that the JSON response contains information about the newly created space such as its
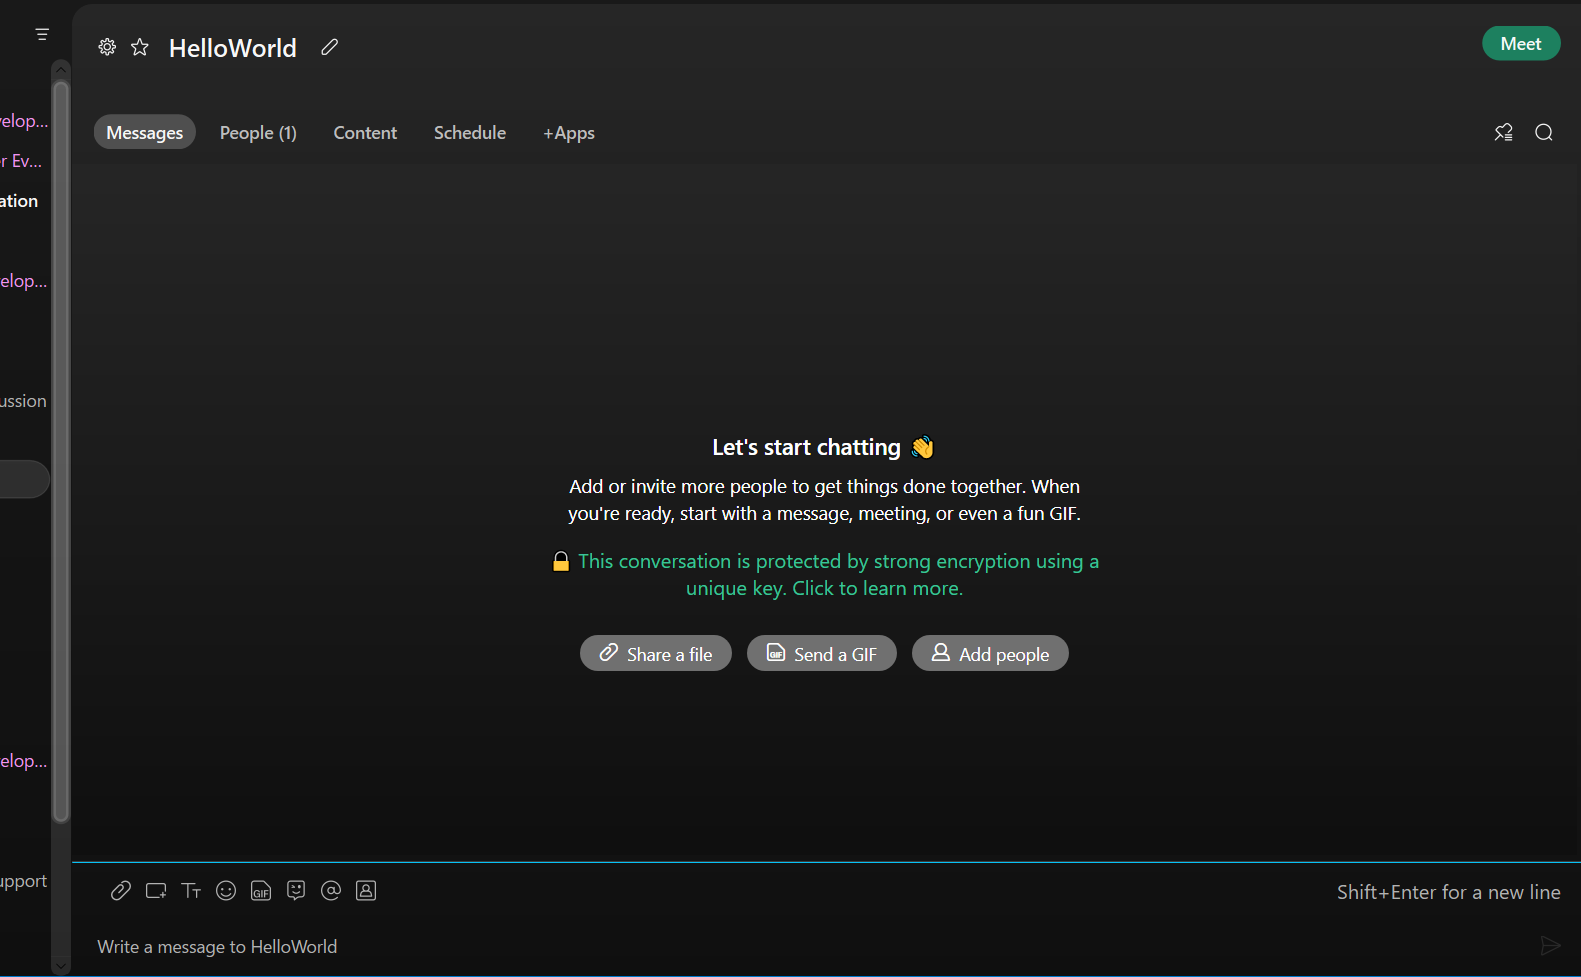
idproperty.Now, open your Webex client and view the new room created by the API request.

Next, let’s look at the potential of Webex extensibility.
anchorTypes of Webex Applications
anchorIn previous steps, we covered how Webex REST API makes it simple to create automated interactions against the Cisco Webex Cloud Platform.
Here are various types of applications you could build using the same approach:
Controller: This type of app listens for events in Webex, such as new messages that contain a specific mention, or a participant being added to a space. When these events happen, the app could send an SMS alert or use Webex to send data to an enterprise back-end.
NOTE: In Webex terminology, an app that listens but does not take any action is called a watcher.
Notifier: This type of app responds to events by sending messages to a Webex space. For example, it could send a message to a "Business Activity" space when new customers sign-in and orders are created or canceled. Employees would monitor new messages in the “Business Activity” space and respond if further actions were needed.
Interactive Assistants: This type of app asks a customer a set of questions and uses the answers to perform actions such as filling out a form, scheduling an appointment, or simulating the interest on loan. These types of interactive apps are sometimes called "chat bots" or simply "bots."
When extending Webex, one uses the term applications rather than the generic bots. As you'll see in next chapter, the concept of a "Webex Bot" is associated with bot accounts and specific behaviors attached to 'Direct' and 'Group' spaces.
Create your application
Depending on your technical background and business goals, there are several ways you can go about creating an application:
You can design and build an app using a visual integration tool. This approach is like creating software from Lego-like building blocks and requires little to no coding. These blocks perform defined tasks and connect to various back-end services.
Various third-party vendors also offer visual integration tools and services, such as IFTTT, Zapier, Built.io, Gupshup, Stamplay, Workato. These services simplify deploying applications and offer benefits such as pre-configured integrations, natural language processing, voice synthesis, voice recognition, and image analysis.
You can write and deploy your code. The Webex API enables you to create an application in any language, and the community has been working on frameworks and examples to help you on this journey.
Delivering apps that are more than prototypes requires allocating effort and resources to meet availability and security requirements. These include setting up and monitoring a DNS, load-balancing, firewalls, traffic monitoring, rate limitations, etc.
In the upcoming Tutorials, you’ll have an opportunity to create apps using code or third-party tools.
anchorBots and Integrations
anchorHere, you will see how your application can run on behalf of other Webex Users.
Suppose you’re building an "Out of Office Assistant" application that automatically responds to Webex messages on behalf of pre-registered users while they are away. Webex users will authorize your app to screen their messages and respond on their behalf when they are mentioned.
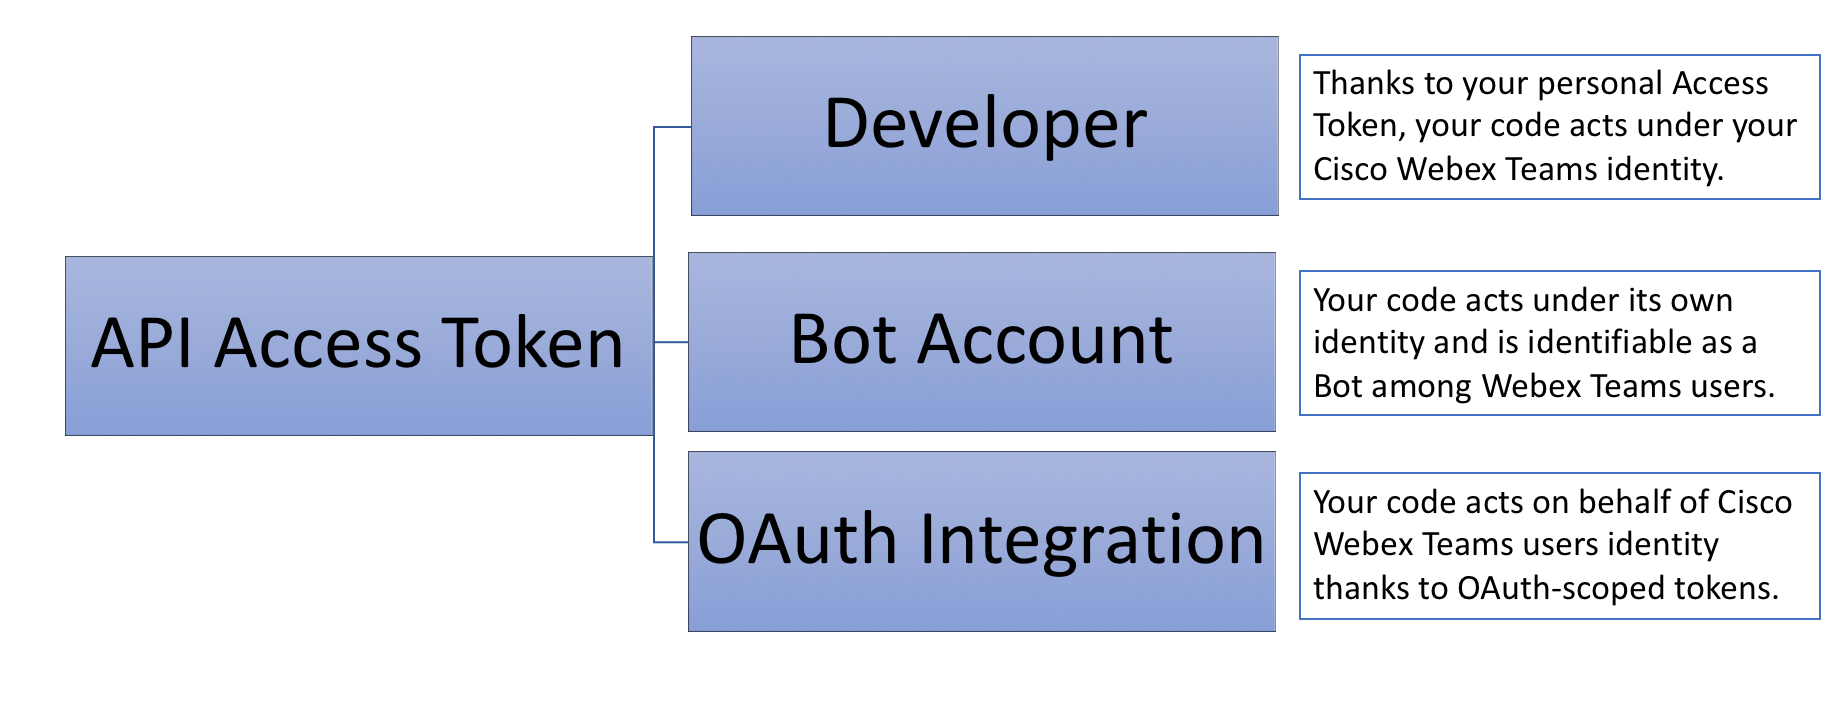
This type of application is called as Webex Integration. The Webex integrations use the OAuth Grant Flow protocol to issue the access tokens that can act under Webex users' identities. These tokens are scoped: Limited to the set of authorizations granted by the Webex users themselves.

Suppose you want your Out Of Office Assistant to behave a little differently: Any user could invite the assistant into a Webex space and interact with it like this: “@OutOfOffice is Mandy on vacation?” or “@OutOfOffice note that I'll be away for the next 2 weeks”.
In that case, you would want your Out Of Office application to receive and respond to questions using its own identity, not using someone else's identity.
This is where Bot Accounts come into play. Bots are dedicated Webex accounts that act under their identity. They can be added to spaces like any other Webex user. Some differences and restrictions apply. For example, bots MUST be 'mentioned' to receive messages in group spaces.
anchorWrapping up
anchorWebex exposes a REST API that enables you to create various applications such as notifiers, watchers, controllers, and interactive assistants.
Apps are nothing more than code that interacts with Webex using an API access token. Your applications can inherit an identity from an access token and can function:
- as 'another you' (from a Developer Access Token).
- on behalf of other users (Webex OAuth Integrations).
- or as a well identified machine (Webex Bot accounts).
anchorGoing further
anchorIn this tutorial, we covered the REST API resources accessible to all Webex Users. If you have administrator privileges for your Webex organization, you might be interested in digging into the Admin API: /events, /metrics, /policies, /licenses, /organizations and /roles. These restricted-access resources will give you the opportunity to automate the provisioning of users, as well as monitor the activity within your organization - or even restrict access to integrations.
Finally, do you know that Webex offers more than REST APIs? Indeed, the Webex SDKs and Widgets give you access to the broader Media resources, opening a new world of possibilities to embed Video, or place calls from existing Web, iOS and Android applications.