Practical Guide to Hosting a Webex Integration on AWS
March 6, 2024

The goal of this article is to go through the process of deploying a Webex integration on the AWS public cloud. The integration is built with Python and helps schedule Webex Webinars based on the information in a Smartsheet. It ties together three services via their respective APIs: Smartsheet, Webex Webinars, and Webex bot. Although not overly complex, this example isn’t trivial either. There are multiple technicalities in the deployment process that won’t be exposed in a simplest sample Webex bot project. While being mostly used for the Cisco Networking Academy Instructor Professional Development program, this integration is highly reusable, and the code is available on GitHub: *https://github.com/zhenyamorozov/smartsheet-webex
When you build a Webex integration, no matter if you write code yourself or use a project from Cisco Code Exchange, after configuring and testing it locally, you eventually come to the need to host it in a cloud. When it runs in a cloud, there is no need to keep your computer always on for Webex bot to respond to commands and for automation to do its magic. There are multiple public cloud vendors, but in this example, I will use AWS. In AWS, we have several options to deploy a Python-based web application:
- EC2 instance - you simply get a Linux virtual machine and run it as a web server for the application.
- Containers - use AWS container services, such as ECS, EKS, or Fargate.
- Lambda + API Gateway - a popular serverless microservice-oriented solution.
Both container-based and serverless deployments require the application code to be adapted for these deployments to a certain degree. And because I wanted to keep the code as reusable as possible, the best choice is to deploy it in EC2 - Elastic Compute Cloud.
Running a web application on EC2 is like simply spinning up a virtual machine in the cloud and copying the application there. However, if we do this the straightforward way, we will have to worry about several things: launching the server, configuring the OS, setting up an environment for our application, and monitoring both the machine and the environment. Also, we would have to manage the code deployment process manually – whenever we make a change to the code, we must zip it and upload it to the VM or push it via SSH. Fortunately, there are AWS services that will let us simplify the deployment and maintenance of our app and cloud environment. In this case, I found Elastic Beanstalk and Code Pipeline to be particularly useful.
We will use Elastic Beanstalk to spin up an EC2 instance and configure the cloud application environment, including permissions and environment variables.
We will set up Code Pipeline to watch the GitHub repository of the project, and whenever a change is committed, automatically deploy the updated version of the code into the environment.
So, let’s get started.
Creating a basic environment with Elastic Beanstalk
Elastic Beanstalk, as the name suggests, is our shortcut to bring the application to the cloud. We create an environment for our application, and Beanstalk will manage the underlying infrastructure for us. So, we should not worry about OS management and maintenance. For example, if something breaks down in the EC2 instance, Elastic Beanstalk will kill it and spin up a fresh one instead.
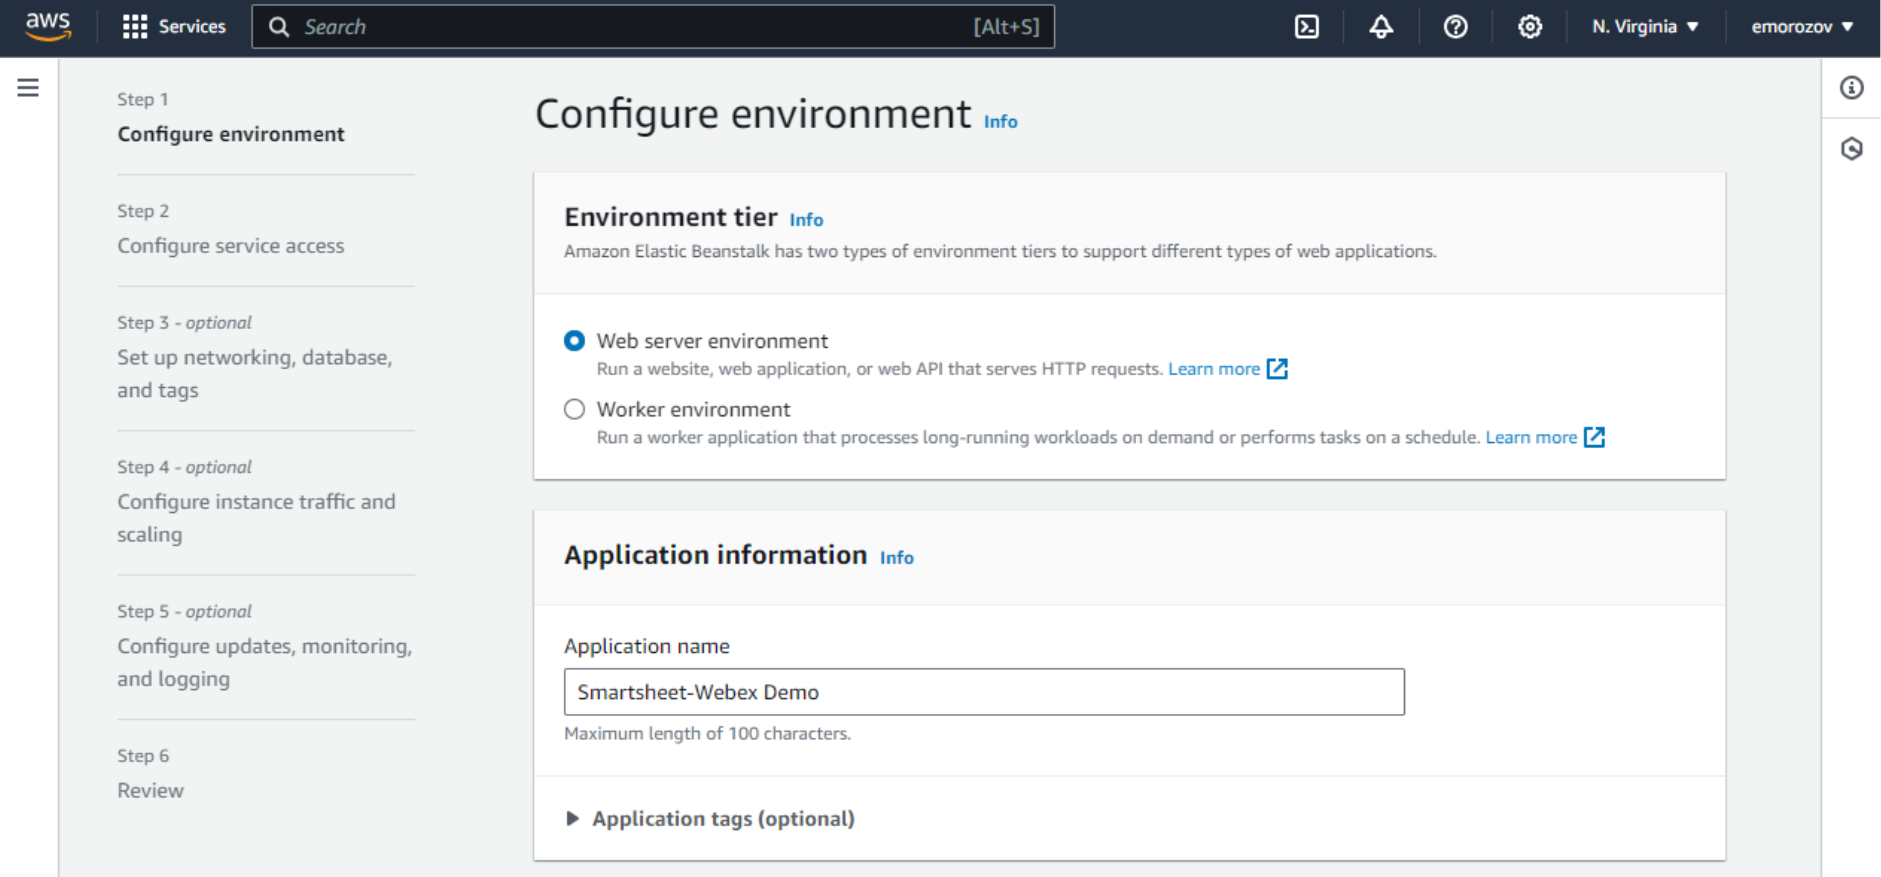
- Log in to AWS Console and find the Elastic Beanstalk service. From the Elastic Beanstalk home page, click Create Environment and fill in the basic environment information on the Step 1 page:
- Environment tier – Web server environment. We are going to run a web server that will be serving incoming web requests relatively fast. The other option here is Worker, which is more suitable for long-running batch processing. Although the actual Webex webinar scheduling process may take up to 10 minutes (in cases of many sessions with considerable amounts of registrants), I saw no issues running it in a Web server environment.
- Application name – any name for our application. Beanstalk will additionally create an application entity for us while creating the environment.
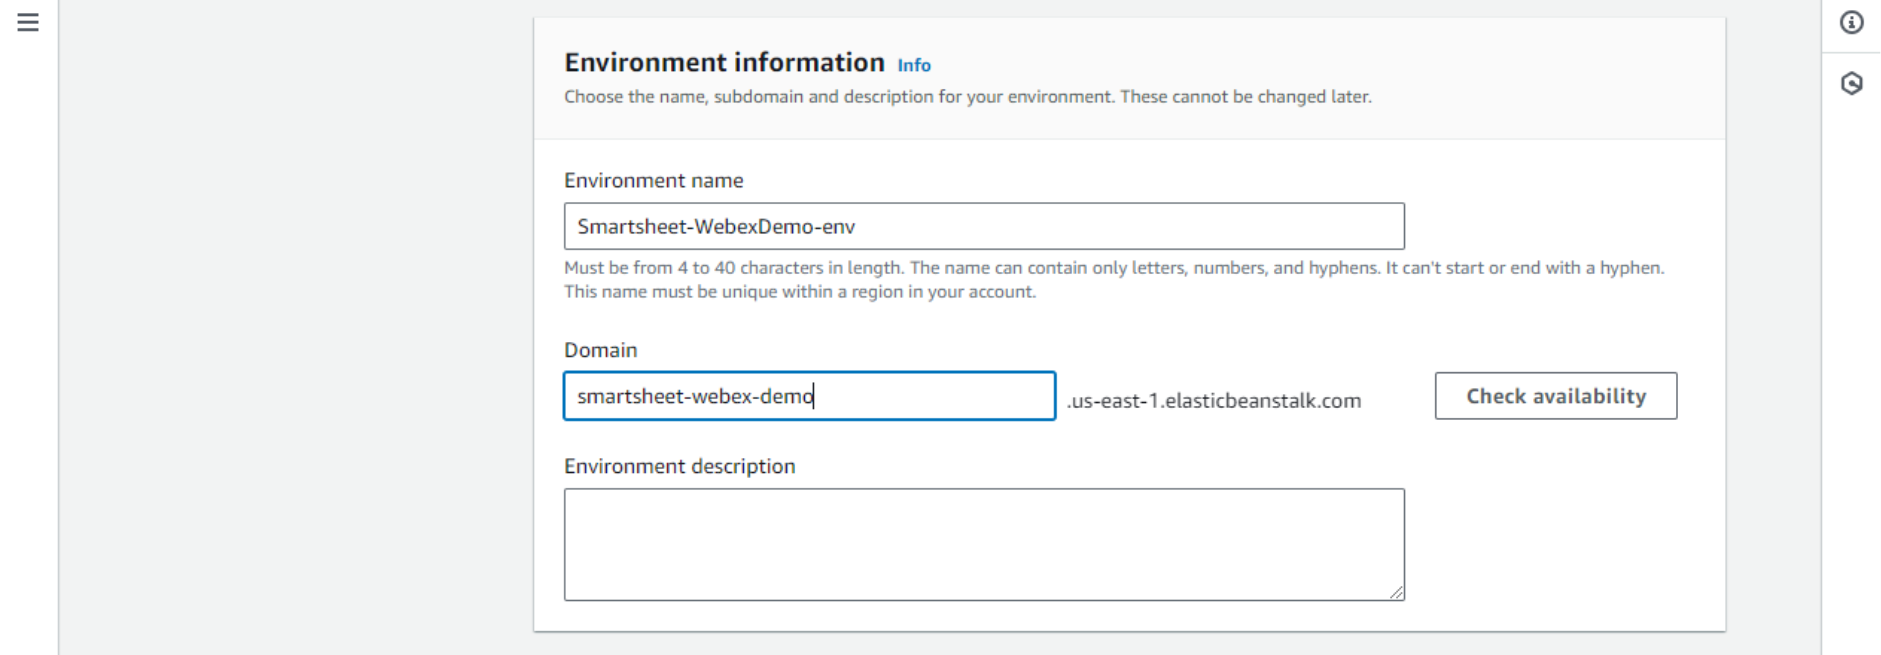
- Environment name will be populated automatically. No need to change this.
- Domain – it is fine to use the random autogenerated domain name, but we can also customize it. It is a subdomain under the Elastic Beanstalk domain which does not cost anything extra and is perfectly usable in this case, as we won’t expose it to humans.
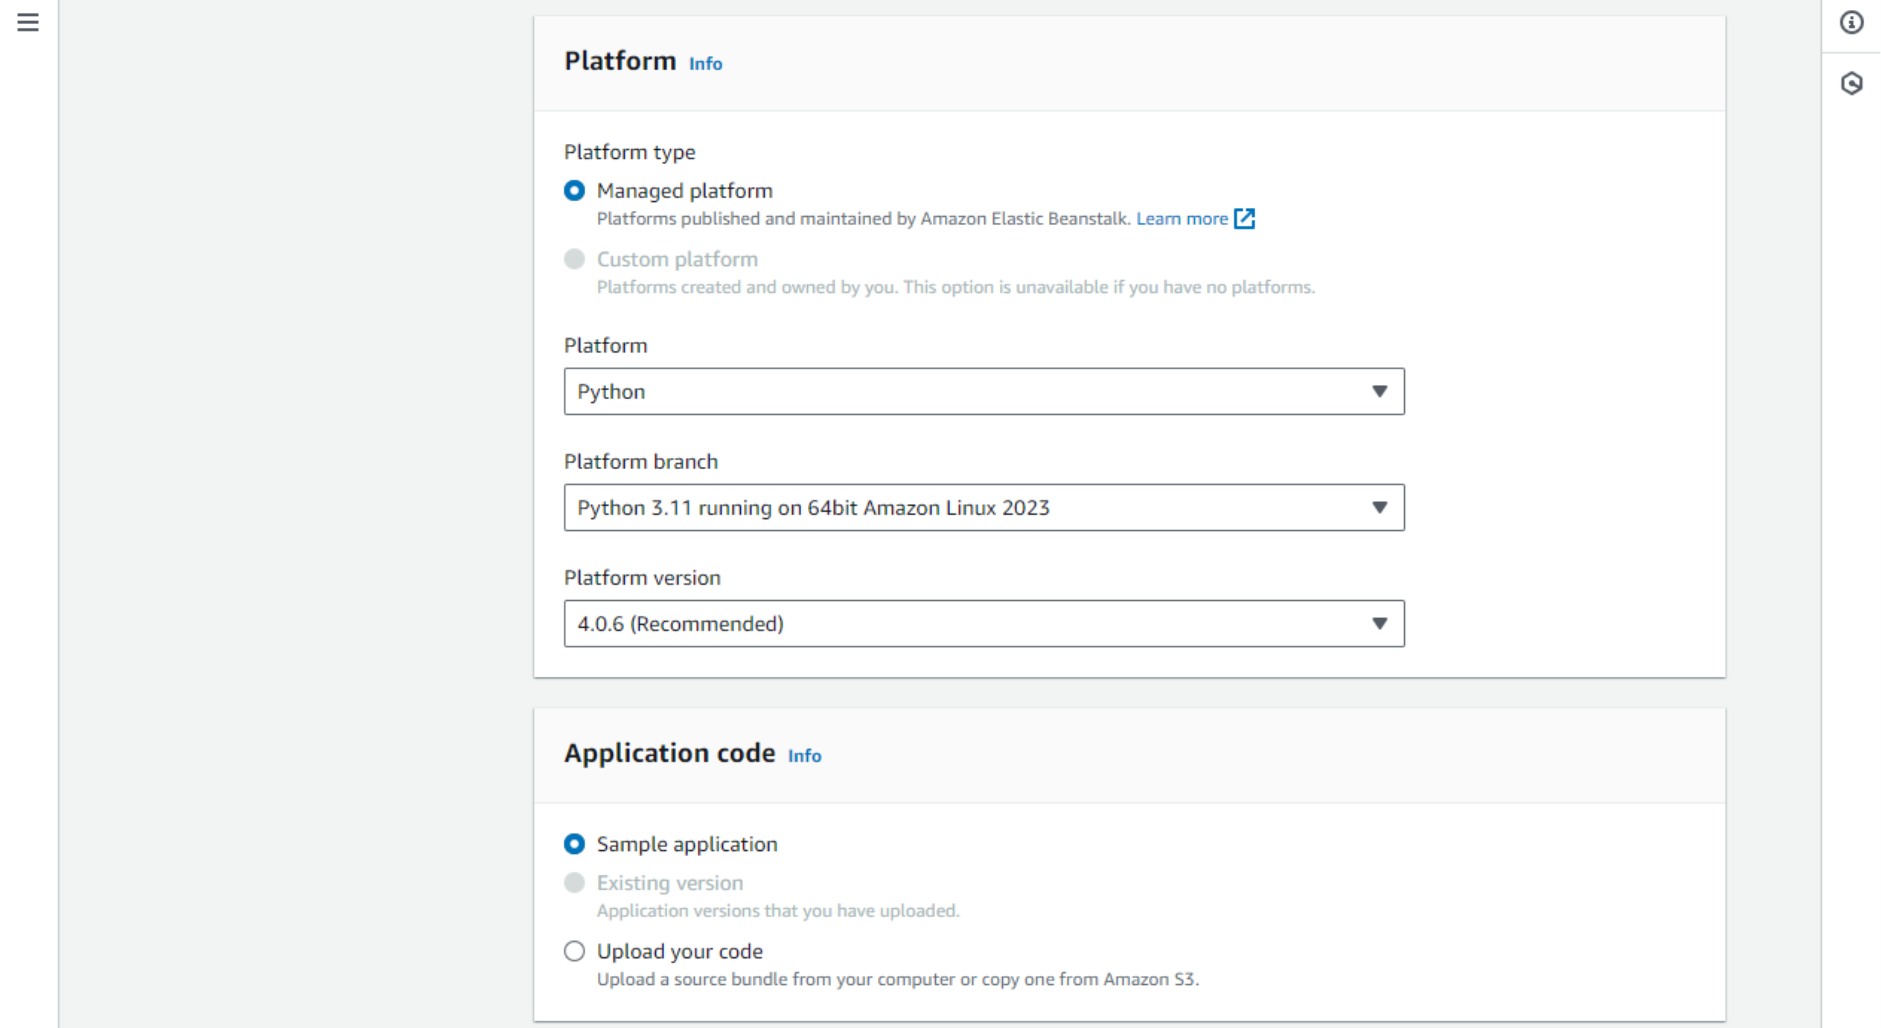
- Platform – identifies which platform (OS and programming language/interpreter) we need. This project is written in Python, so the latest version of Python 3 and the recommended Linux OS should work. Note: there is a compatibility issue with Python 3.12+ in Webex Python SDK, so until it is fixed, use Python 3.11 environment.
- Application code – for now, let’s select Sample application. Later, we will set up Code Pipeline to deploy our code automatically.
- Presets – as this application is not supposed to serve a huge amount of internet users and does not require extra reliability, the Single instance option will be fine. It even runs free for some time if your AWS account is new, according to the AWS Free Tier policy.

- On the next screen, the Service access is configured. Access between different services in the AWS cloud is controlled with roles. Elastic Beanstalk will assume the service role when accessing your EC2 instance. From the EC2 side, we need to create another role – the instance profile that will grant access to Elastic Beanstalk. This combination of roles will allow Elastic Beanstalk to do things like spin up, configure, monitor, and terminate instances.
- Select Create and use a new service role.
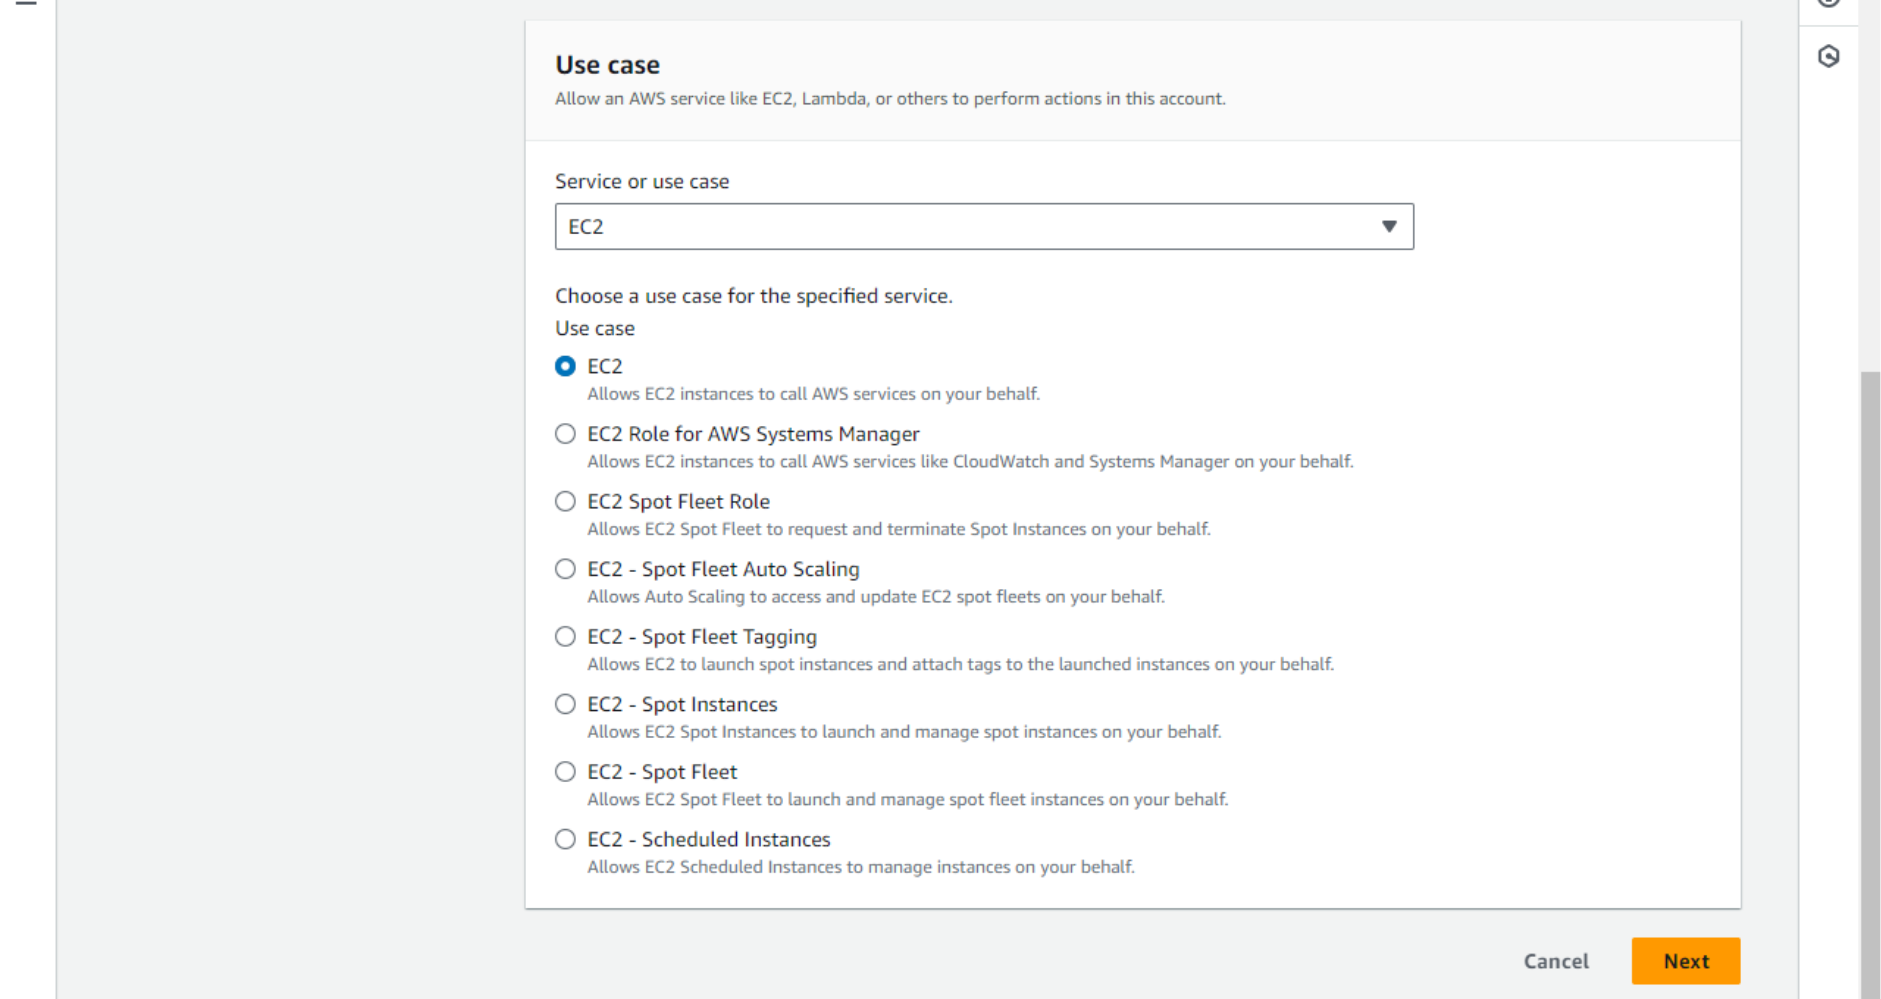
- To create an instance profile, open the AWS console in a new tab and navigate to IAM (Identity and Access Management service) – Roles. Click Create role, under Trusted entity type, select AWS service.
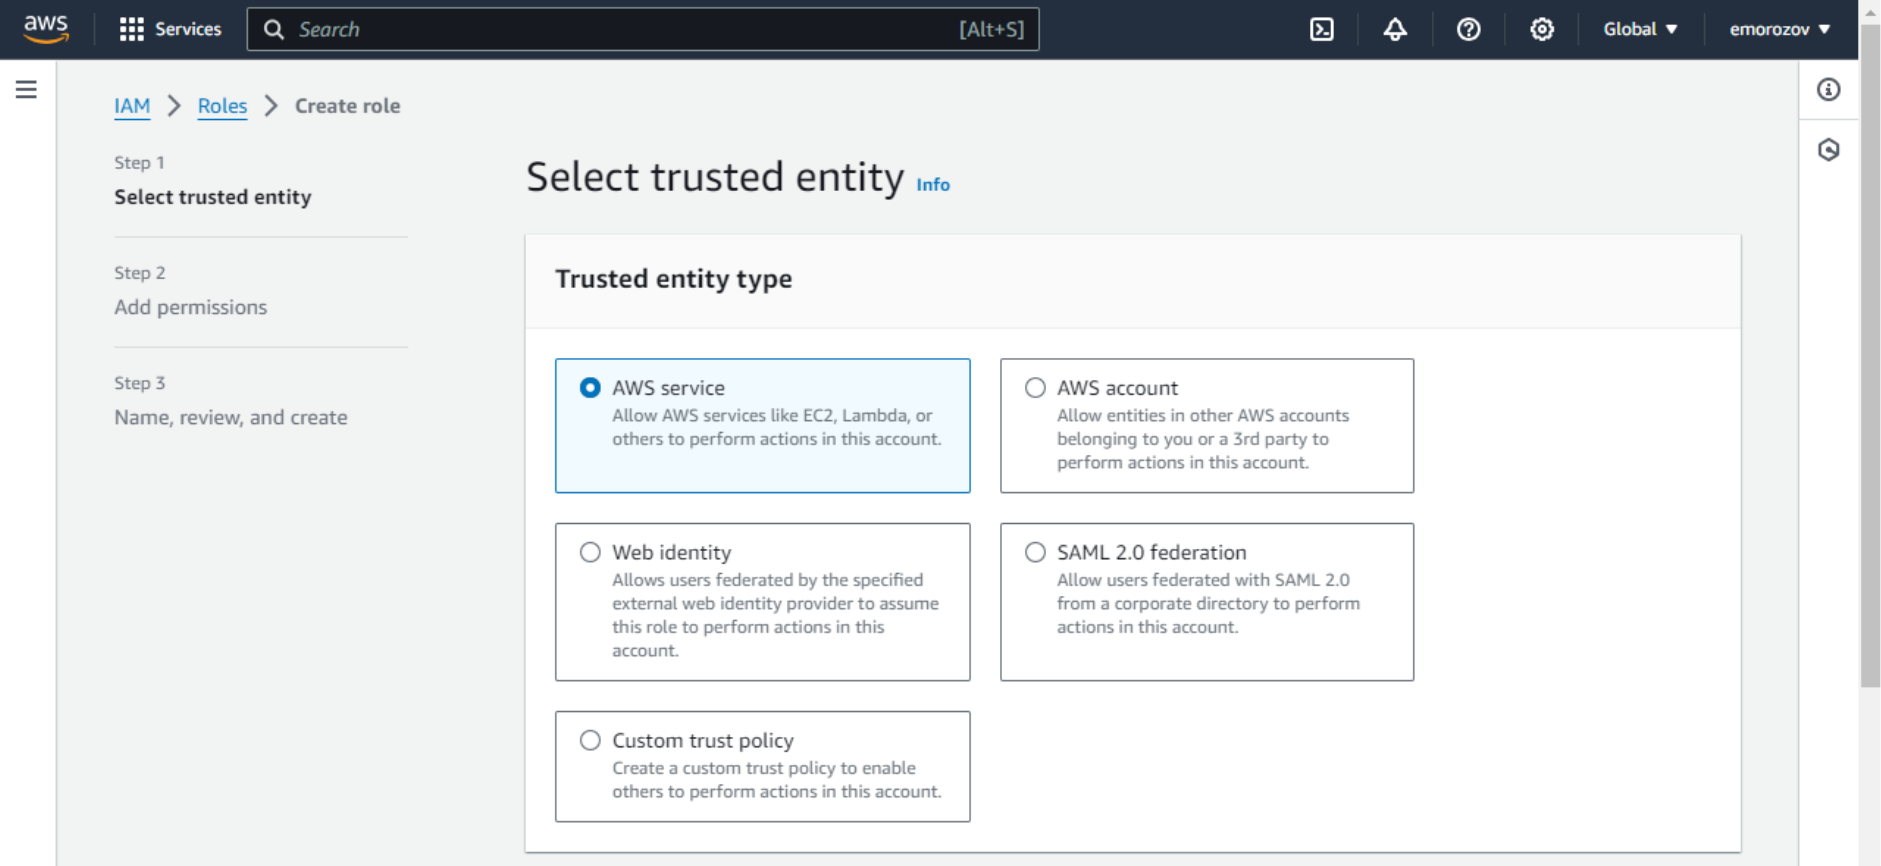
- For the Use case, choose EC2.
- On the next screen, search for and add the
AWSElasticBeanstalkWebTierpermission policy. This policy is managed by AWS and includes everything we need for now. We attach the permission policy to the role, and the role is attached to the EC2 service via an instance profile.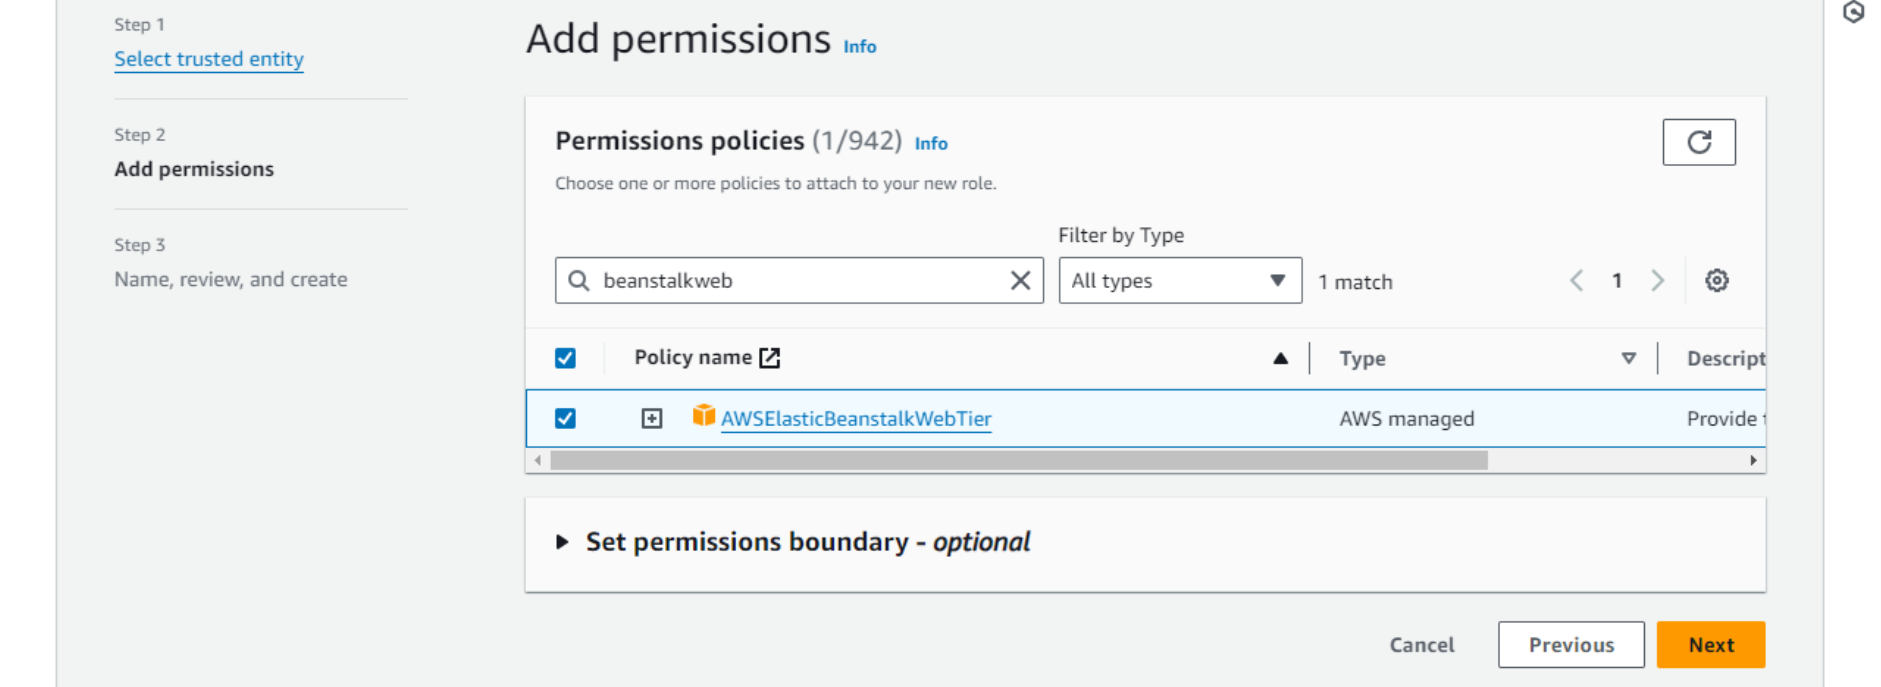
- Finally, name, review, and save the role.
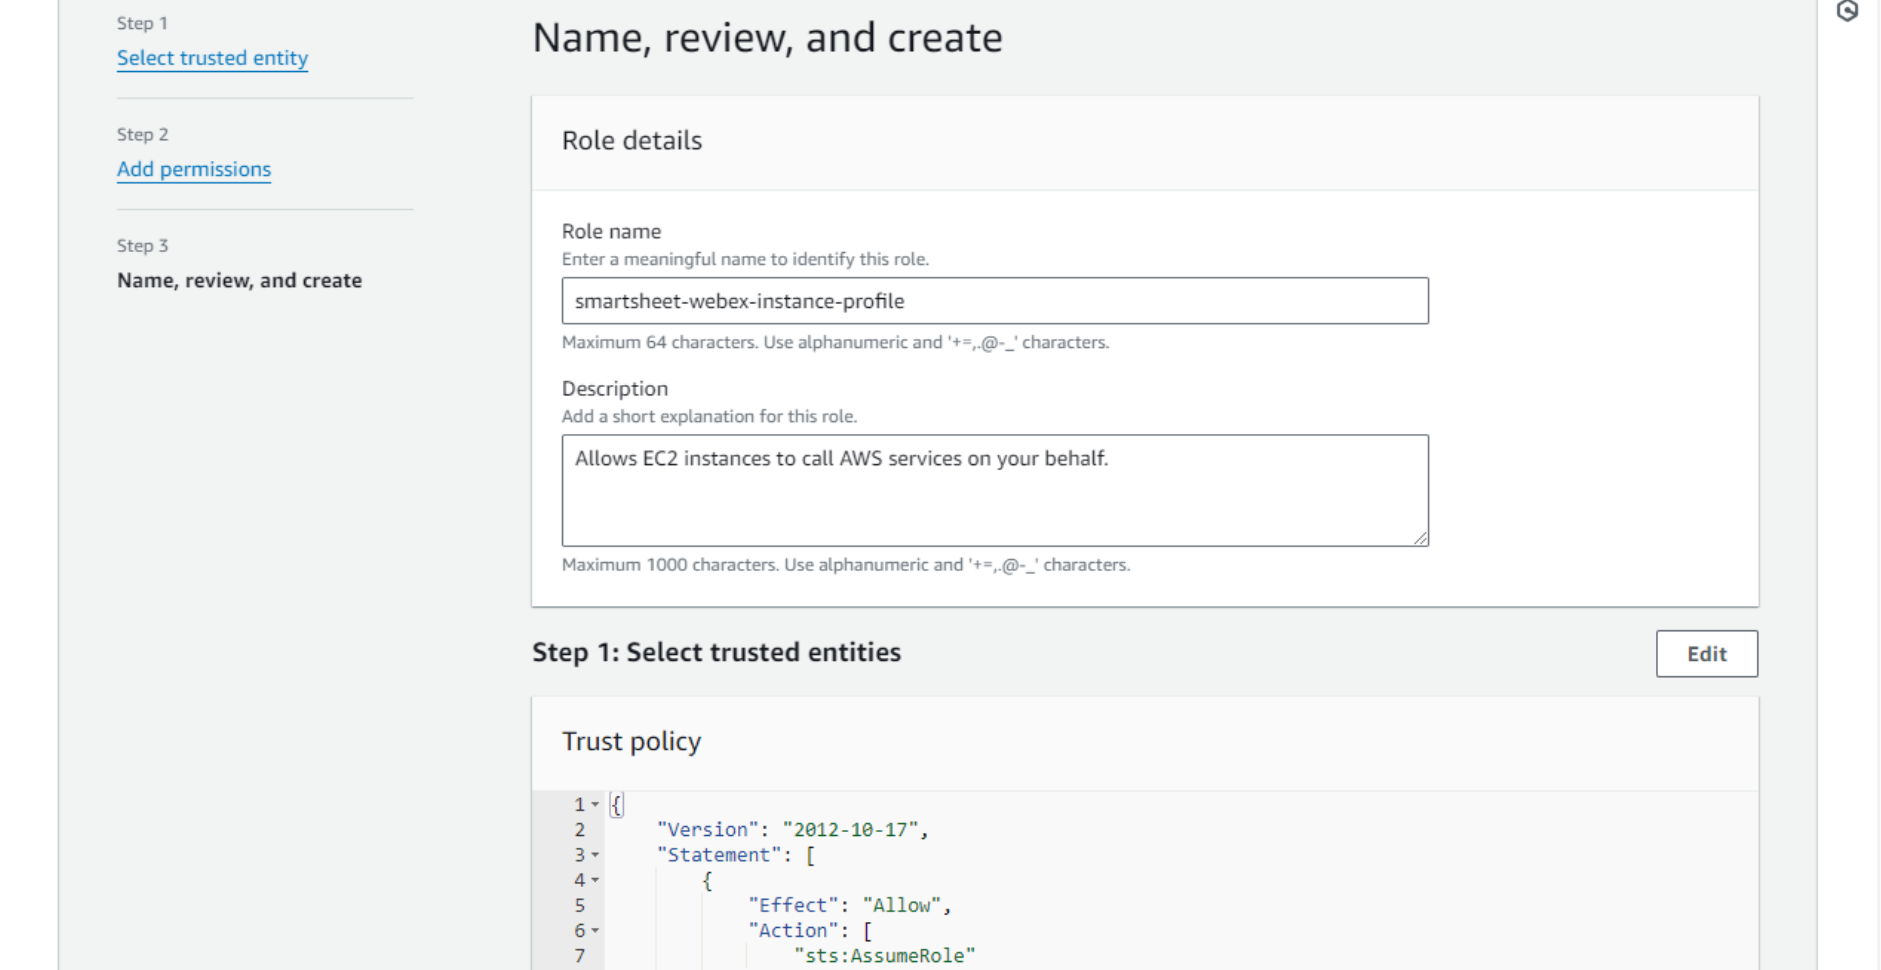 Return to the original tab, refresh the list of instance profiles, and select the one newly created.
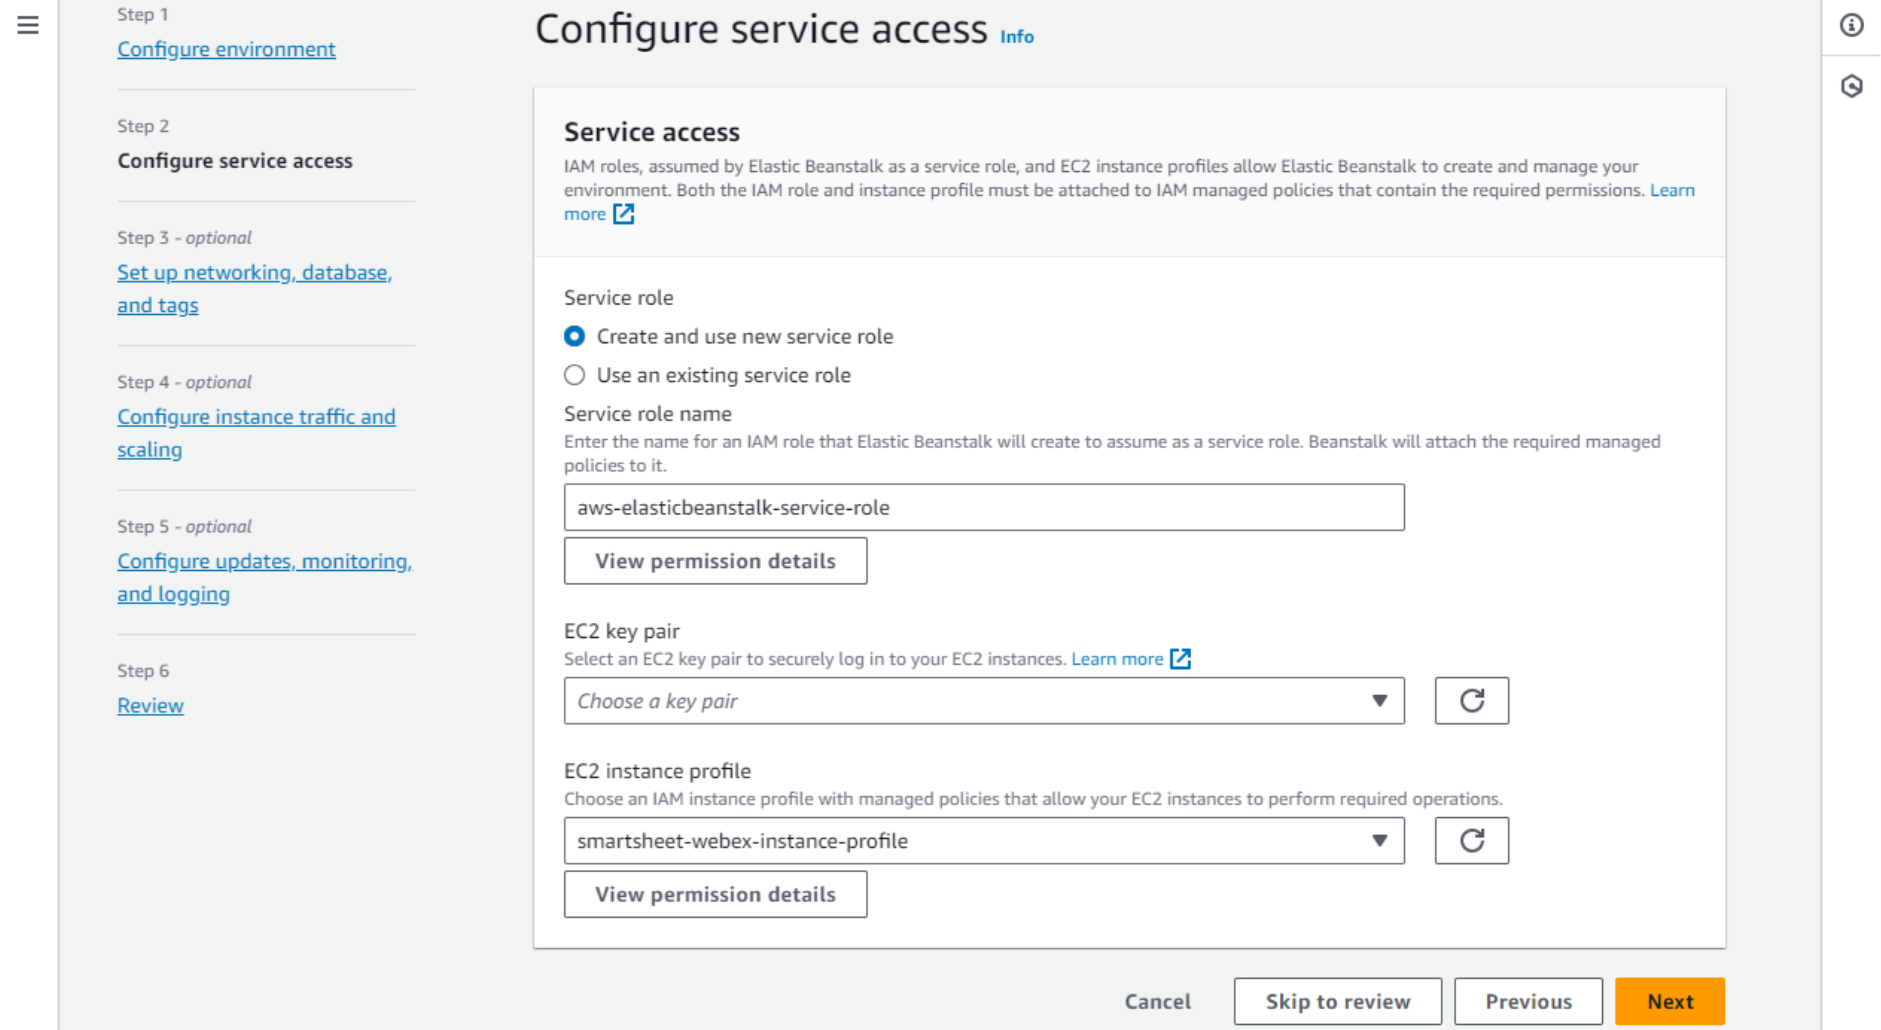 Optionally, you can create an EC2 key pair to be able to log in to your EC2 instance via SSH. To create a key pair, open the AWS console in a new tab, navigate to EC2 – Network & Security – Key Pairs, create it, and save the keys.
 - In Step 3 we can select the default VPC. VPC is like a private network (VLAN) where the server will live.
- One thing we will certainly need is a Public IP address. When new messages are sent to the bot, the Webex service sends webhooks (HTTP requests) over the public internet. Our application needs to be able to receive them on this IP address.
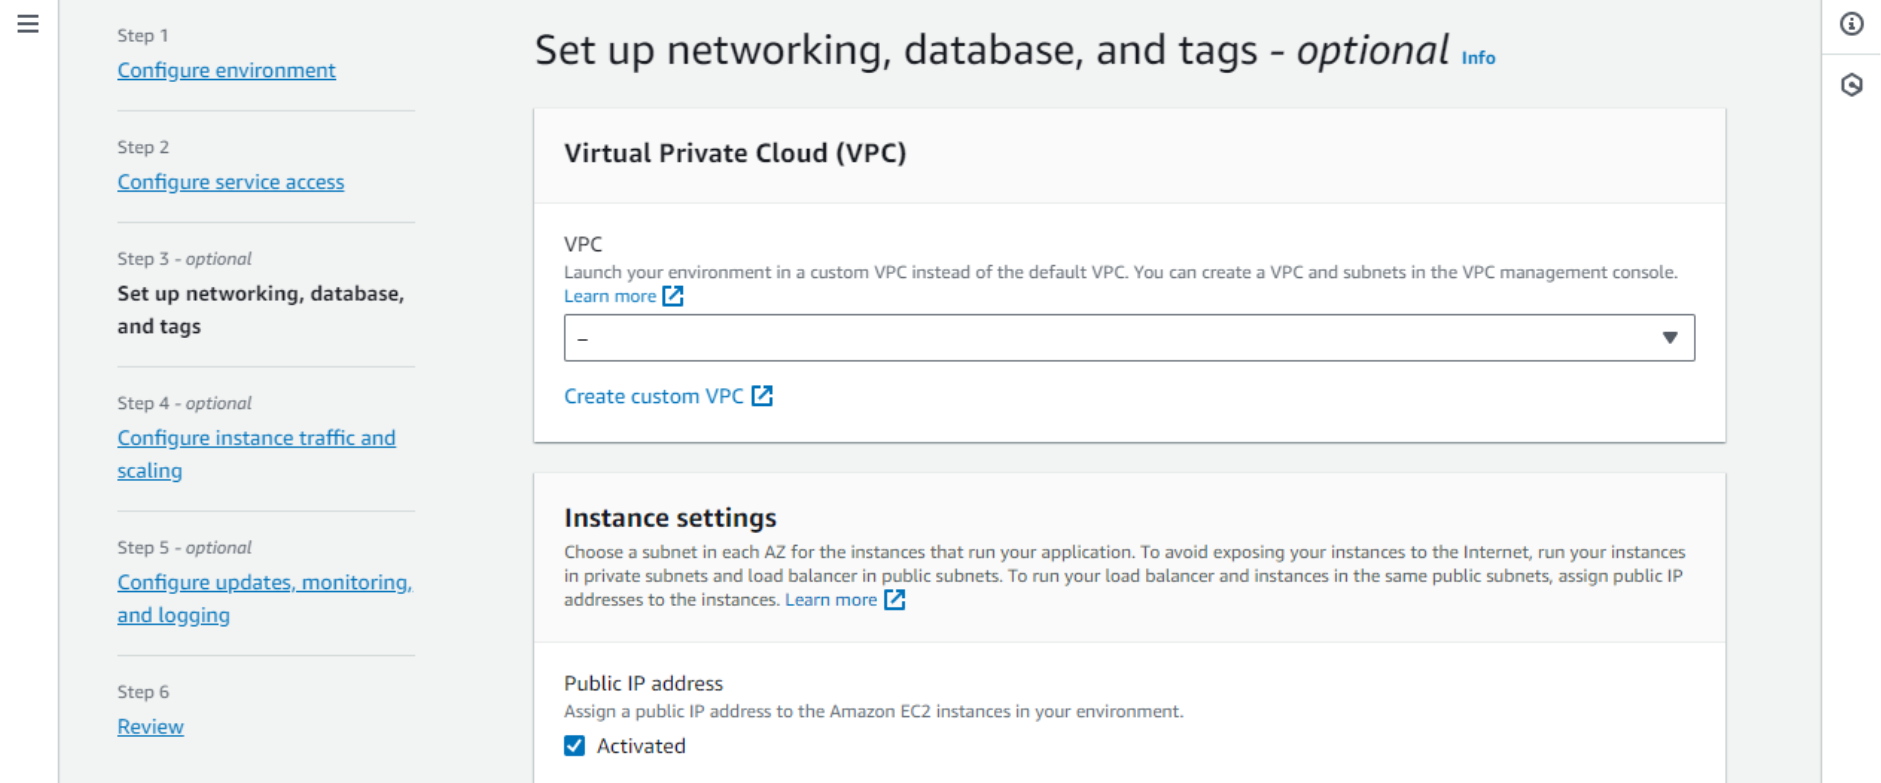 Please, note that since February 2024, AWS charges a fee for public IPv4 addresses. The rest of this page may be left as default as our app is stateless and does not use any database.
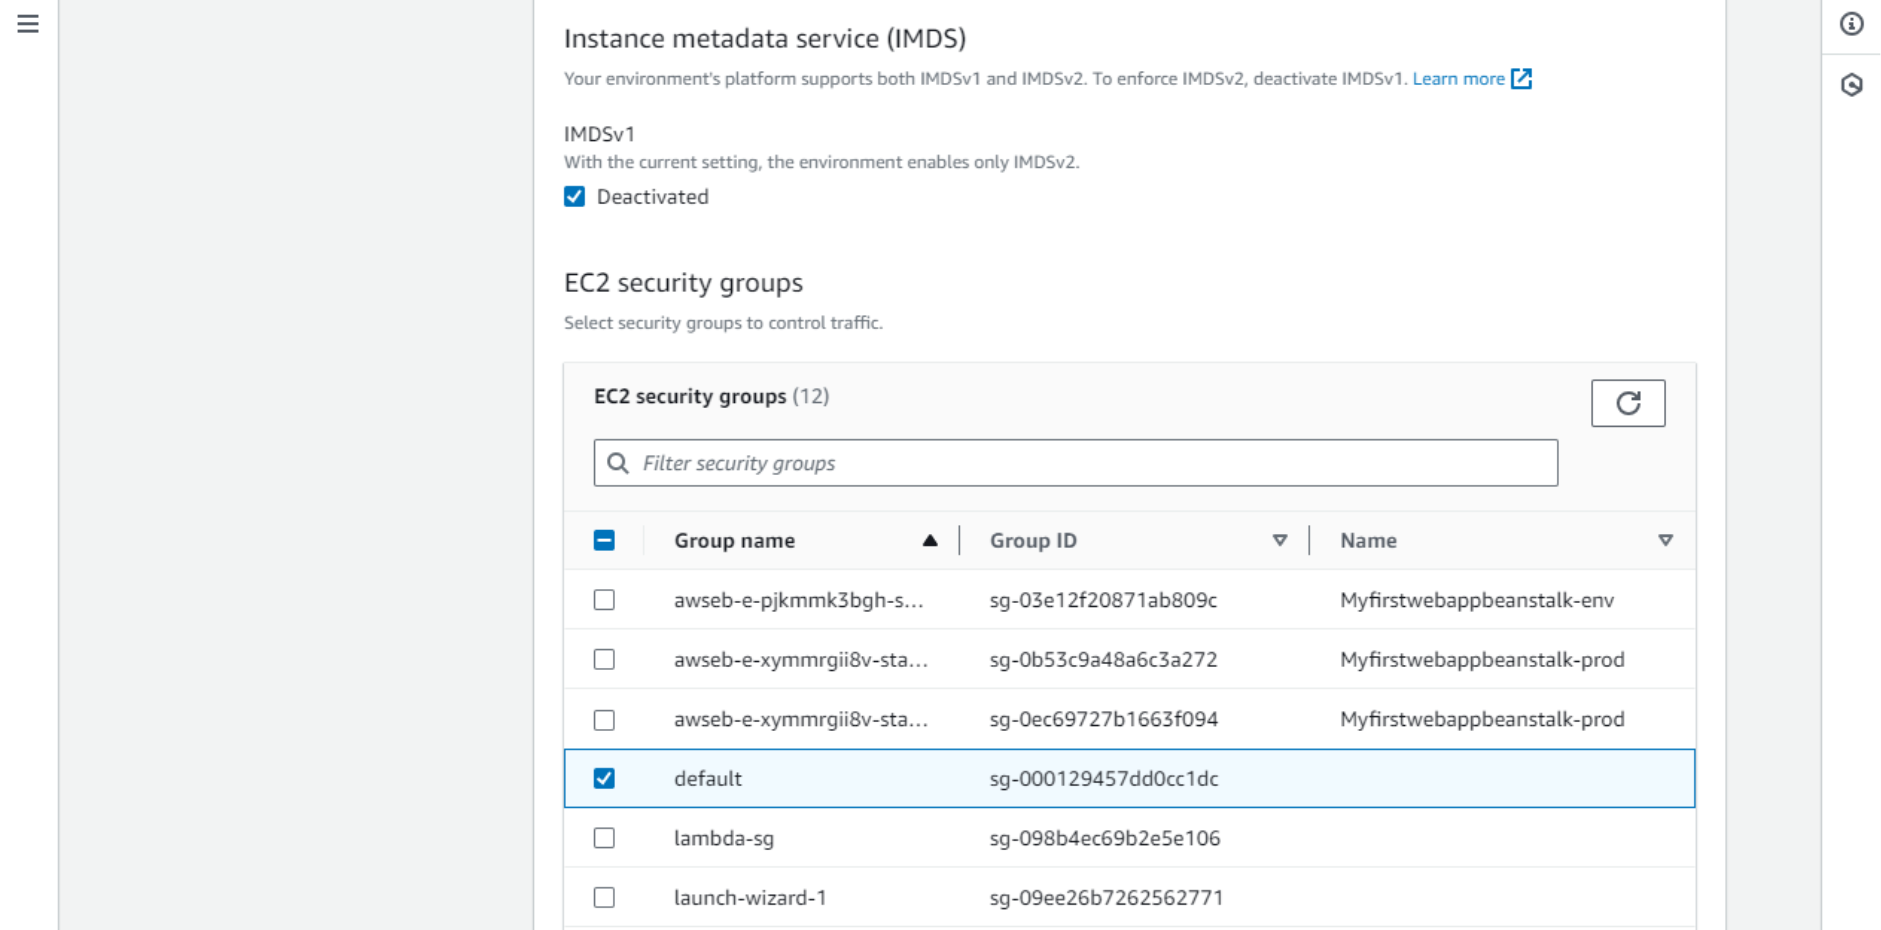
 - Step 4 is all about the instance configuration. No need to change it, but just note the IMDS service settings. IMDS (Instance Metadata Service) lets code running on the instance query basic information about the environment, such as public domain name. It is used by the Webex-Smartsheet application. IMDSv2 requires an additional authentication step which is implemented in the code.
- EC2 security groups control network access between different hosts in the network (“data plane”). It is a smaller level of segmentation than VPC. In this case, we will place the EC2 instance in the default SG.
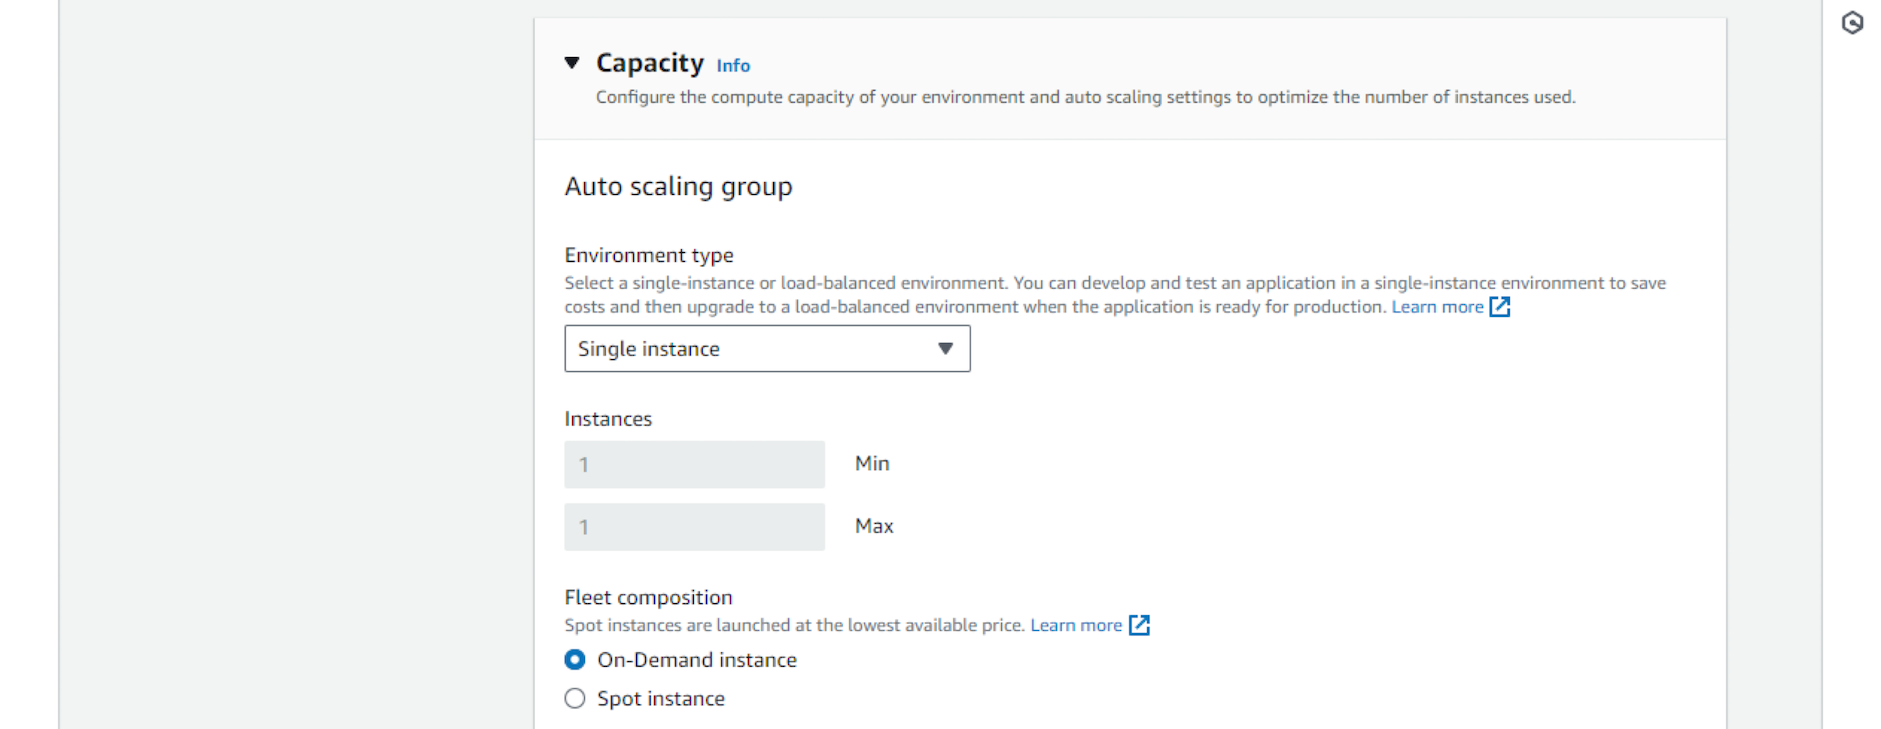
- Auto scaling group can manage a fleet of instances (virtual servers) to serve large high-load applications. In our case the load is small, so we’ll select Single instance. The scaling group will make sure the sole instance is running and healthy, and in case of any issues will terminate it and spin up a new one.
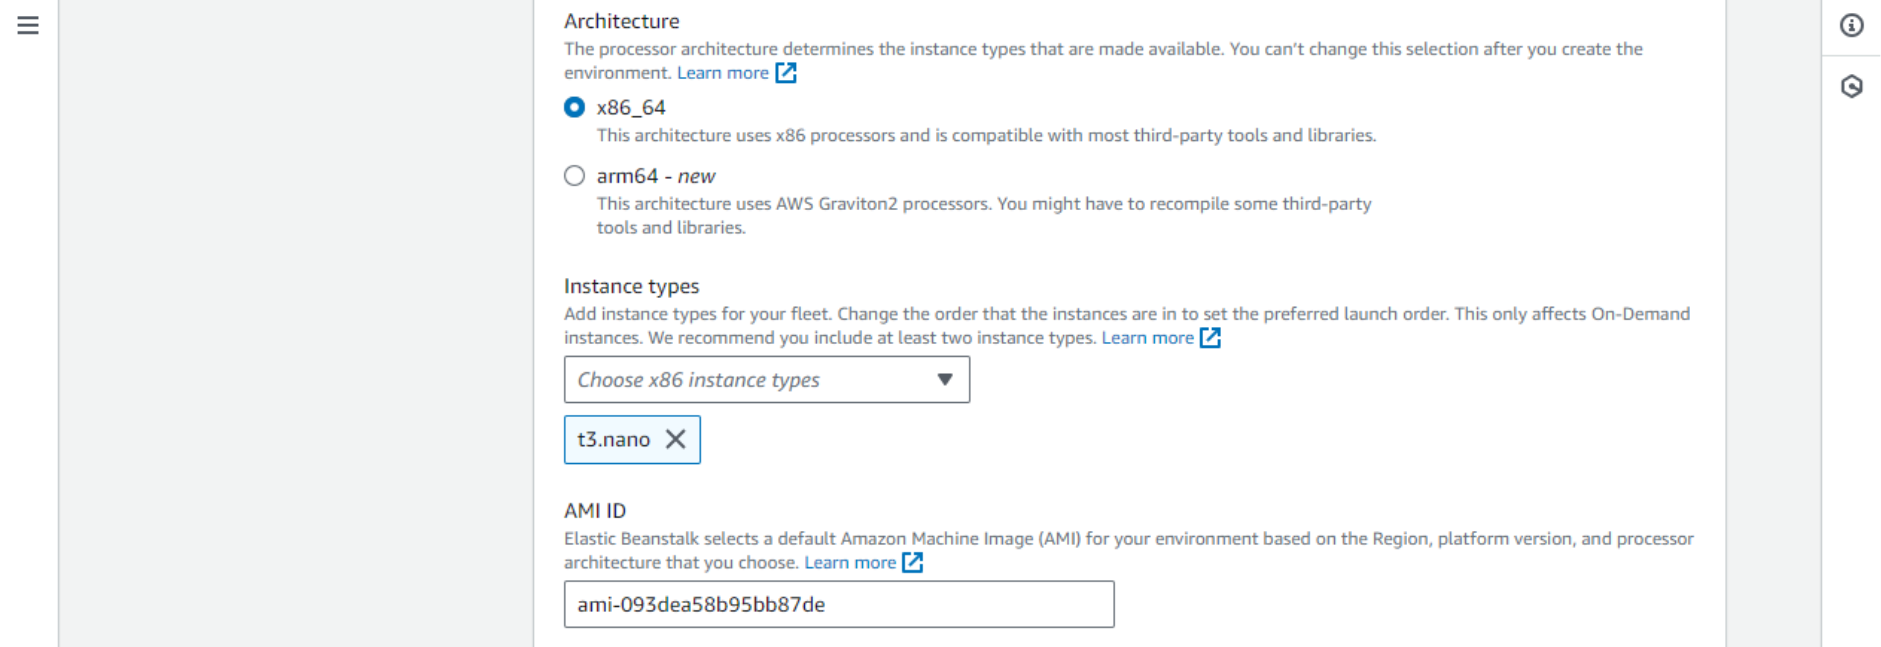
- Instance type is important, as it affects the cost of the running service. The smallest possible instance will be sufficient in our case – t3.nano at the moment. It should be also among the cheapest.
- EC2 security groups control network access between different hosts in the network (“data plane”). It is a smaller level of segmentation than VPC. In this case, we will place the EC2 instance in the default SG.
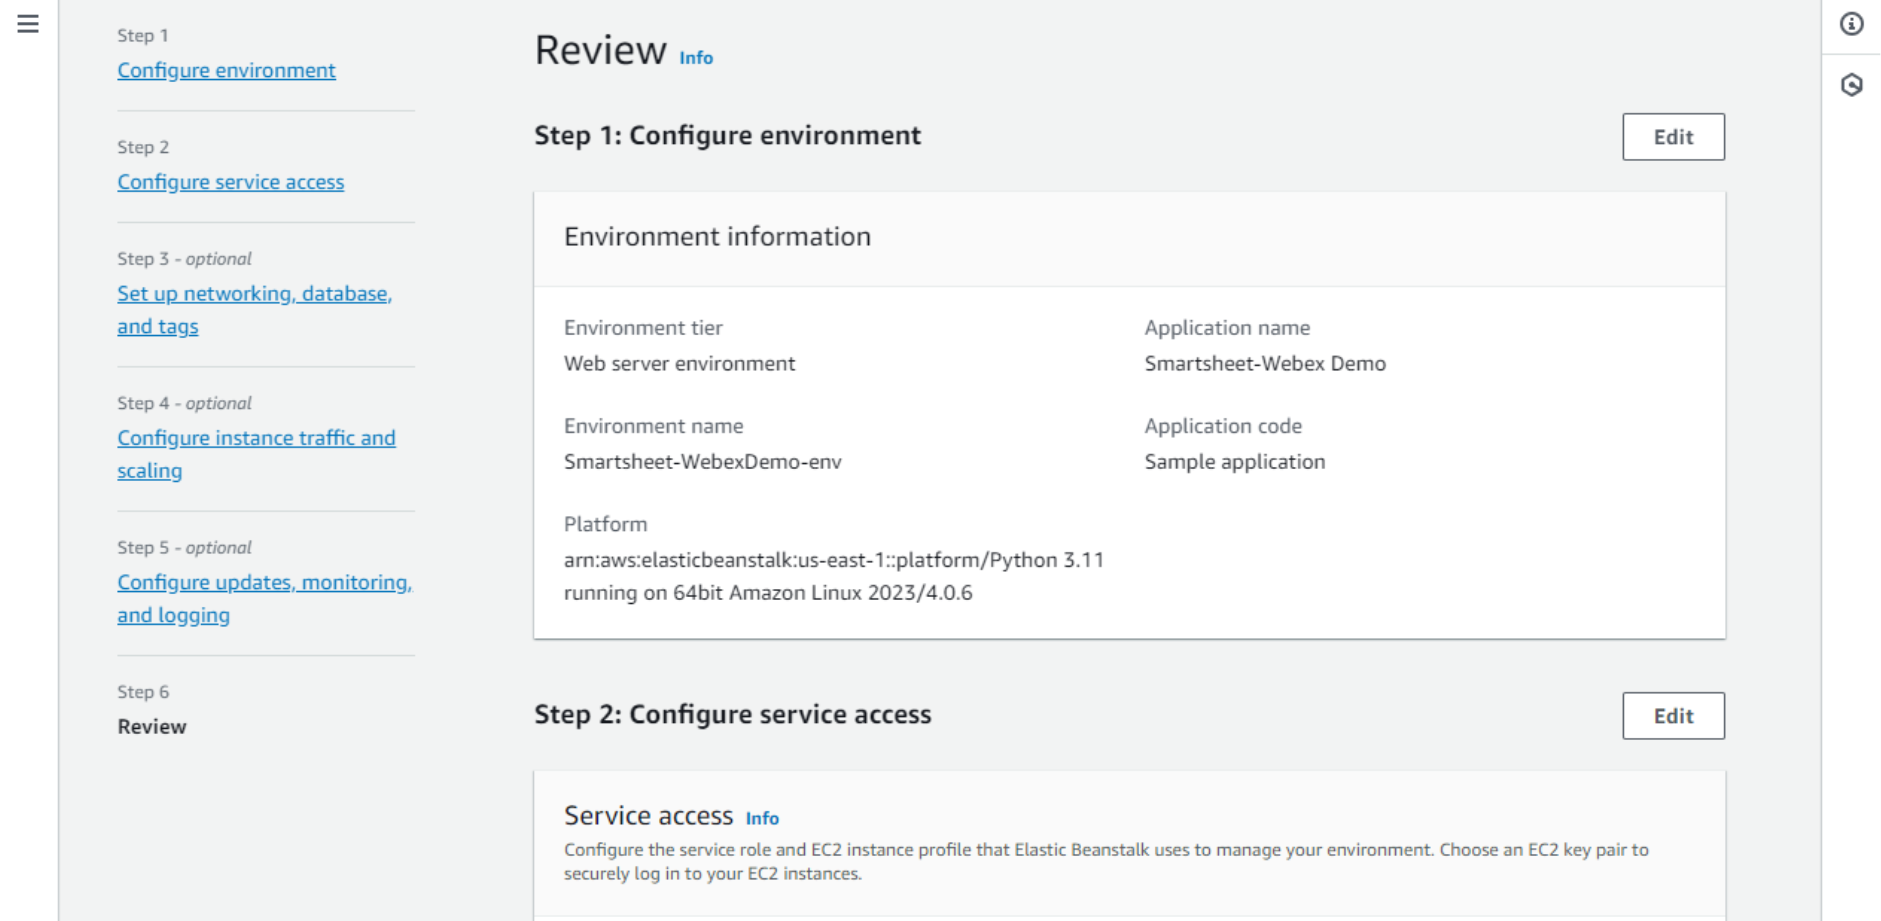
- Let’s keep the rest of the settings default. We will get back to some of them later when we need to make changes. On the Review page, you can verify the configuration and finally click Submit.
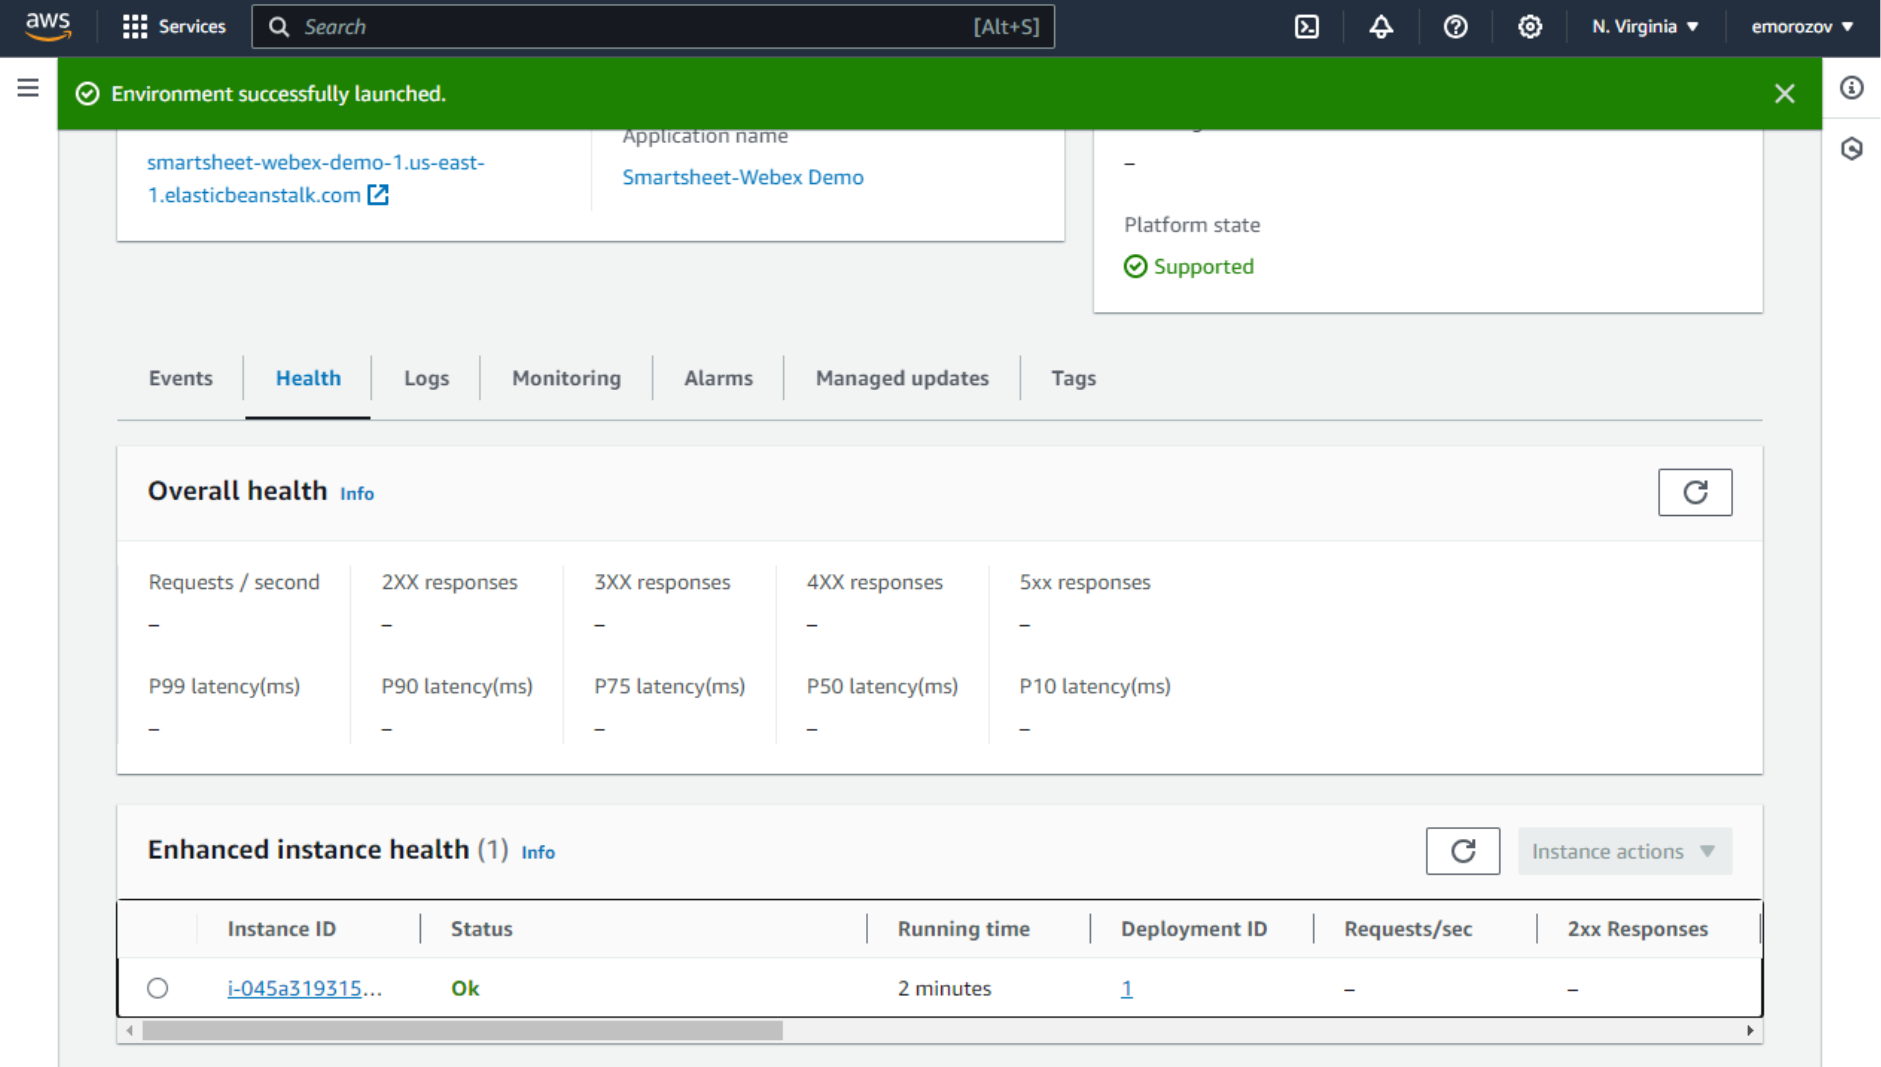
After several minutes, the environment Health status should change to Ok, and on the Health tab, we should see the EC2 instance up and running.
If you click this environment’s domain name, the sample application will open in a new tab. This shows our environment is up, publicly accessible, and ready. In the next step, we will set up Code Pipeline to deploy our actual application code.

Setting up Code Pipeline
With Code Pipeline, we will set up a simple CI/CD process. This service will monitor a repository in GitHub, and whenever a new commit is pushed, it will deploy the updated version of the application into our Elastic Beanstalk environment.
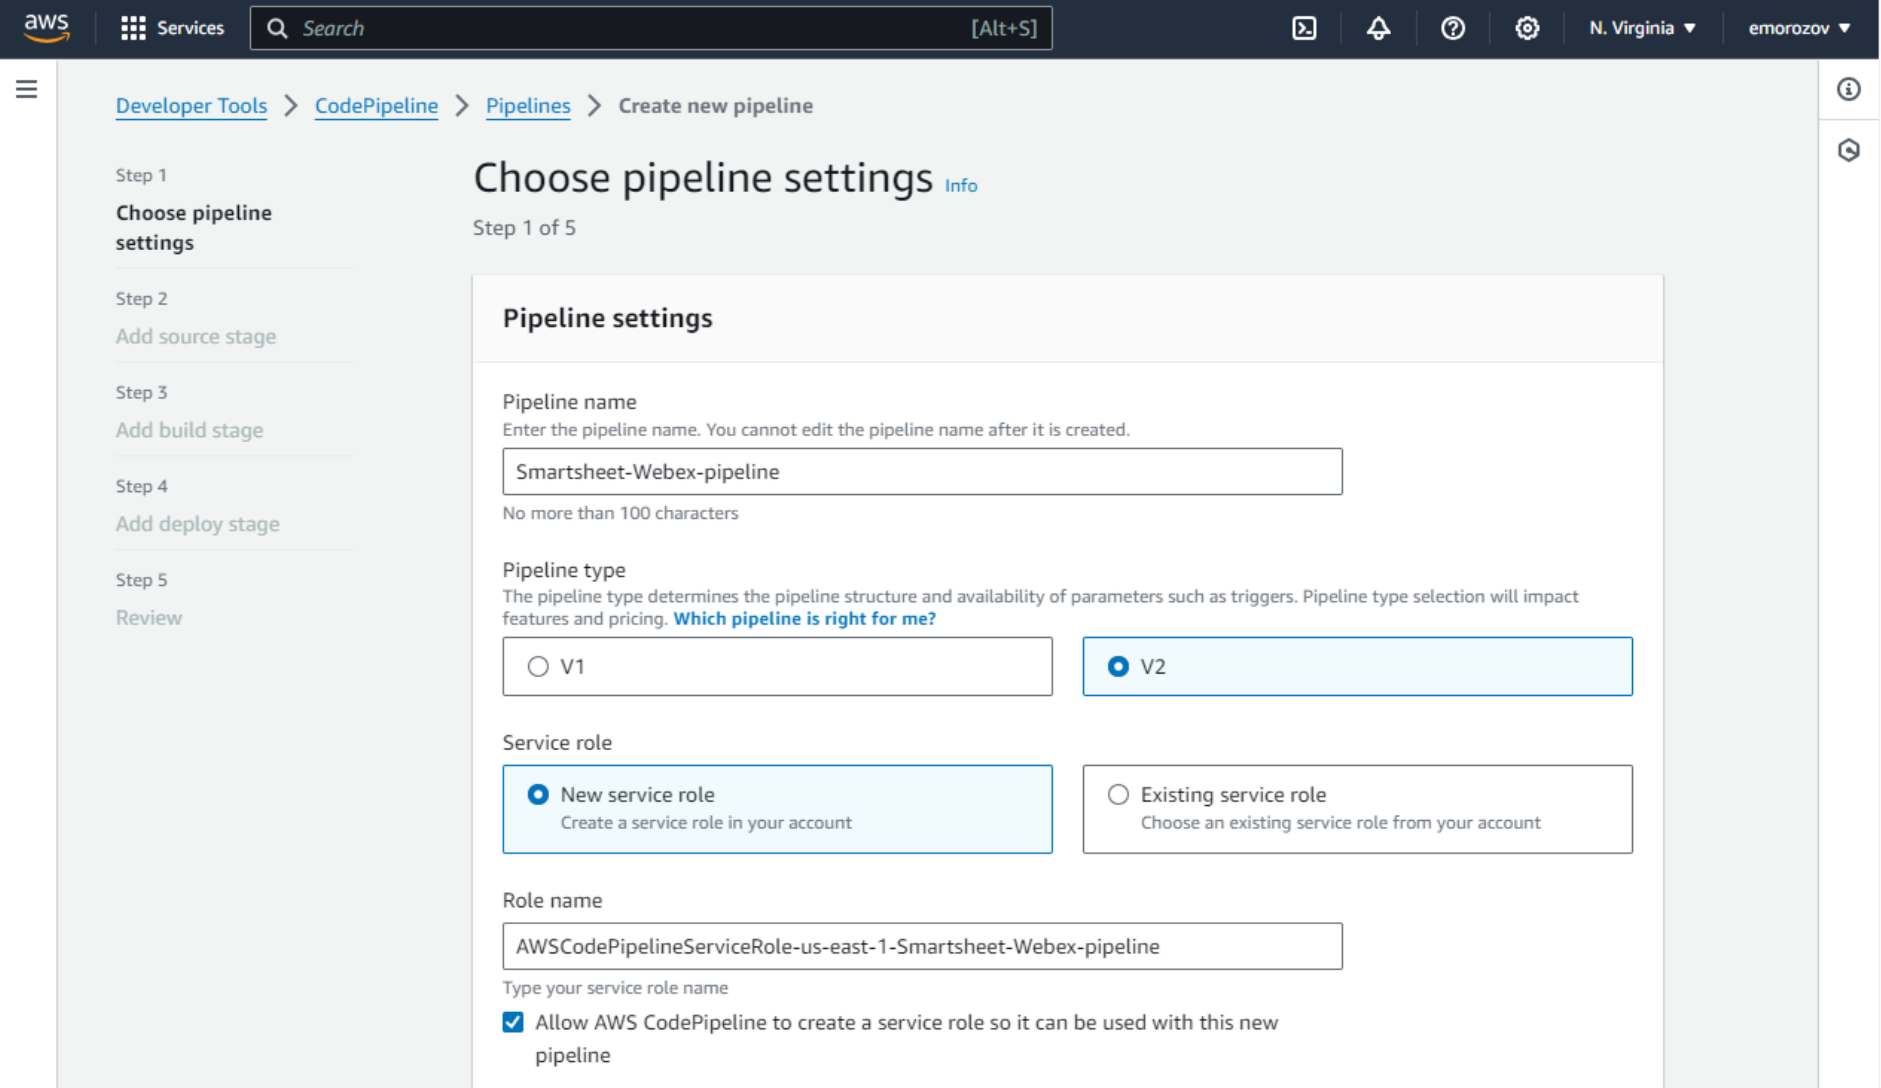
- Navigate to the Code Pipeline service in AWS Console and click Create pipeline. Give this pipeline a name and leave the rest of the settings on the first page default. We will use v2 pipeline and will let AWS create a service role for Code Pipeline automatically. Remember, service roles control “management plane” access between AWS services. This pipeline will need to be able to access Elastic Beanstalk/EC2.
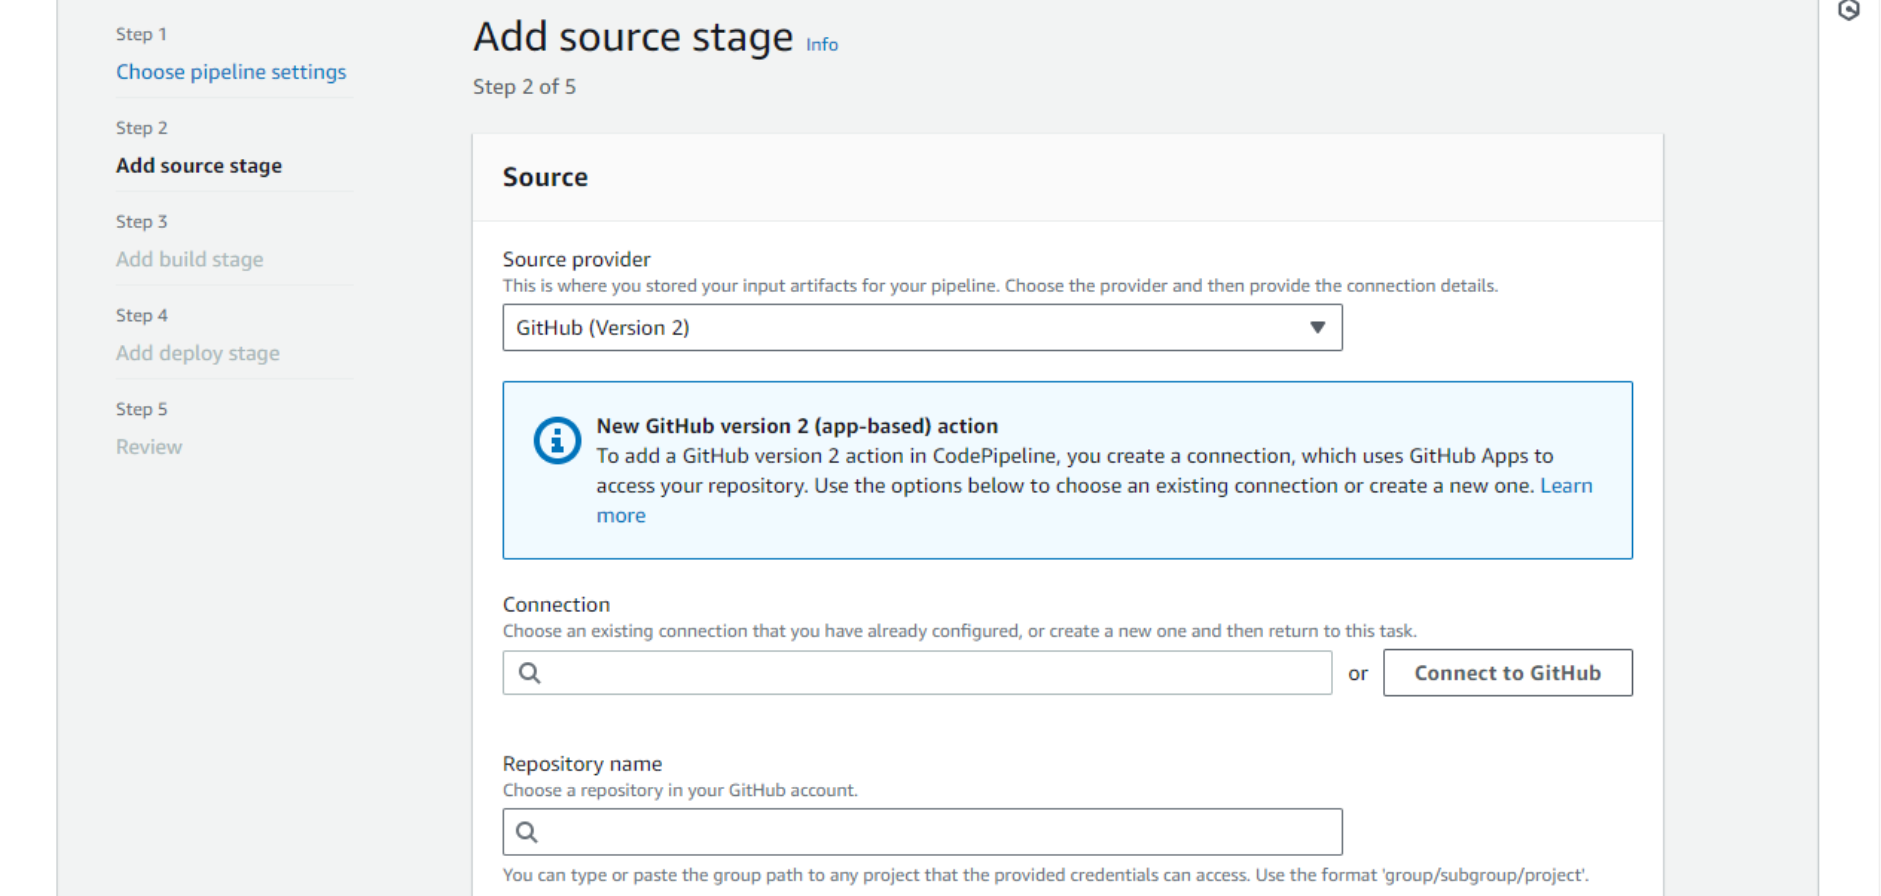
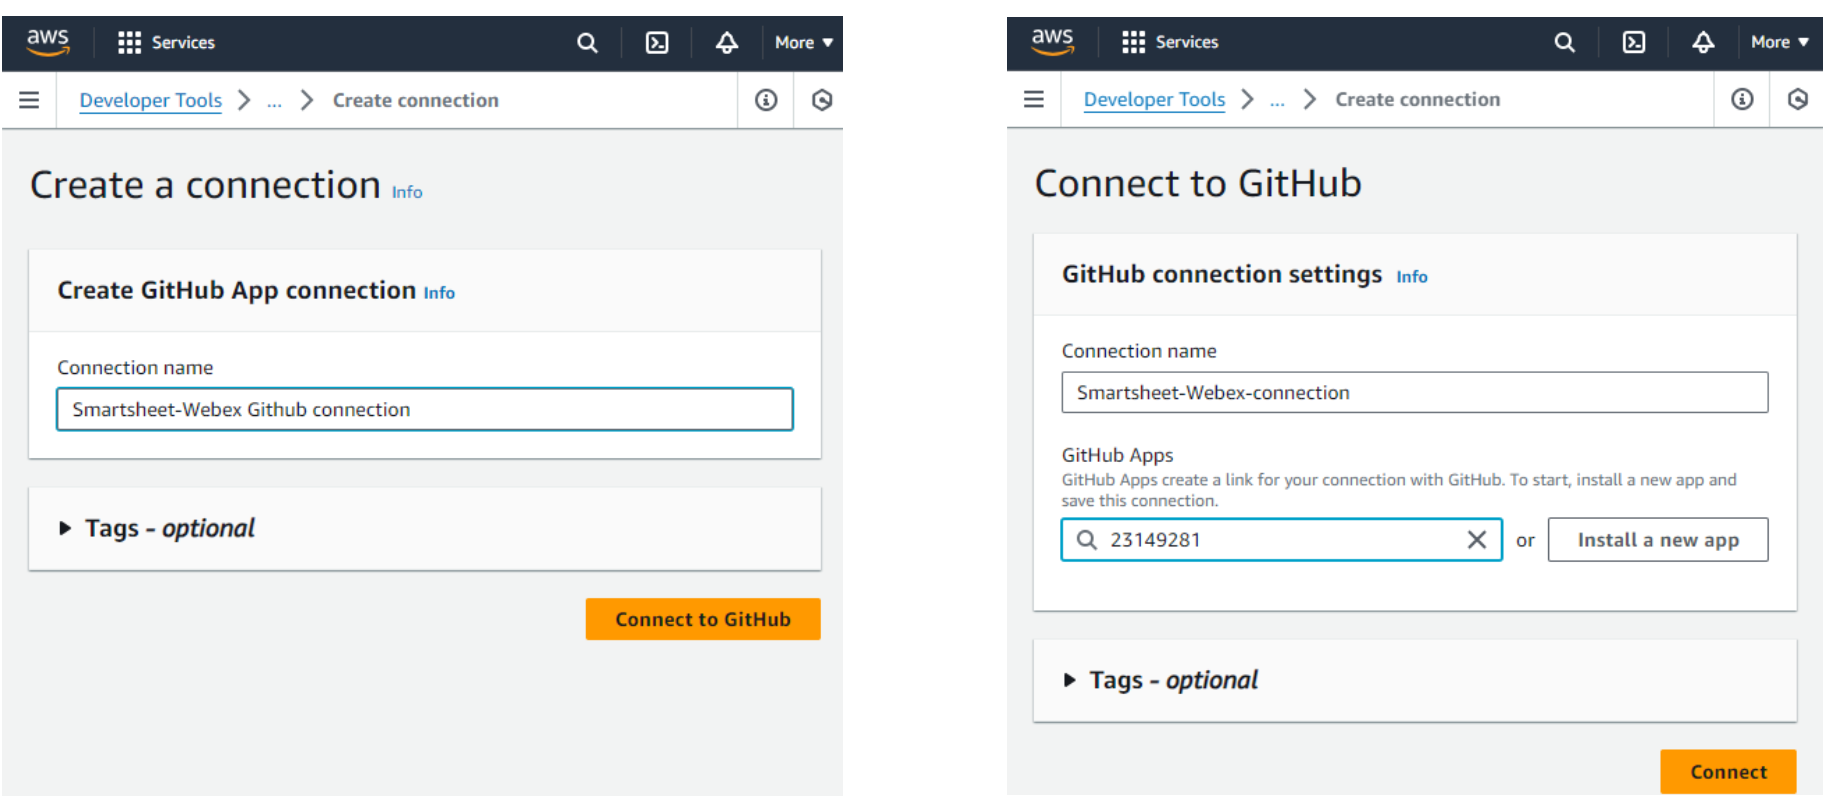
- On the Add source stage page, for Source provider, let’s choose GitHub (Version 2). Even though the repository we are using is public, we must use a GitHub account here. Click Connect to GitHub. A new window will pop up. We will set up a GitHub connection here.
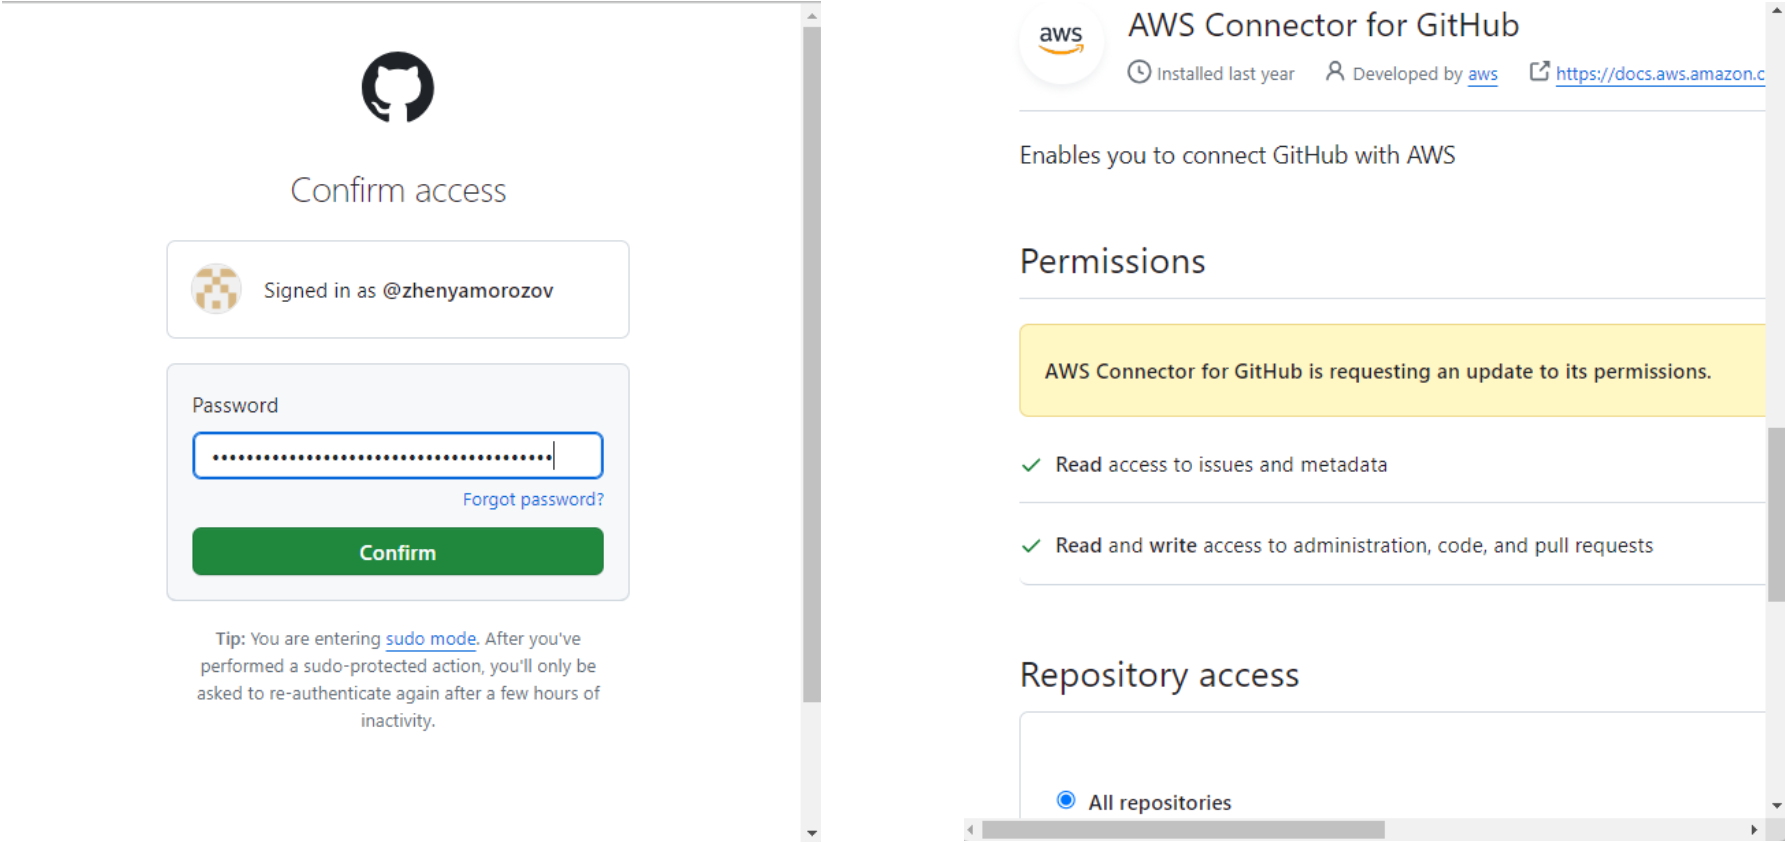
- In the pop-up window, type in a name for the GitHub connection and click Connect to GitHub. Then click Install a new app and follow the steps to install the AWS Connector for GitHub app into your GitHub account.
 You can authorize the app to access all or selected repositories.
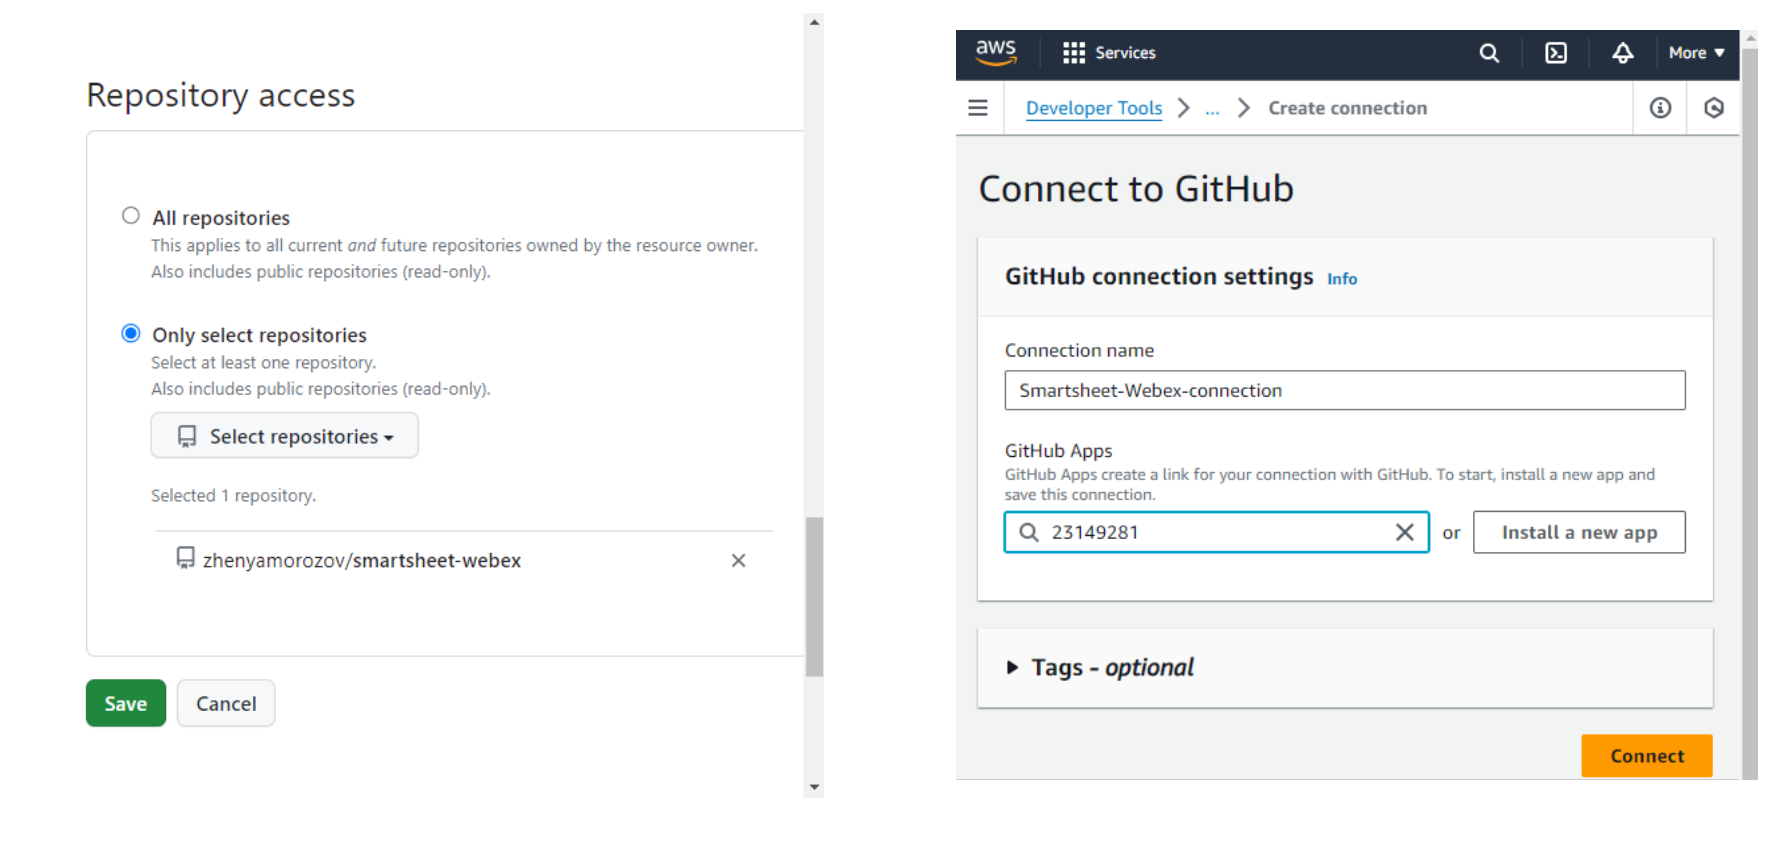
 As I do not plan to use this connection for other projects, I will select only the smartsheet-webex repo. After clicking Save, the GitHub App will show in the drop-down, and we will finally be able to click Connect to finish this step.
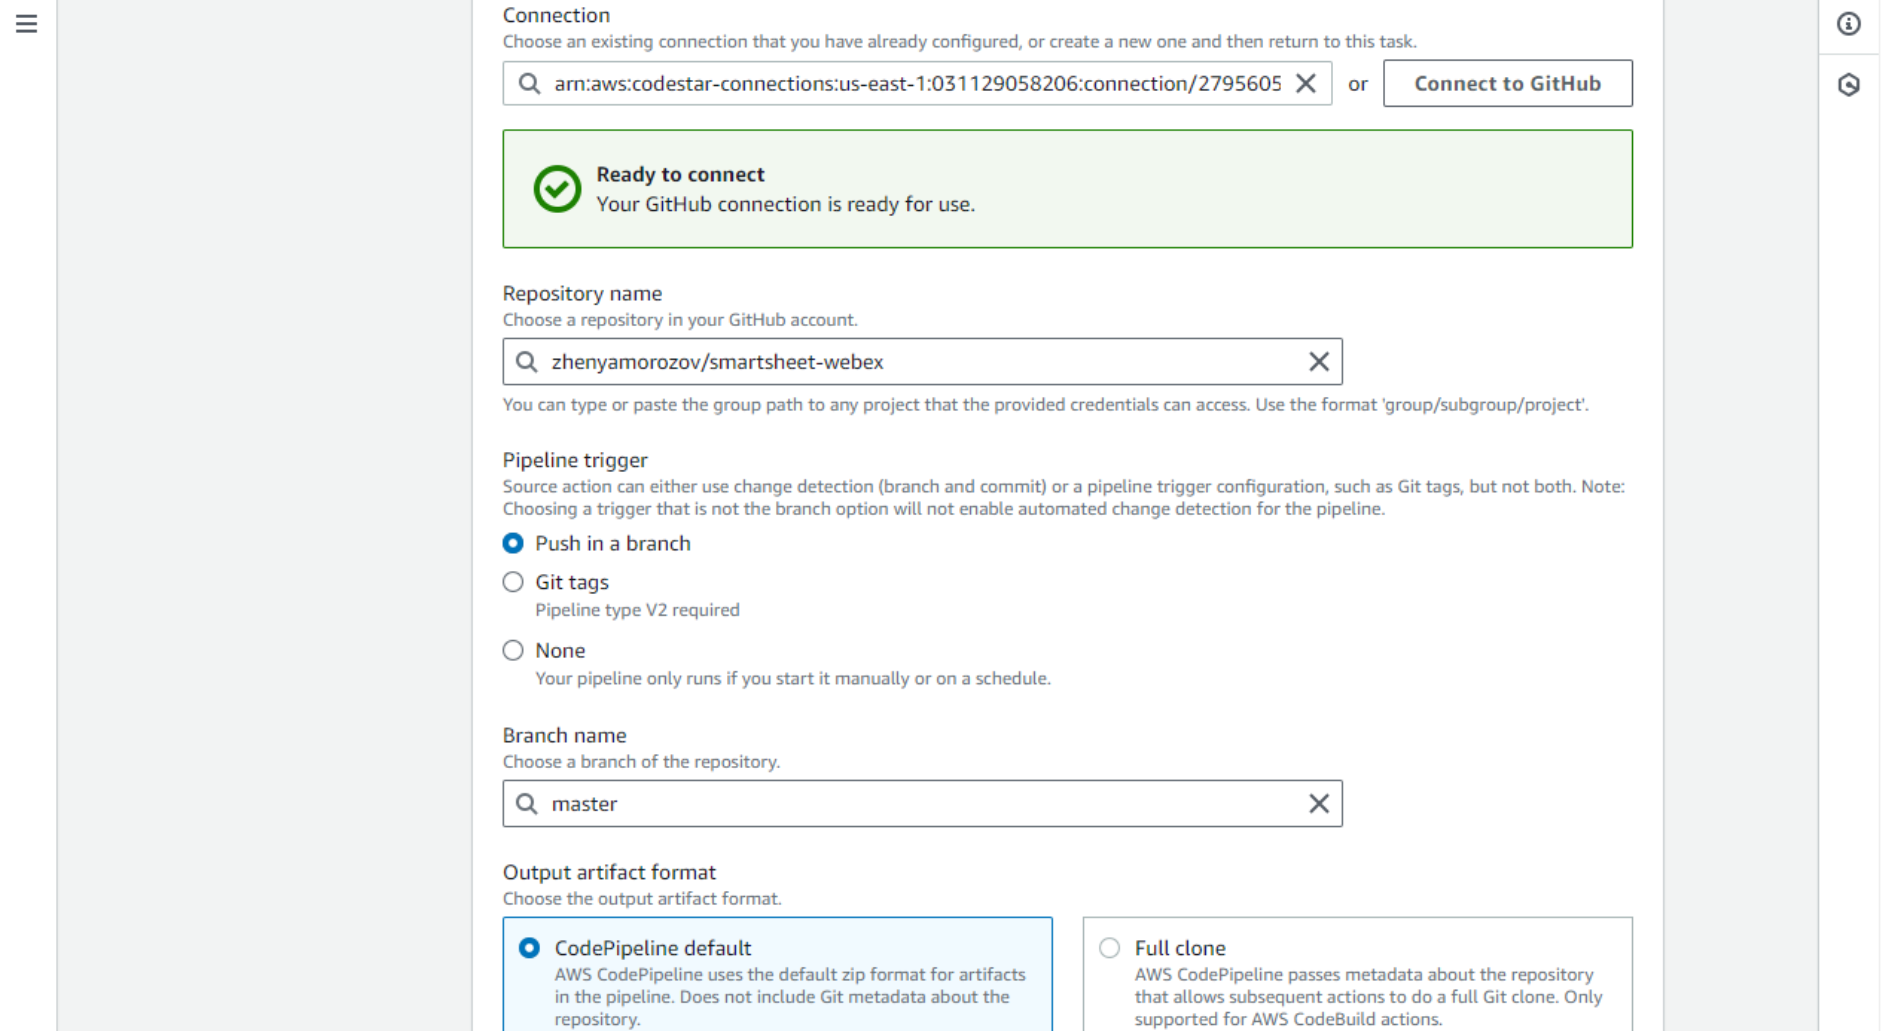
- Yay, now the GitHub connection is established, and we can select the repo in the Code Pipeline configuration, as well as the Branch name. For Output artifact format, select Code Pipeline Default.
- The next step is the build stage. Don’t worry, there is nothing to do here for the Python code. It does not require any compilation, build, or artifact generation. Just click Skip build stage.
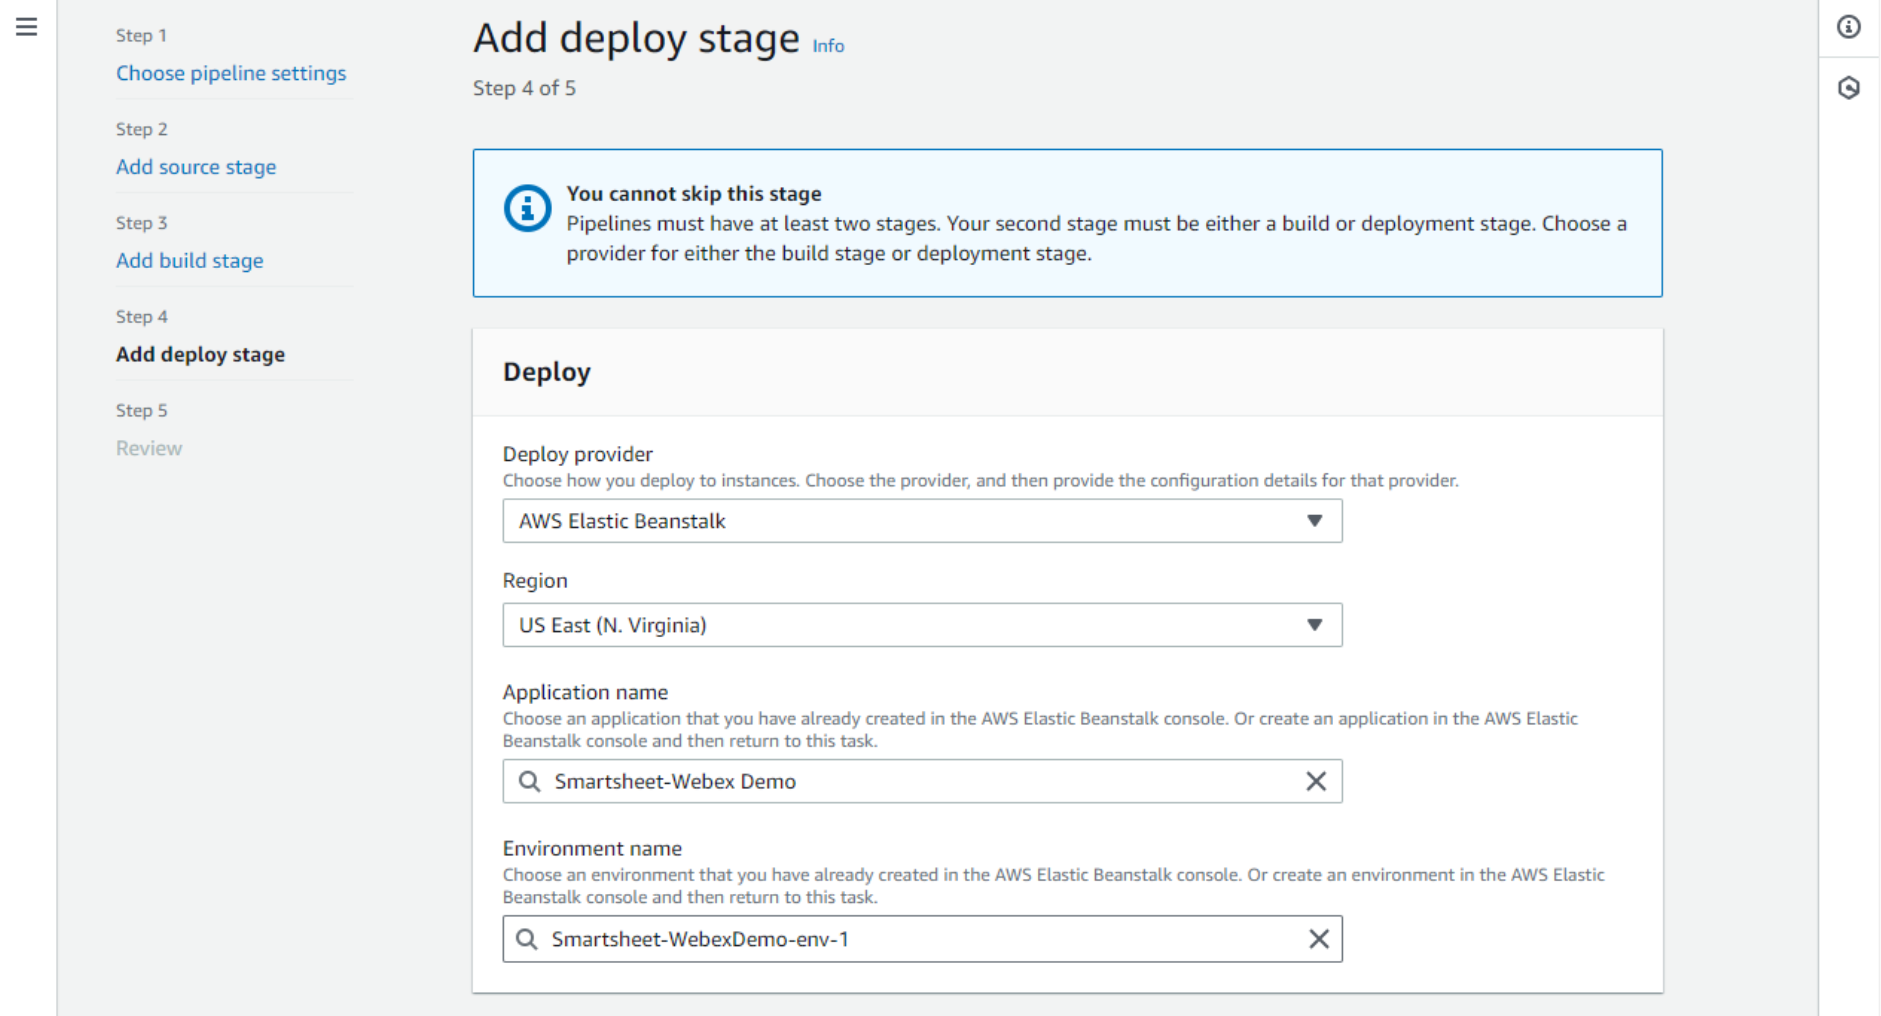
- On the Add deploy stage, select AWS Elastic Beanstalk as the Deploy provider, and select the correct application name and the environment name.
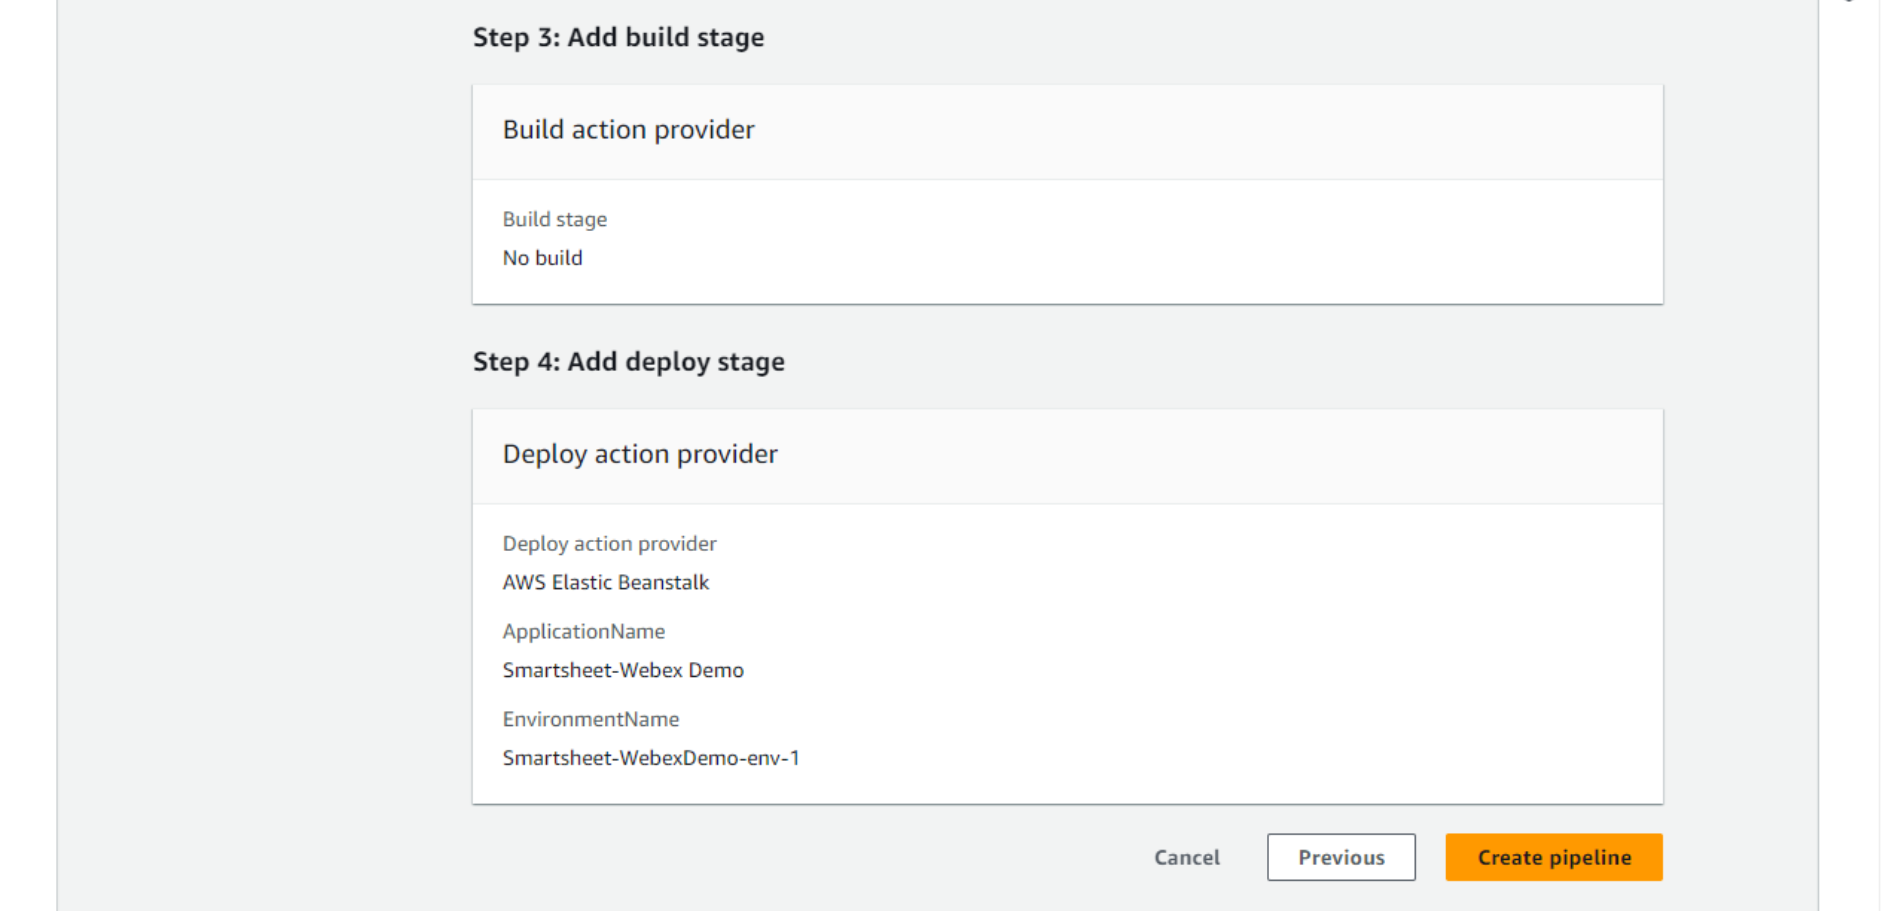
- The next page is just Review and confirm by clicking the Create pipeline button.
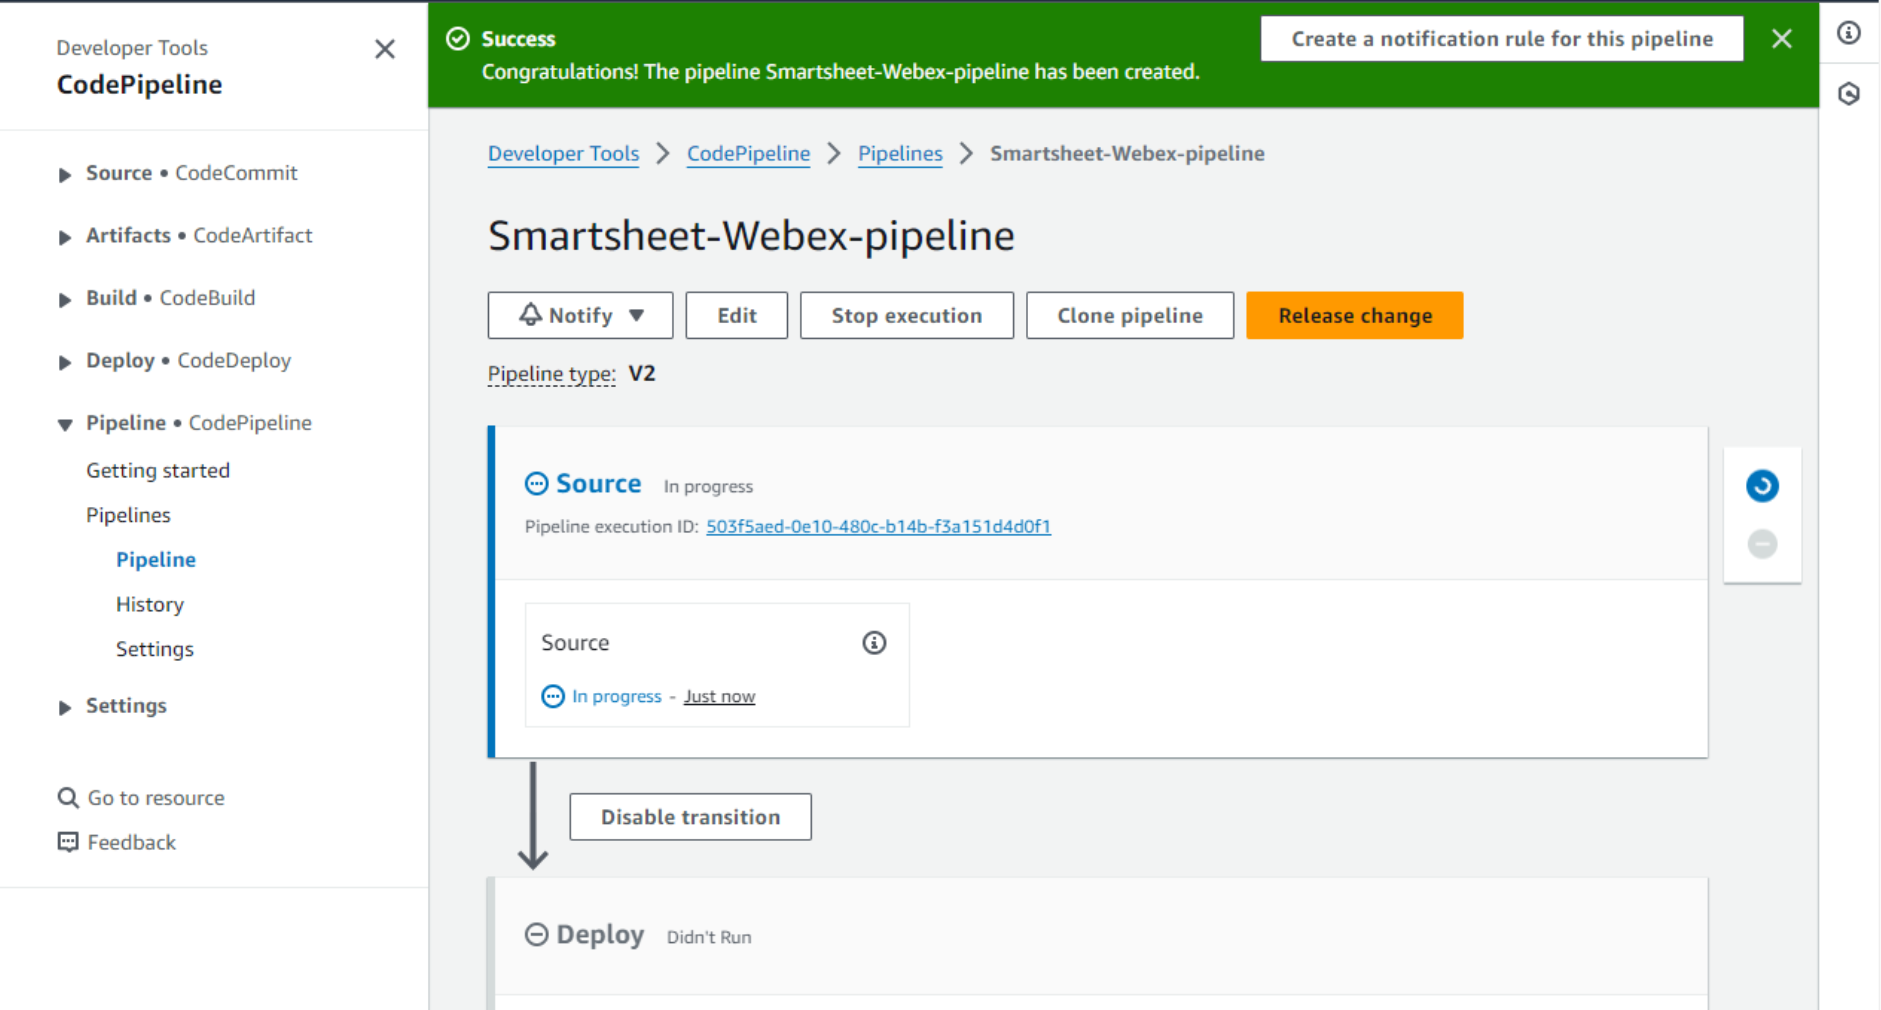
- Elastic Beanstalk will report that the pipeline was successfully created and start executing the pipeline.
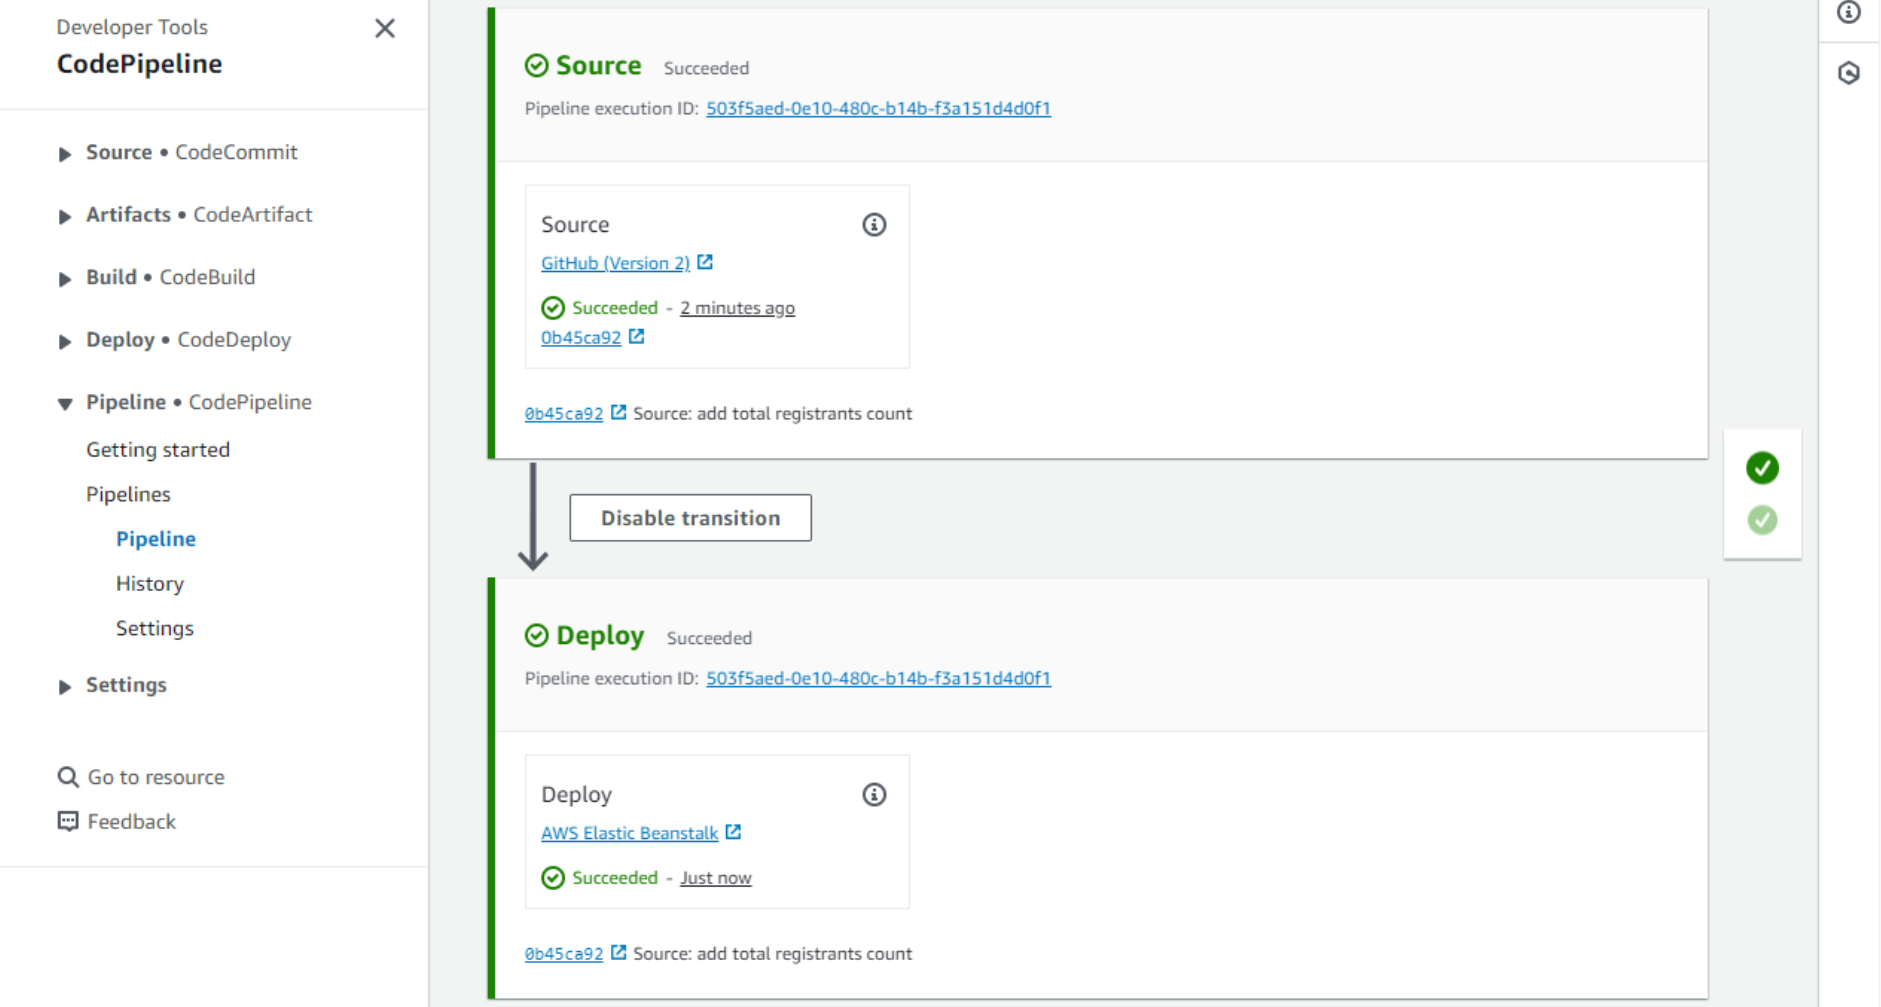
- After a short while, we can see that the Source stage has completed successfully, and the source code was pulled from GitHub.
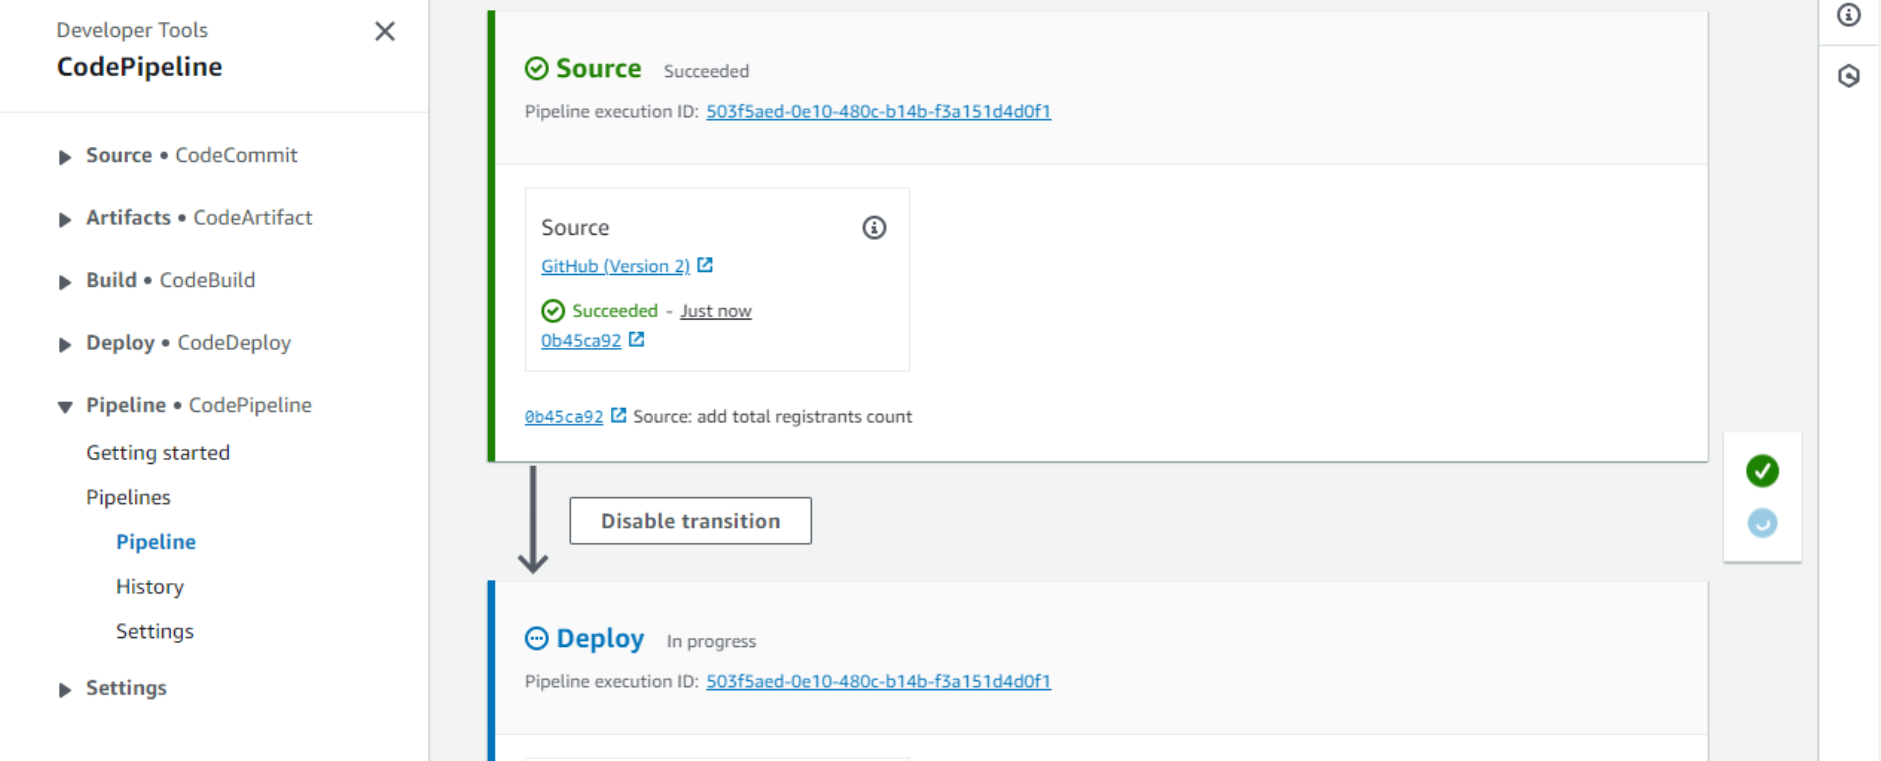
- After a couple additional minutes, the Deploy stage should also complete successfully. Our application is now deployed.
- But is the code running already? Let’s check this by looking into the logs. We can retrieve the logs from the Logs tab of the environment page.
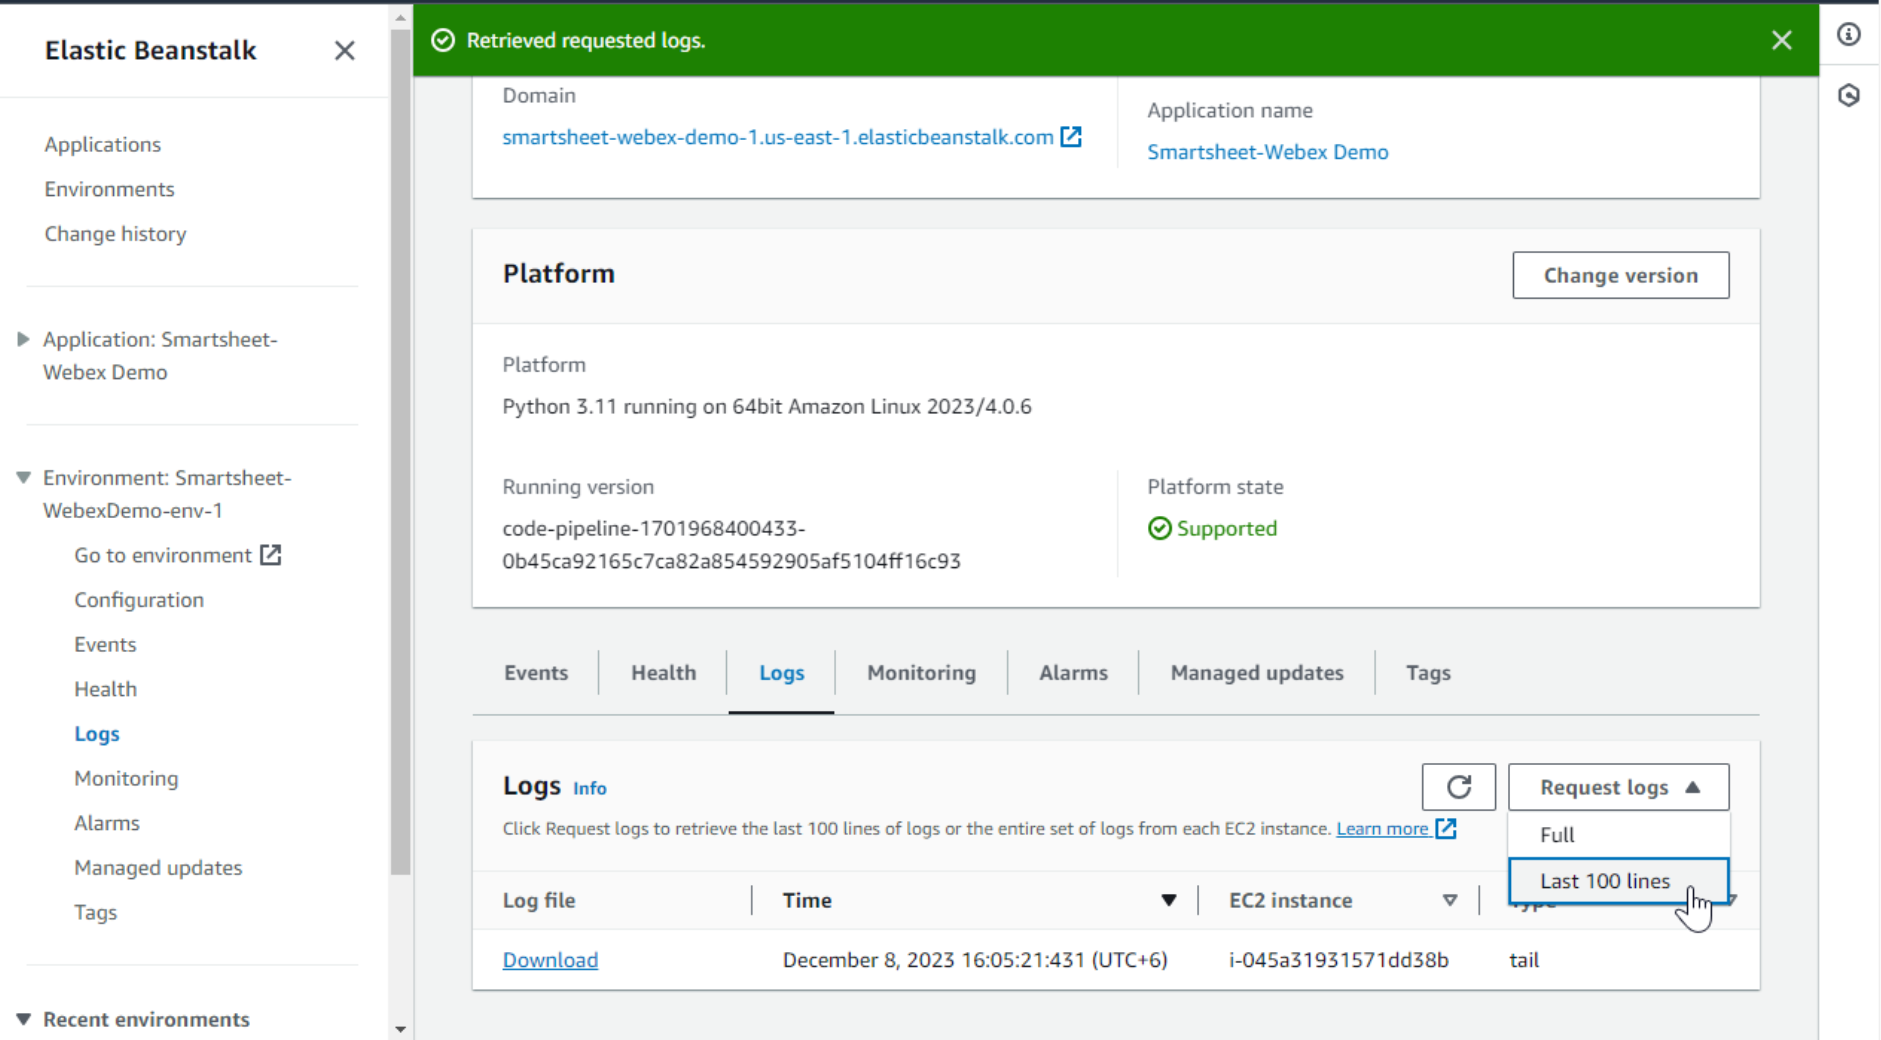
While looking through the log file, under the /var/log/web.stdout.log caption, we can see the following. Is it a good sign? Actually, yes! It shows that Elastic Beanstalk is continuously trying to launch our application, it starts, spits out an error message, and stops. The error generated is a custom message that shows that we haven’t configured the environment variables yet.

But before fixing this, I want to note two important parts of the code package that weren’t visible but made the deployment smooth: .ebextensions and requirements.txt.
What is requirements.txt
Almost any Python application is built using external modules. In the local development environment, you typically use package manager pip to install them in your system (or virtual env), and then import them in your code. You end up depending on these modules to make your code work. That’s why the external modules are also called dependencies.
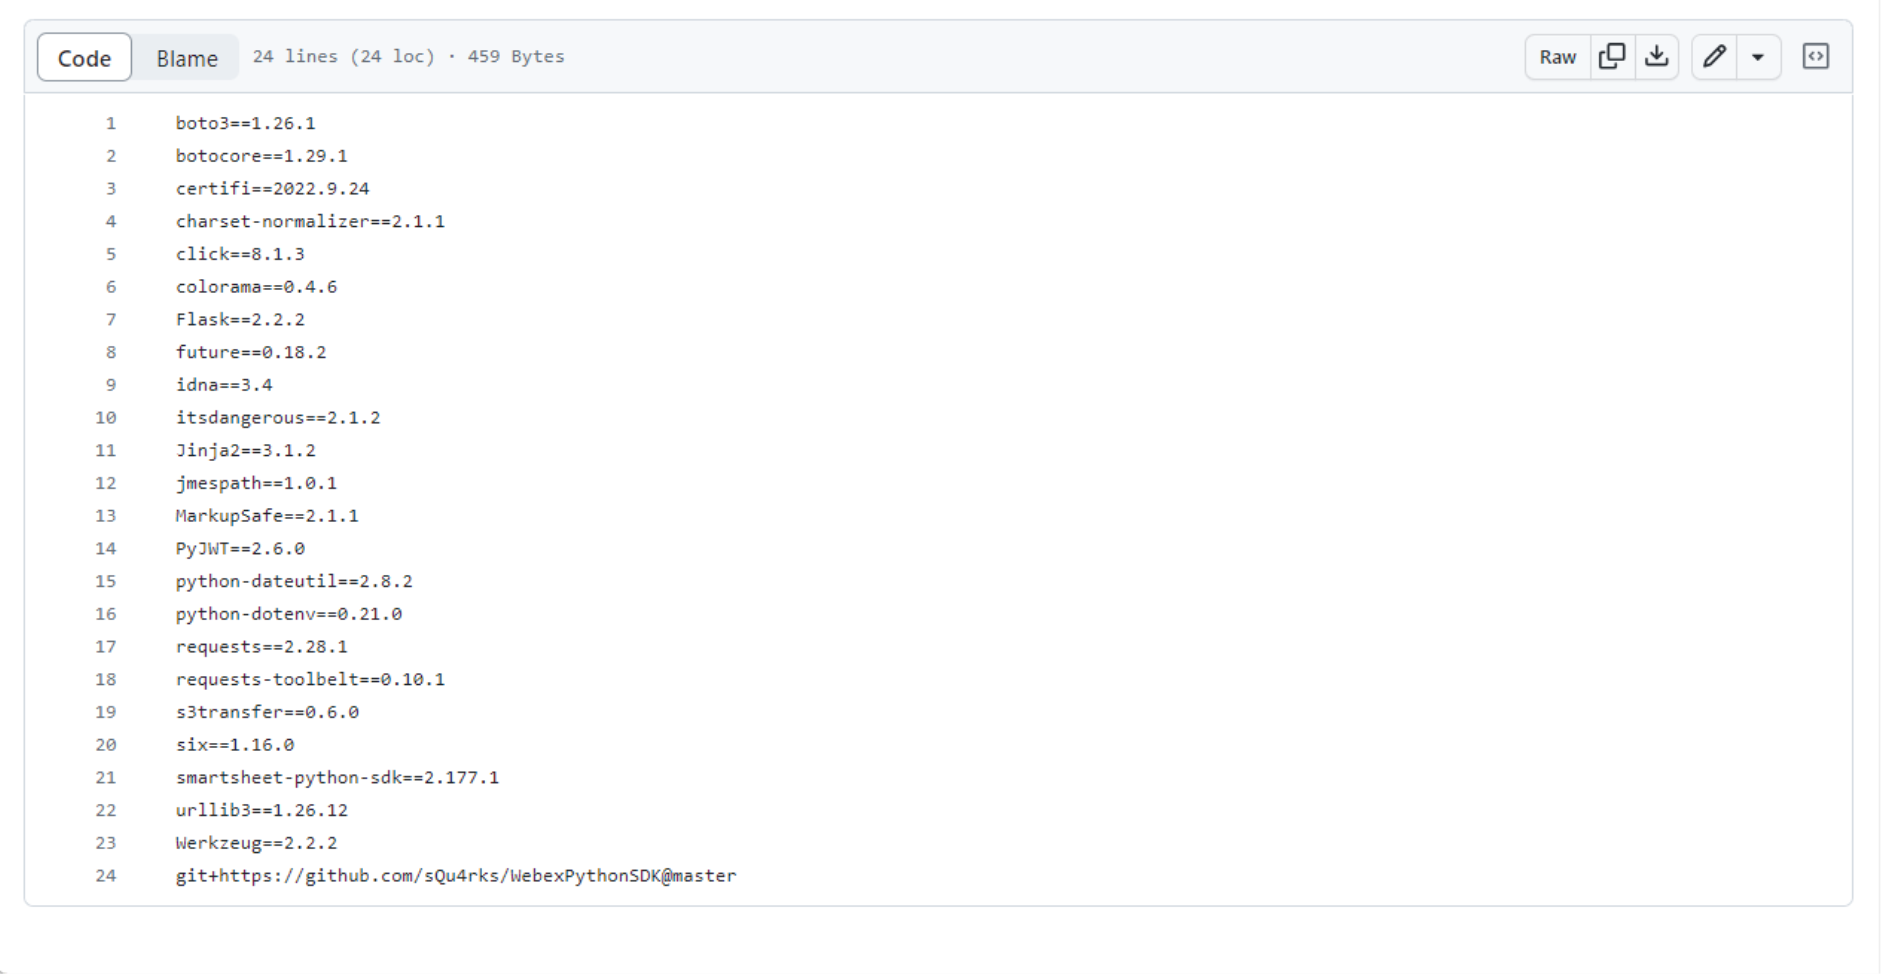
Elastic Beanstalk wants to create a comfortable environment for your code and supply all the dependencies it needs. But how does it know what Python packages to install for your application? The answer is requirements.txt. This file has the list of dependencies with a specific version for each package. Elastic Beanstalk runs pip that reads this file and installs all the listed Python packages into the environment.
Note the last line in the requirements.txt for this project is not like the others. This is because this module – Webex Python SDK – does not have its latest version published in the central Python module repository (PyPI). This line instructs pip to install this module directly from the GitHub repo by running some git commands. But is git even installed in the system?
What is .ebextensions
The .ebextensions is a folder that was added to the project specifically for Elastic Beanstalk. It has information on additional accommodations Elastic Beanstalk should make for this application. The folder contains multiple files that are processed in order.
Let’s look at the first file, 00-packages.config. It instructs Elastic Beanstalk to install one additional OS-level package to the EC2 instance – git. Remember why we need git? Of course, to be able to install the Webex SDK dependency directly from GitHub.

The second file, 01-flask.config indicates the entry point for our Flask web application. web:app means the server will look in the file named web.py for the application object named app. Here’s the place in the code where this application object is created.

Now, let’s get back to our application. It is running in the Elastic Beanstalk environment, but it is not yet functional. We still need to configure a few environment variables.
Environment variables
The documentation of this Webex integration states that there are few environment variables required:
SMARTSHEET_ACCESS_TOKEN- your Smartsheet access tokenWEBEX_INTEGRATION_CLIENT_ID- Webex integration Client ID stringWEBEX_INTEGRATION_CLIENT_SECRET- Webex integration Client SecretWEBEX_BOT_TOKEN- Webex bot access tokenWEBEX_BOT_ROOM_ID- Webex bot room ID. This bot can only be used in one Webex room/space. The space can be a direct or a group space.
These values are normally set on the OS environment level of the virtual server. As we are using Elastic Beanstalk, we ideally should not touch the actual EC2 instance at all. We can configure all these variables in the Elastic Beanstalk environment.
- Go to the environment home page and click Configuration on the left. Scroll all the way down. In the Environment properties section, we see that one variable is already set. It is
PYTHONPATH.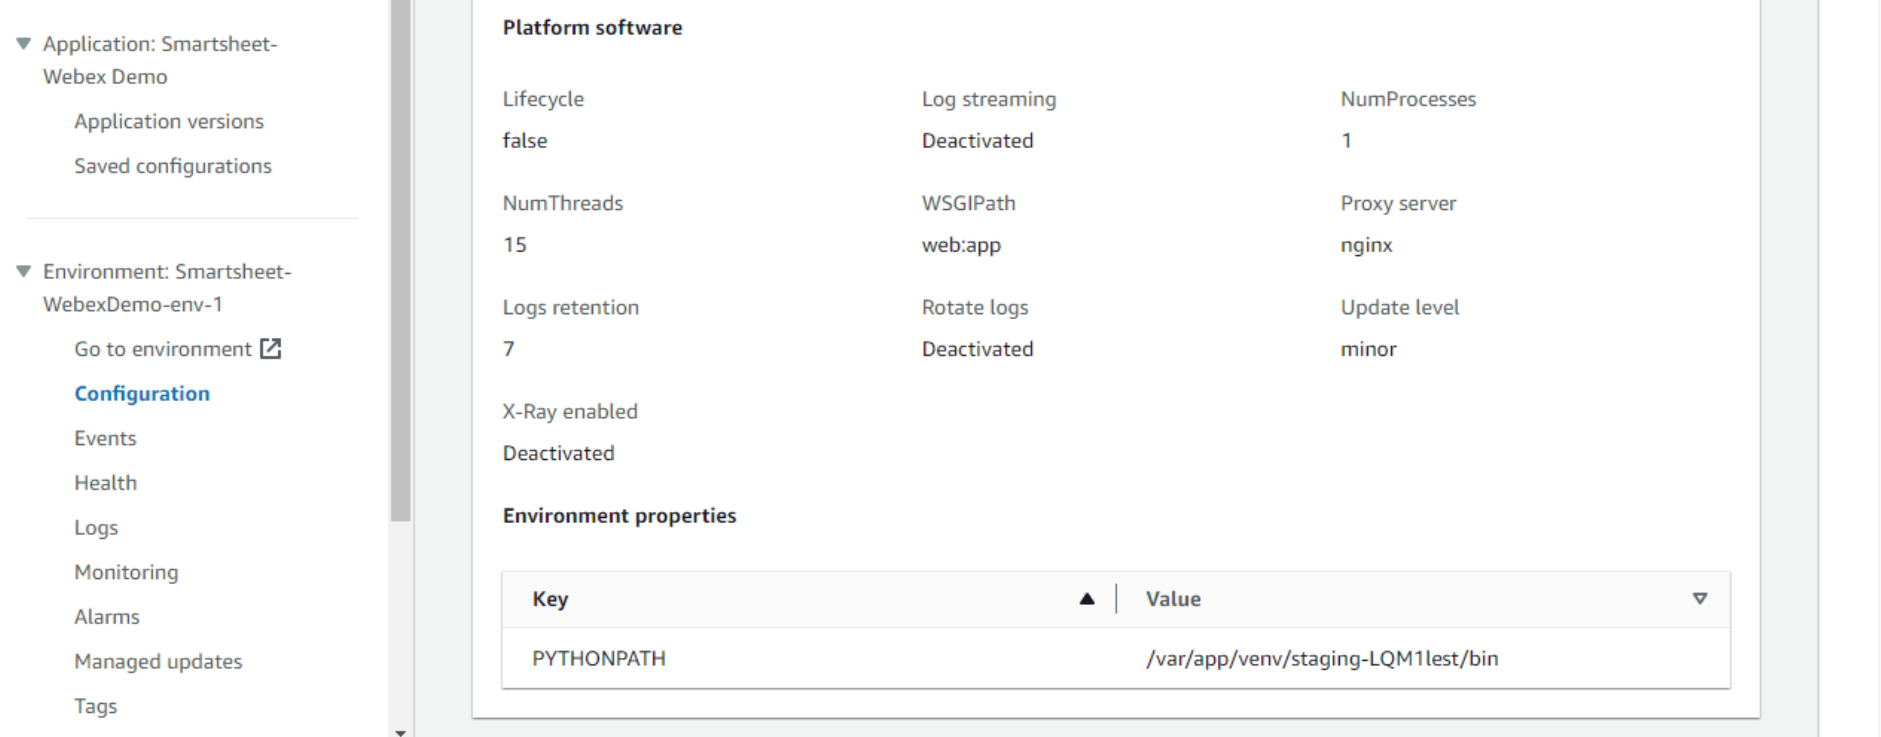
- Let’s add more variables to this list. Click Edit on this section, scroll down, and add variables and values one by one. The steps on where to get all these credentials are listed in Get Started.
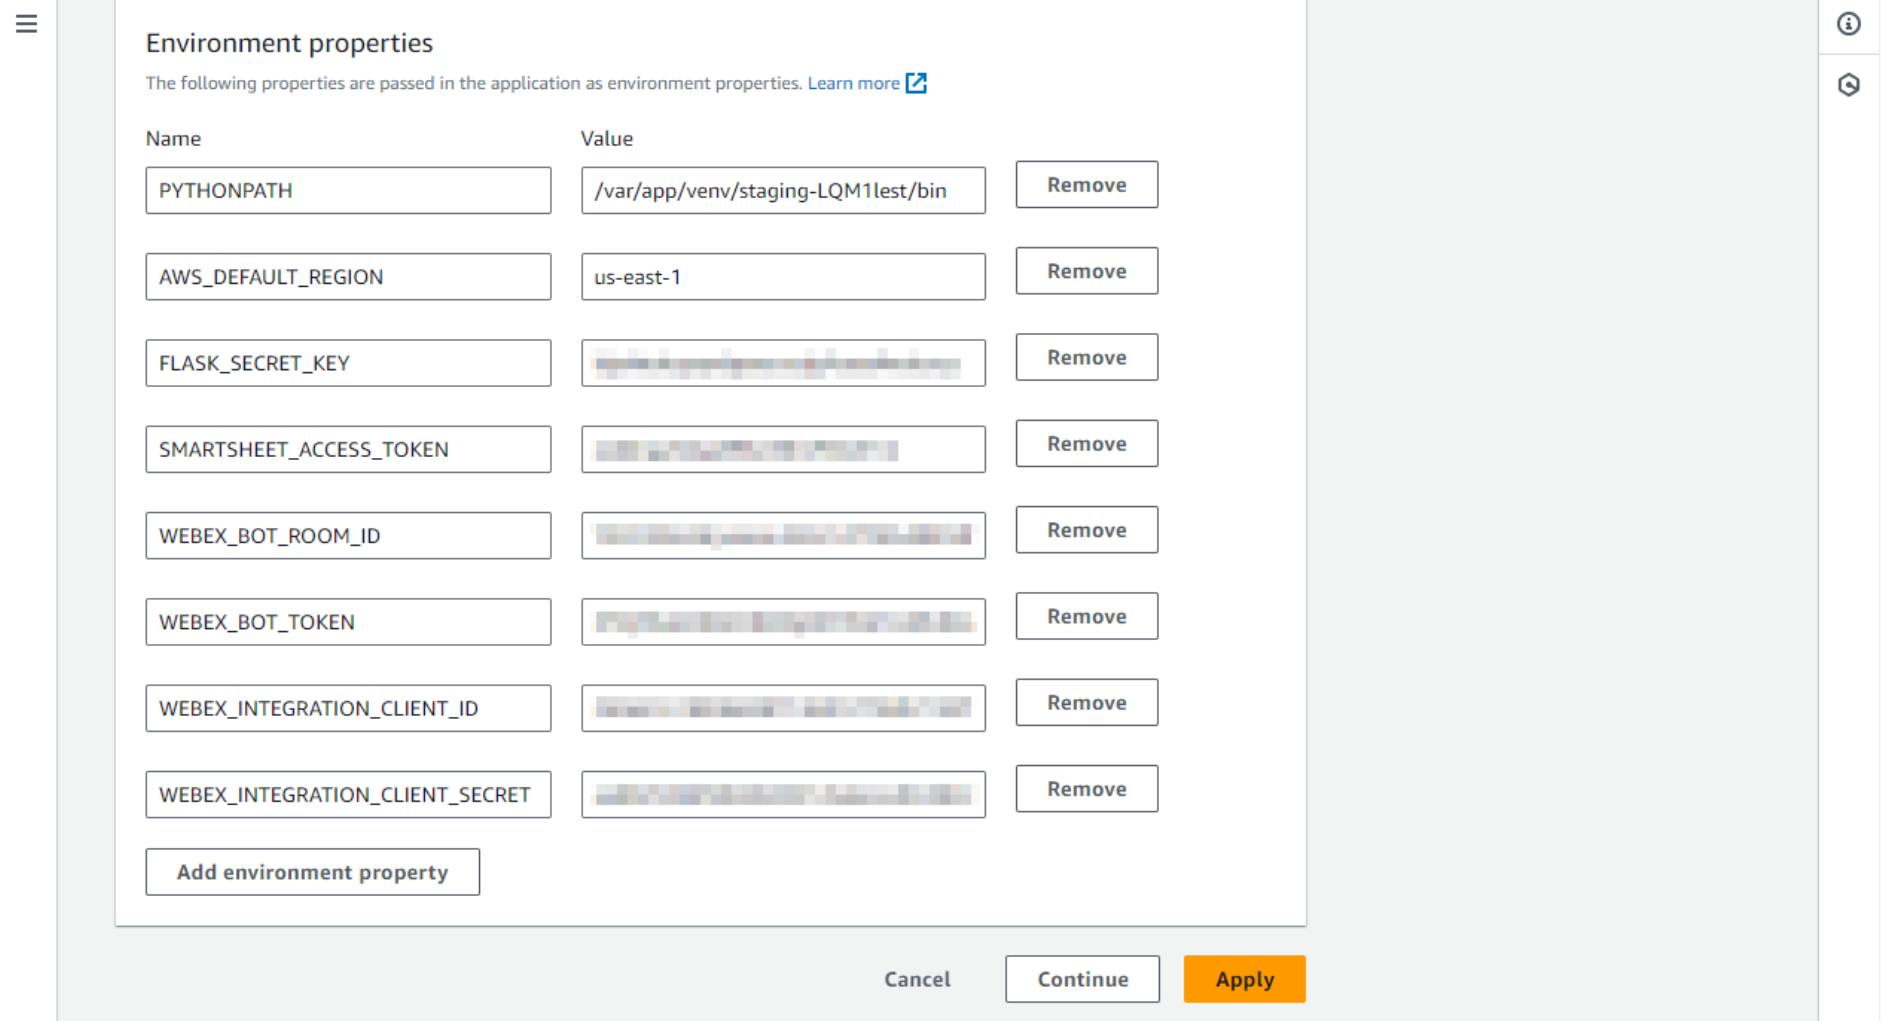
- Note what happens after you click Apply. Elastic Beanstalk will take a minute and then report that the new configuration has been deployed on the instance.
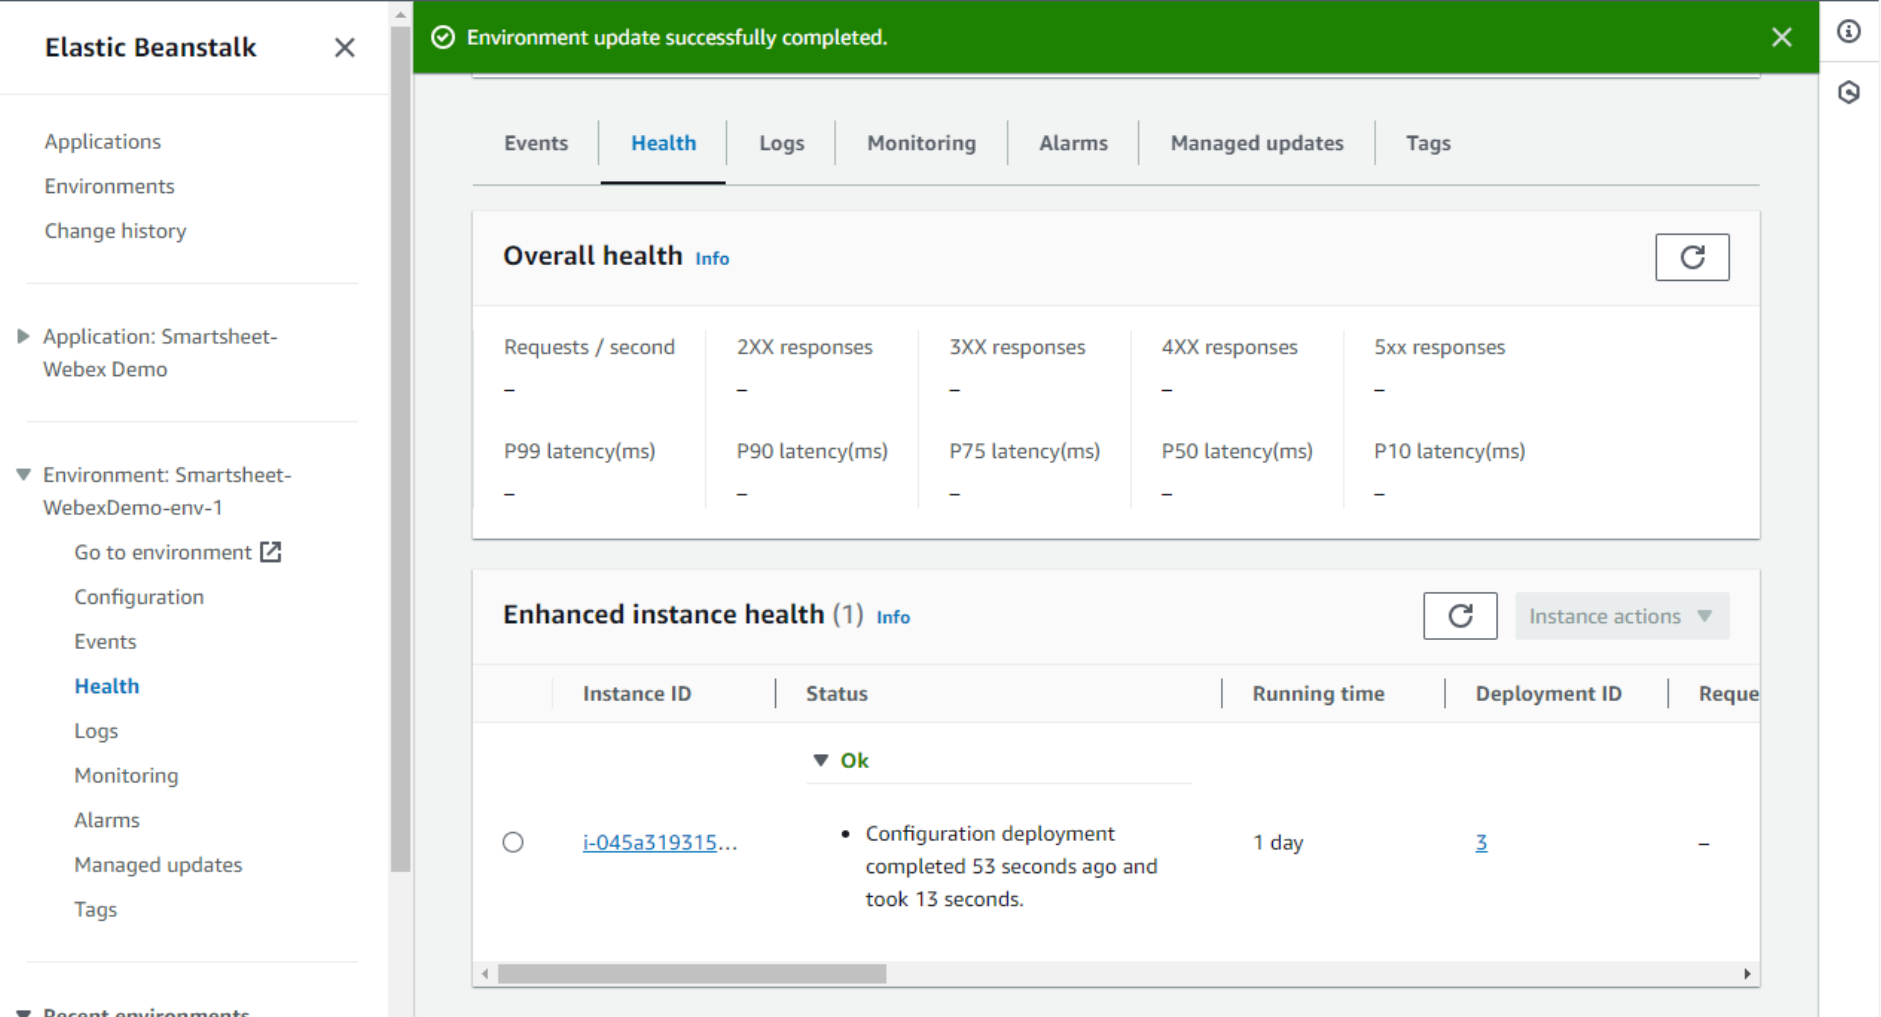
- Let’s check the log file again. Notice that it stopped yelling at us for the missing environment variable and started the web service successfully.

- And if we open the environment domain name, we can see a response. It means the application is working, available on the public internet, and is ready to receive webhook requests from Webex.

We are almost done, but there will be one more problem to solve. Anyway, let’s see if our bot is working. And it is.
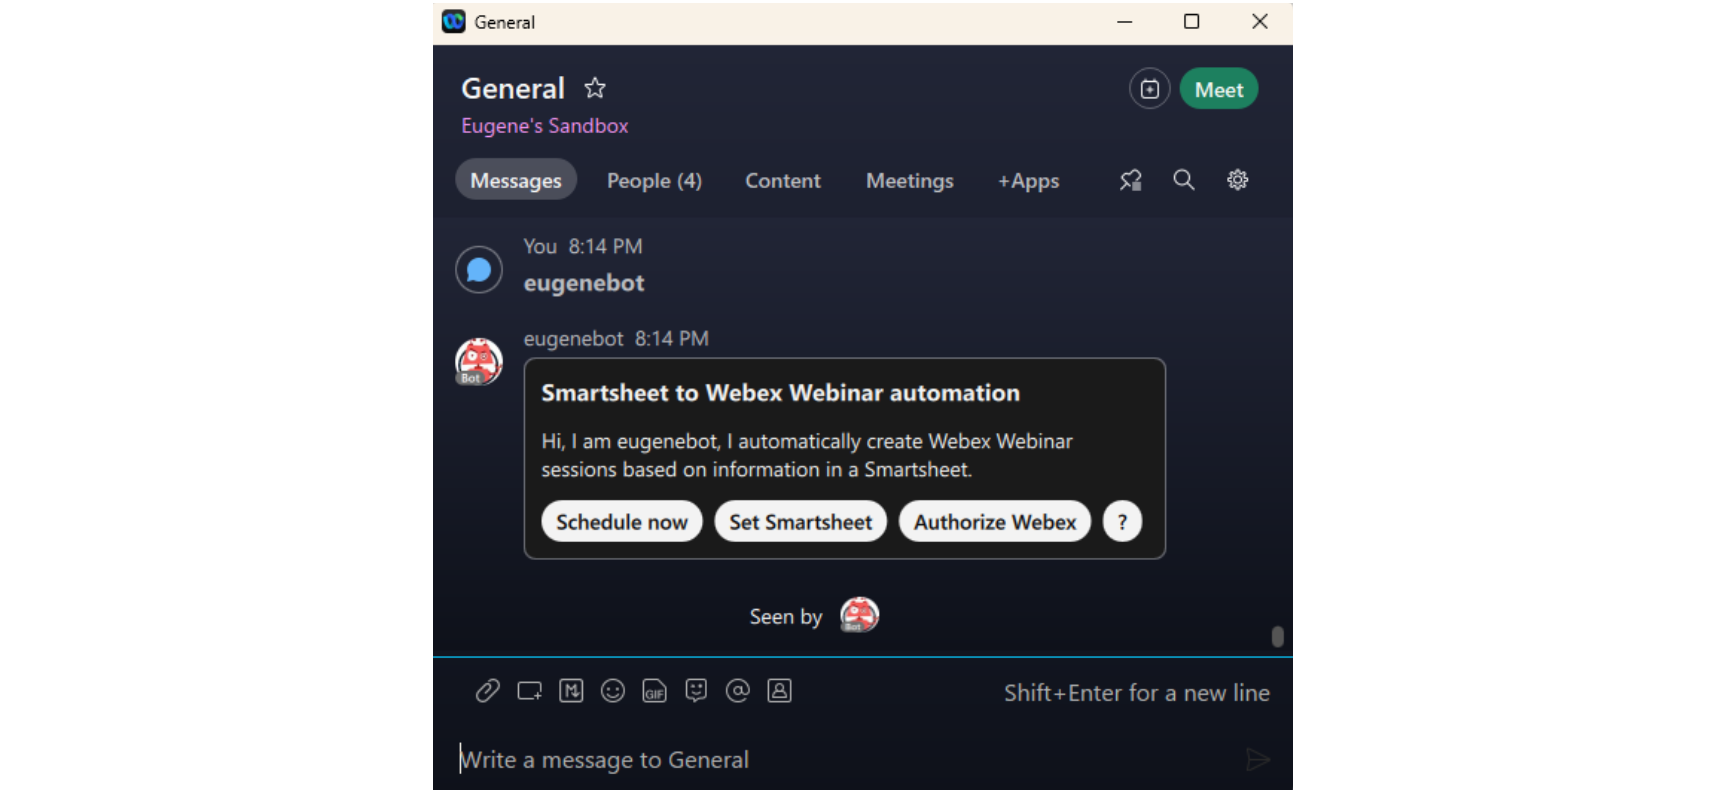
The Set Smartsheet and Authorize Webex buttons show that there isn’t currently a working smartsheet set, and the Webex integration part of the app does not have any authorization. But before continuing with setting these, we need to tweak something in our AWS setup. The problem is the parameters that are set via the Webex bot are stored securely using yet another AWS service – Parameter Store. Parameter Store is part of the AWS SSM (Systems Manager) and can securely store sensitive parameters, such as passwords, keys, and other credentials.
Setting up the Parameter Store
We do not have much to do with the Parameter Store itself, but we need to make sure our application has access to it. Yes, it is again about my favorite roles and permissions: they control access between services in AWS.
- Let’s go to the IAM service and select Policies. This is the list of AWS-managed policies.
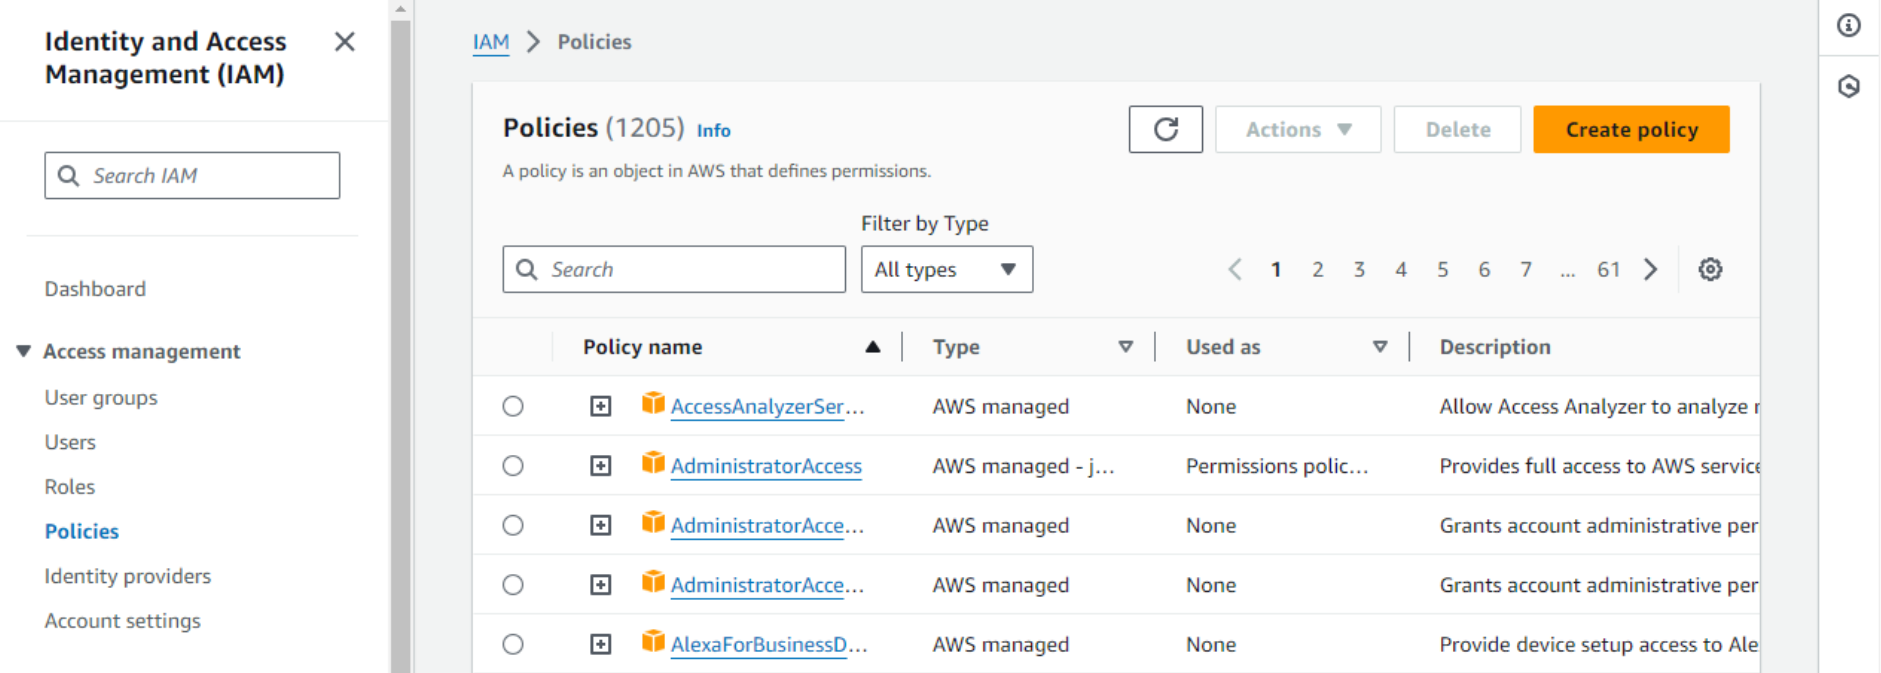
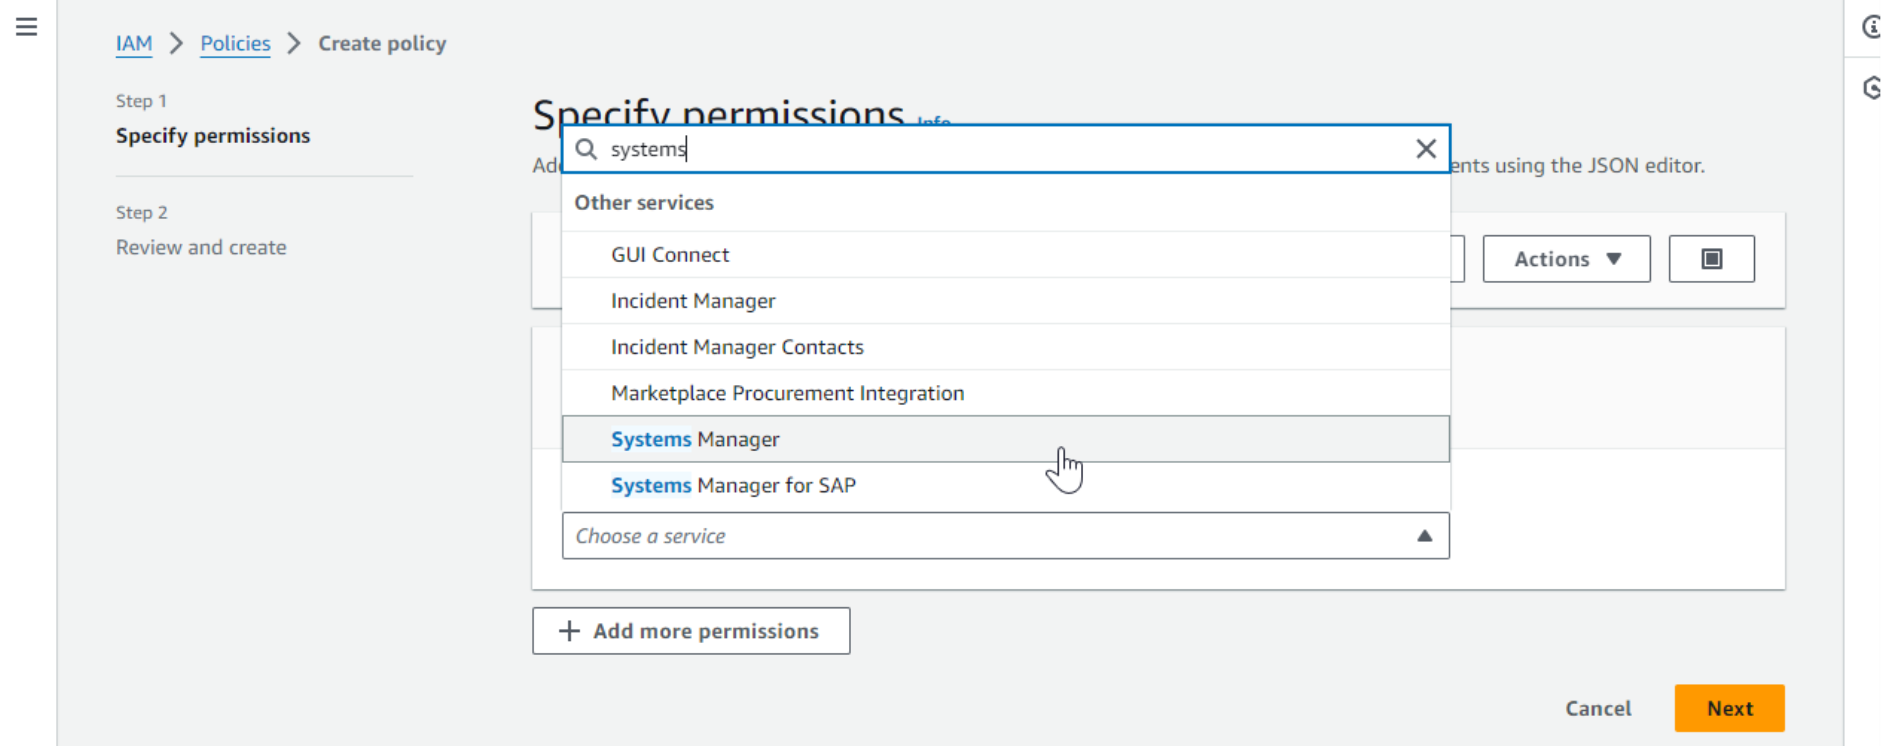
- We will create a new custom policy that will allow access to Parameter Store. Click Create policy. Select the Systems Manager service from the drop-down.
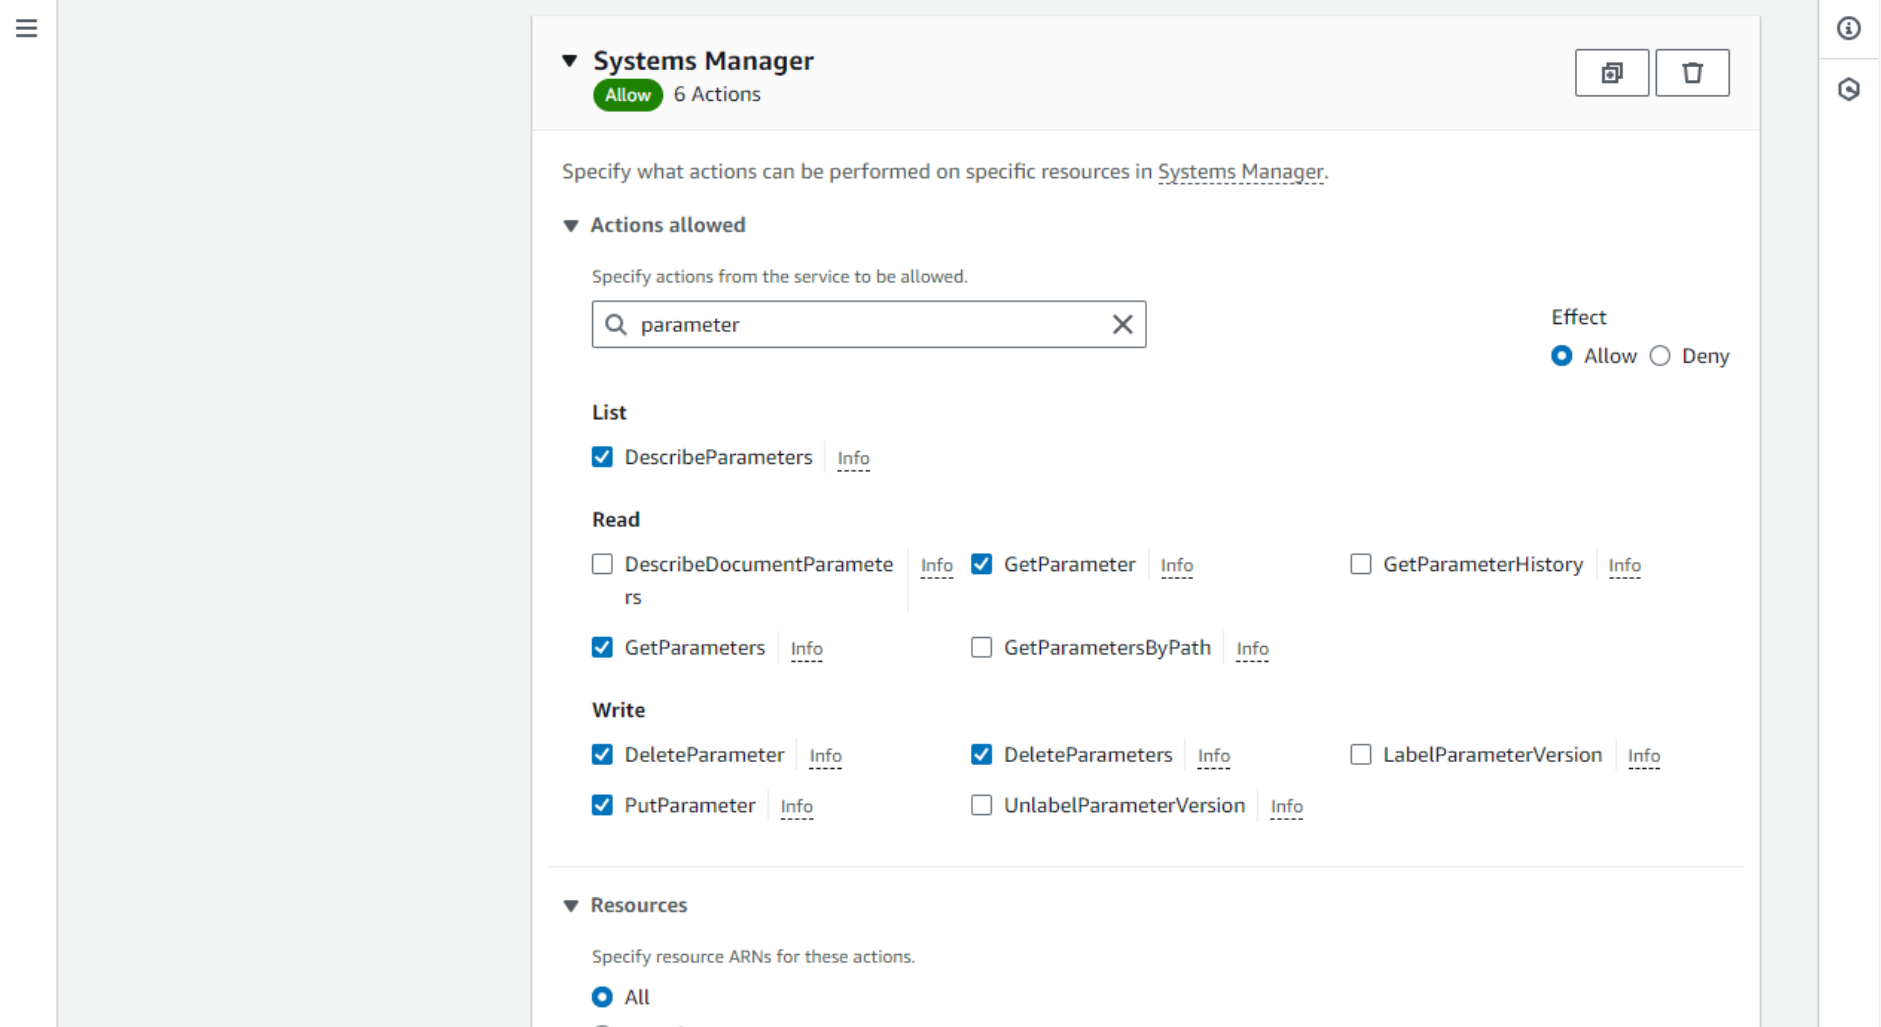
- Check boxes to enable the actions needed to read and write Parameter Store parameters.
- Then, review and save the policy. Next, we need to attach this newly created policy to the role EC2 uses – the instance profile. Select Roles on the left and search for the instance profile role.

- Click Add permissions, then Attach policies, and find our custom policy.

- Confirm and verify that the policy has been attached to the instance profile role.
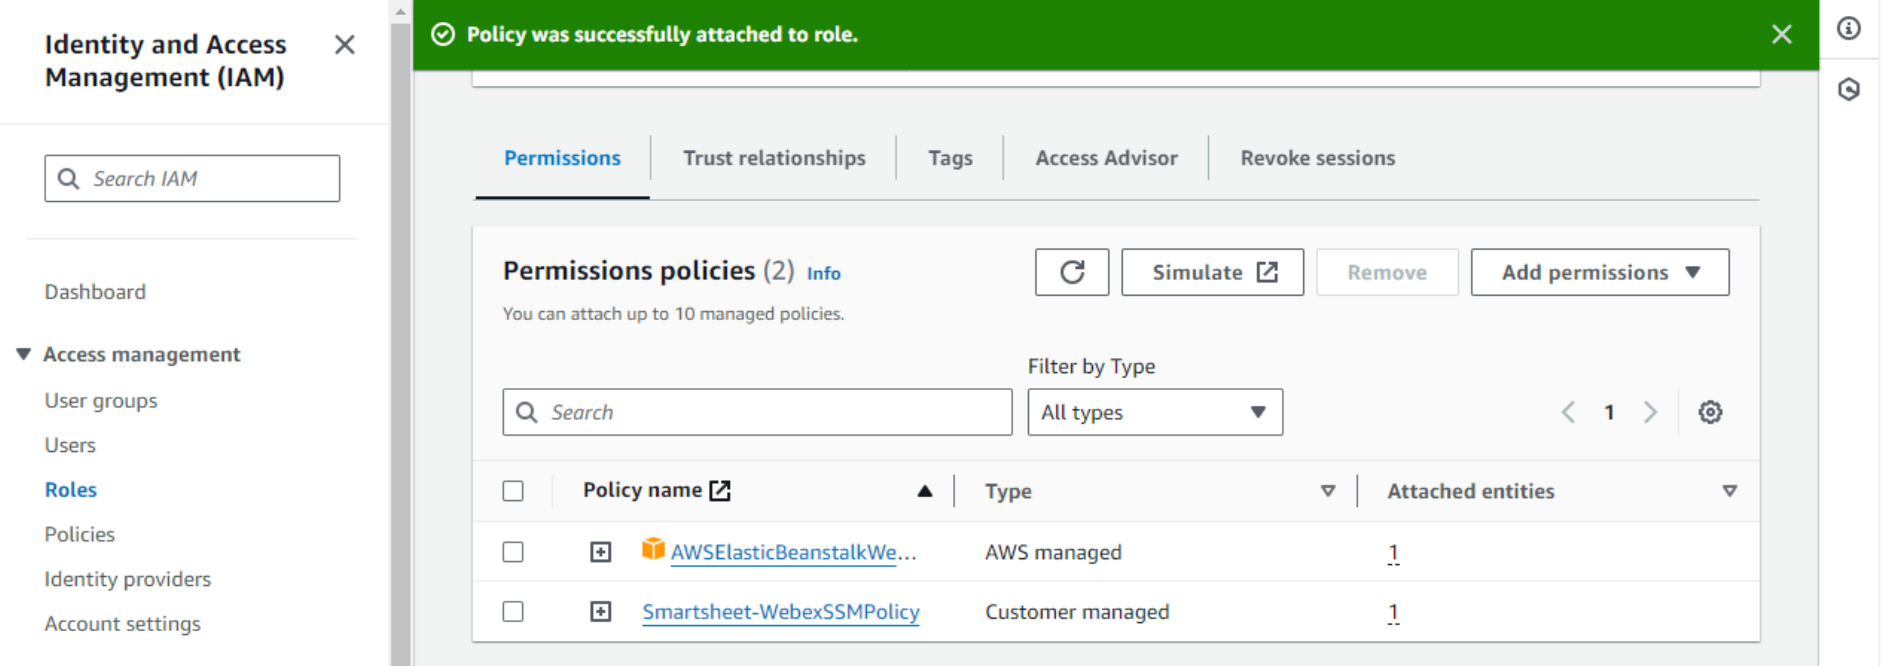
And finally, we are all done. We can now set the working smartsheet and authorize the Webex integration via the Webex bot.
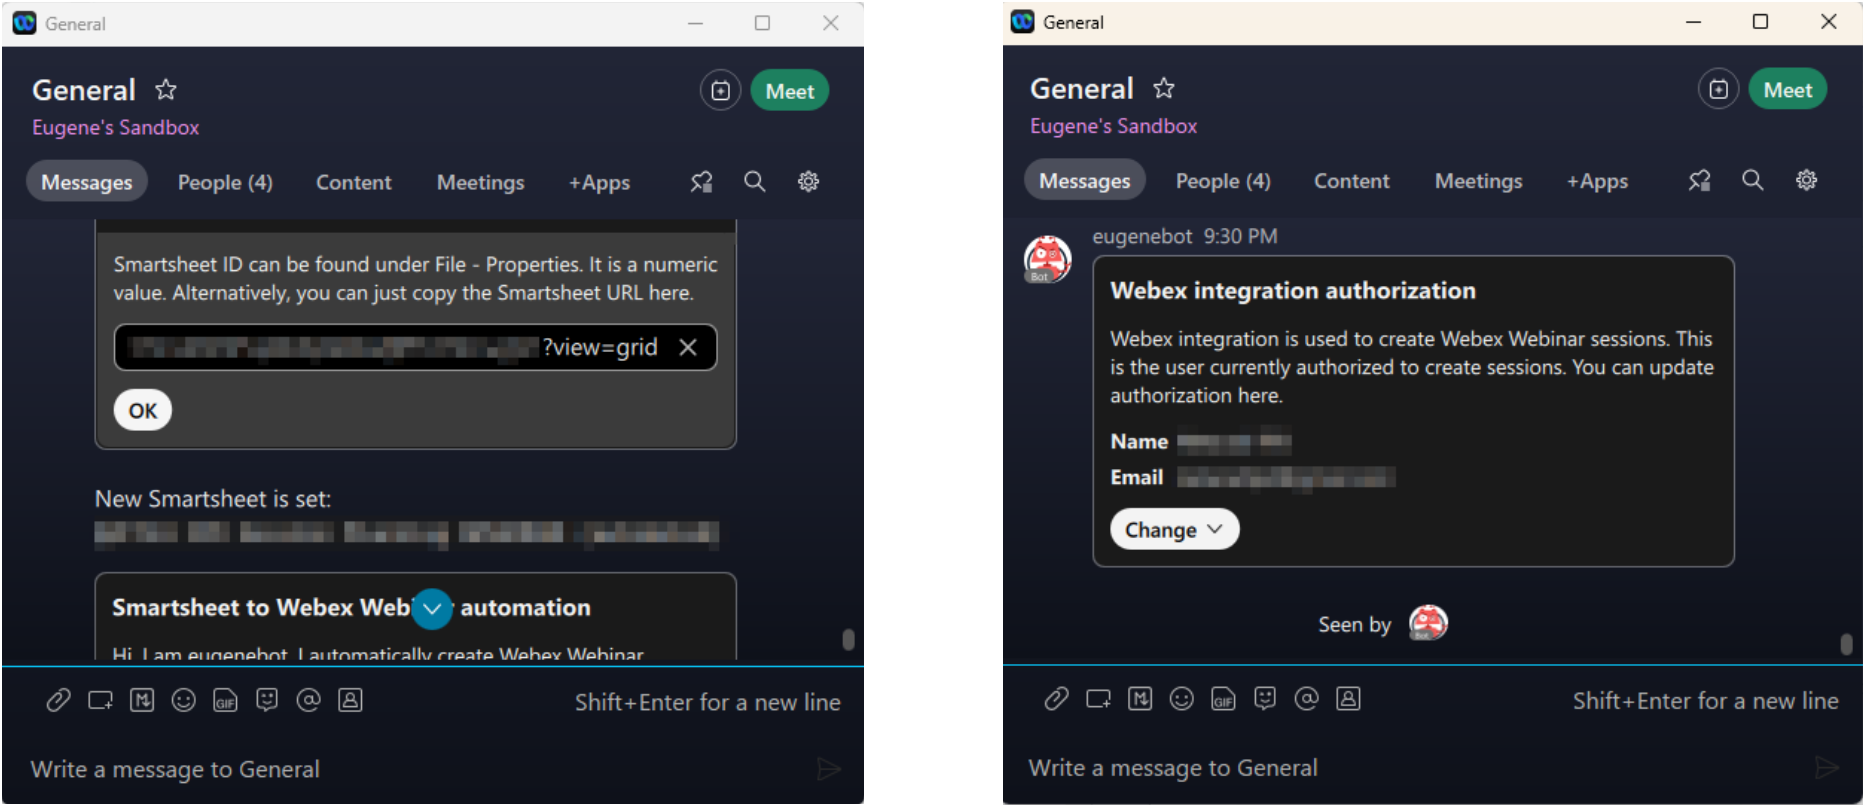
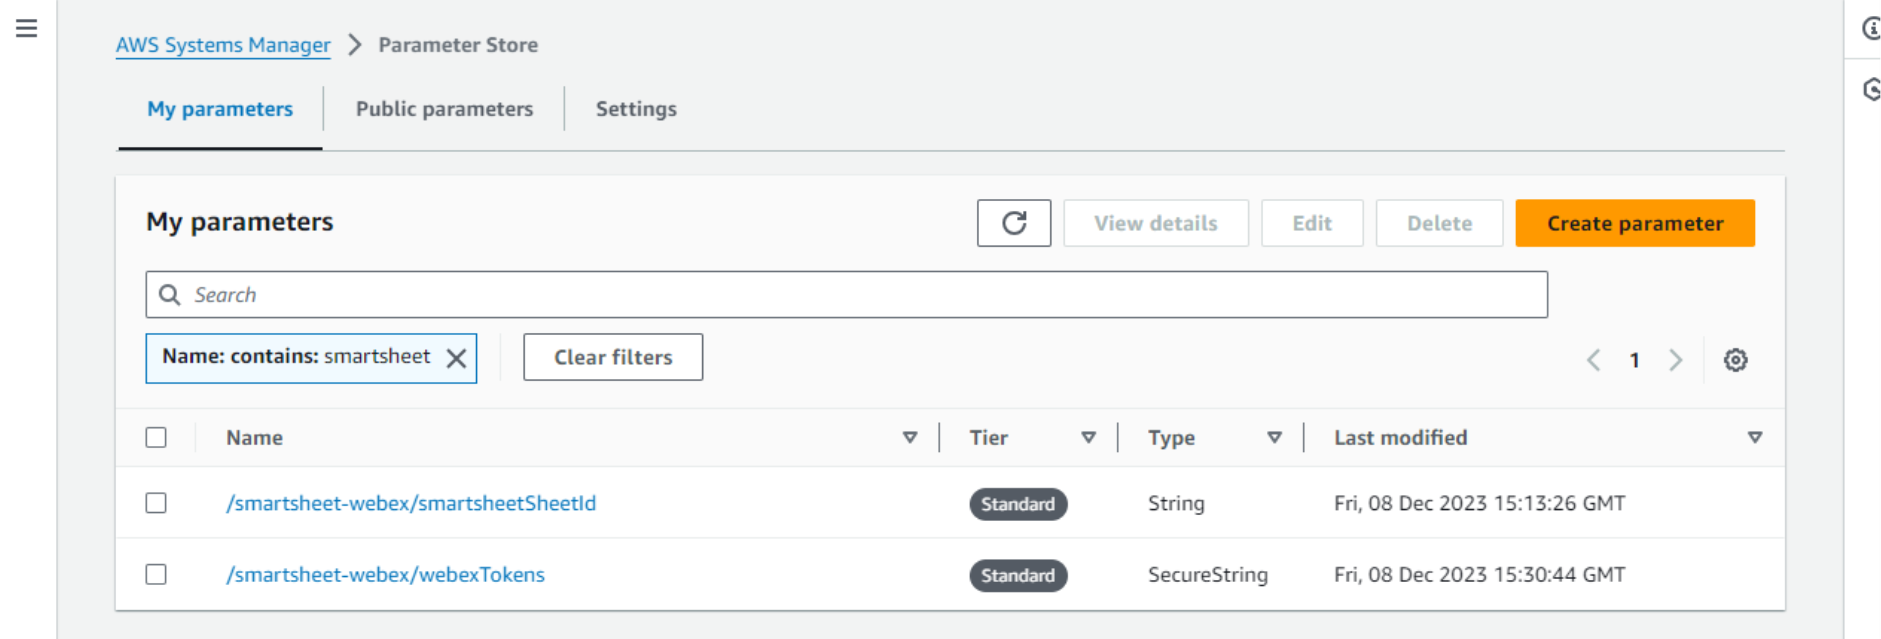
We can even check the stored parameters directly from the AWS Console. Go to the Systems Manager service, then Parameter Store. This application stores two parameters: Smartsheet ID and Webex authentication tokens.
Conclusion
Congrats, we finally were able to deploy an actual Webex integration on AWS. Deploying an even moderately complex application on the AWS public cloud can be a daunting task and requires understanding of multiple cloud services. I hope this write-up is not only useful as practical guidance but helps to demonstrate that there is a lot more to cloud deployment than just clicking “launch” when your code is ready to go. For additional support, you can rely on AWS documentation and the Cisco Webex Developer Community.