Navigating Webex Contact Center API Authentication with Ease
March 20, 2024

Cisco understands that secure API interactions are fundamental for all enterprise developers. The Webex Contact Center platform is no exception, offering a streamlined authorization process designed to protect and simplify user authorization for integrations. This article will provide a high-level summary of how integrations are configured and authorized for the Webex Contact Center APIs.
Keep in mind that Webex Contact Center has a robust set of APIs that can power a variety of integration use cases. For example, a call recording application utilized by a banking & finance contact center, where conversations must be archived for compliance requirements. Another example is an integration that utilizes the Configuration APIs to automate contact center provisioning, for bulk onboarding of agents and teams. To learn more about the Contact Center integration APIs, check out this introductory blog.
Authorization for Integrations
Webex uses the OAuth2 grant flow standard to securely authorize integrations. The grant flow is a multi-step process that essentially goes like this:
- The integration directs the end-user to the Webex authorization server with a request that includes the application's identity, requested permissions (scopes), and a redirect URI.
- The end-user logs in (if not already authenticated) and grants the requested permissions to the integration.
- Upon consent, Webex issues an authorization grant code to the integration via the “redirect URI”.
- The integration exchanges the authorization grant for an access token by making a server-to-server request to the Webex token endpoint.
- With the access token, the integration can interact with the Webex API on behalf of the authorized user, within the scope of the granted permissions.
This process ensures that user credentials are not shared with the integration, providing a secure method for authentication and authorization.
Configuring a Webex Contact Center Integration
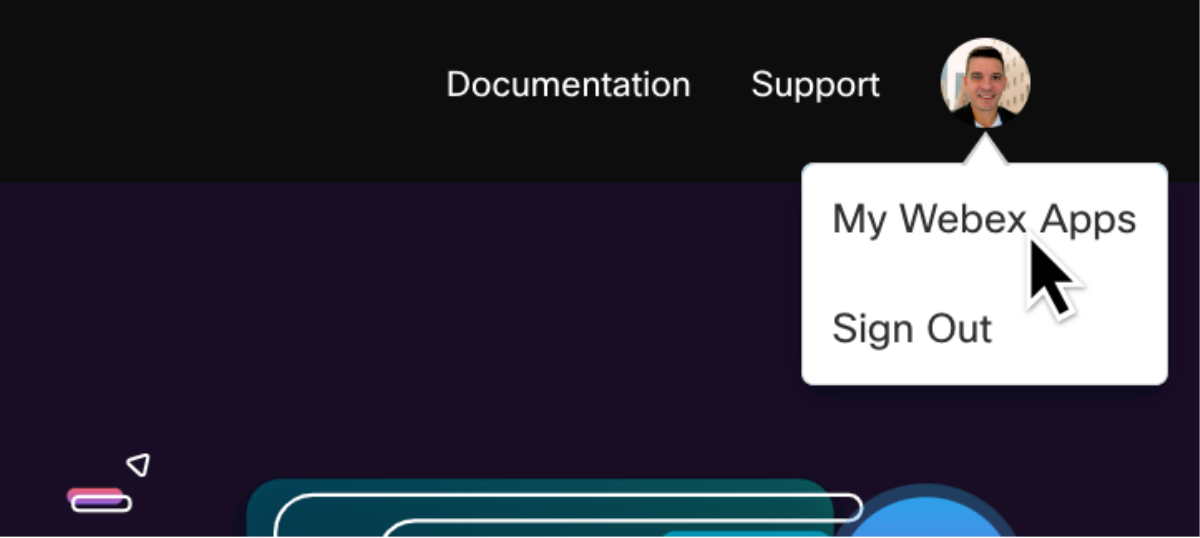
Those who have previously created integrations for the Webex suite on developer.webex.com will notice the steps are quite similar for creating Webex Contact Center integrations. When creating a new Webex Contact Center integration, it starts on the developer.webex-cx.com portal. After logging into the Contact Center for Developers portal, simply hover the cursor over the avatar on the top-left corner and click “My Webex Apps”.
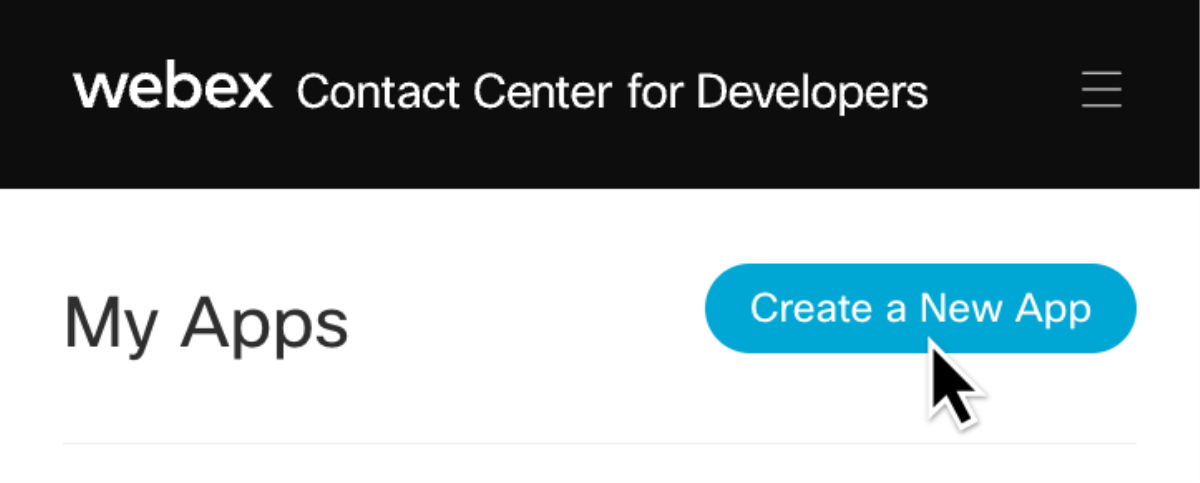
On the “My Apps” page, click the blue “Create a New App” to start registering the integration.
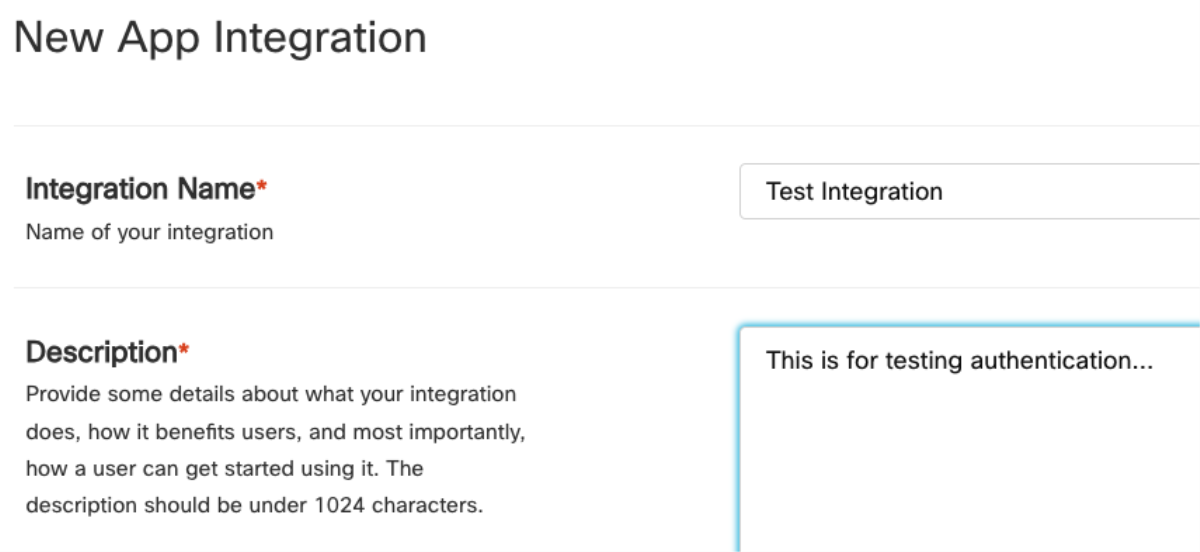
This lands on the “New App Integration” registration form. The integration will need a name and a short description in the specified fields.
The remaining fields are more technical. First, the "Redirect URI", which is used to point the end-user's client back to the integration and tell Webex where to send the authorization code upon completion of the grant flow. The value can contain one or multiple URIs for the hosted integration app and must be HTTPS.
The last part of the form is for selecting the level of access the integration will require, called “scopes”. For example, a Customer Journey Data Service (CJDS) integration that retrieves and modifies engagement data would utilize the cjds:admin_org_read and cjds:admin_org_write scopes. When the integration is initiated, these scopes appear as permission requests that the end-user will need to accept to grant the application access to their Webex account. As a general rule, developers should only select the minimal number of scopes required for that specific integration to operate. To read more about Webex Contact Center APIs scopes and definitions, see the overview guide.
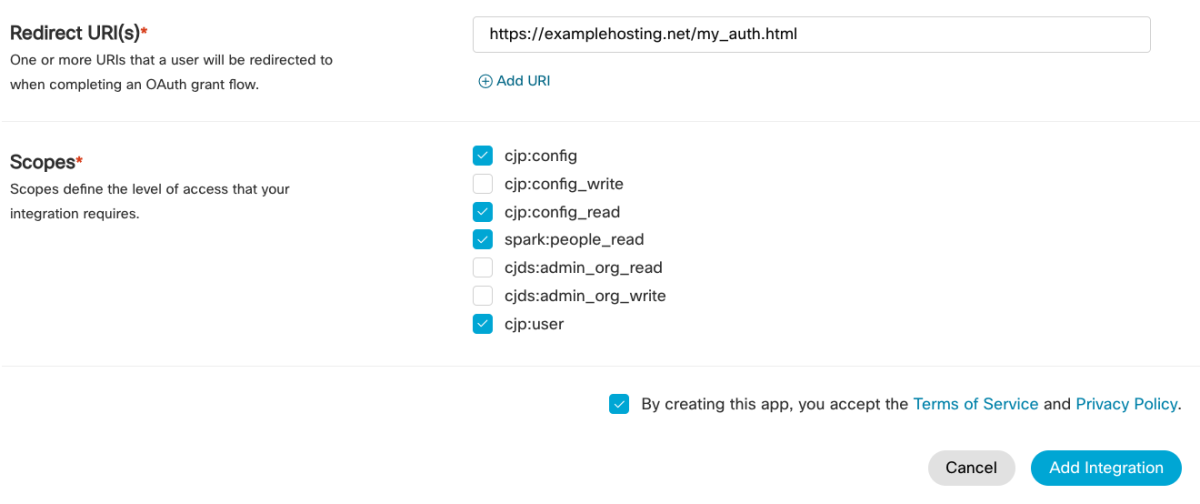
Once the terms are accepted, the “Add Integration” button can be clicked.
API Access and Refresh Tokens
After completing those steps, the integration application is now enabled to authorize with the Webex Contact Center platform and obtain an API access token & refresh token. Both tokens are essential for maintaining a secure and continuous interaction with the Webex Contact Center APIs. The access token is used for short-term access and the refresh token enables long-term access by allowing the application to refresh the access token as needed.
All of the steps for authentication and retrieving the tokens are documented here.
Once the grant flow is complete, the tokens are sent in a JSON payload that will look something like this:
{
'access_token': 'Yzd9abc55ef459fe67_D0C2_g6abc12e-4711-9rf8-6543-d33d0394gz55',
'expires_in': 1209599,
'refresh_token':Yzc7adce67c62d7709ge6n_D0C2_g6abc12e-4711-9rf8-6543-d33d0394gz55',
'refresh_token_expires_in': 6322470,
'token_type': 'Bearer',
'scope': 'cjp:user spark:people_read cjp:config cjp:config_read'
}
The values for the expiration of the tokens are output in seconds. For clarity, the initial access token expires in 14 days and the refresh token expires in 90 days. Keep in mind, once the refresh token expires, the user will need to reauthorize the integration again. However, whenever as long as the refresh token is used to refresh access tokens, the refresh token expiration timer will be reset back to zero. This allows the refresh token to essentially be used in perpetuity and the user will not need to reauthorize the application. For more information, this blog has a great overview of the entire OAuth process for Webex integrations and developer strategies for implementing it.
The final part of the token JSON payload provides the scopes associated with the token, that were configured when the integration was created on the portal. These scope values can be leveraged by an integration to conditionally present features, access data, or other actions dependent on permission levels.
Data Inside the Token
The token values in the payload also contain helpful “hidden” data - the orgID that correlates to the organization the authorized user belongs to. The orgID value is a required parameter for many of the API endpoints, including the Users API. The only other method for obtaining an orgID is through the /people API with the spark:people_read scope and returns it in a Base64 encrypted format. However, the token string from the JSON payload already reveals the unencrypted orgID value. This makes it an ideal place to retrieve it from without having to perform another API call or further decryption.
The orgID is always found after the final “_” in a token string. To see how the encoded orgID can easily be separated from the token, check out the app-auth-sample in Webex CC Github repo, starting on line 147:
let [accessToken, ciCluster, orgId] = loginDetails.access_token.split('_');
Now that the orgID has been retrieved, it can be used for subsequent API calls. In this example cURL script, the orgID is sent in a GET query to the List Users API with the cjp:config_read scope:
curl --request GET \
     --url 'https://api.wxcc-us1.cisco.com/organization/g6abc12e-4711-9rf8-6543-d33d0394gz55/v2/user?page=0&pageSize=10&filter=id%3D%3D57efb0e6-5af0-4245- d3c5045cdb6e&attributes=id%2Cactive' \
     --header 'Accept: application/json' \
     --header 'Authorization: Bearer Yzd9abc55ef459fe67_D0C2_g6abc12e-4711-9rf8-6543-d33d0394gz55'
The response for that API query would look something like this:
[
  {
    "active": false,
    "agentProfileId": "8e6bb6da-2a78-4768-bef9-7e229f92af22",
    "broadCloudUserId": "1dq21e23-1234-5578-9a83-2afdae0d4ba1",
    "ciUserId": "1dq21e23-1234-5578-9a83-2afdae0d4ba1",
    "contactCenterEnabled": false,
    "createdTime": 1617536244000,
    "dbId": "1dq45f23-1234-6r18-9a83-2atuiy0d4bh1",
    "defaultDialledNumber": "1234567890",
    "email": "johnwick@company.com",
    "externalIdentifier": "121212",
    "firstName": "John",
    "id": "93912f11-6017-404b-bf14-5331890b1797",
    "imiUserCreated": false,
    "lastName": "Wick",
    "lastUpdatedTime": 1617536244000,
    "mobile": "1234567890",
    "multimediaProfileId": "f53c8b54-46ca-43f6-ba05-08426a46e23d",
    "organizationId": "f53c8b54-46ca-43f6-ba05-08426a46e23d",
    "preferredSupervisorTeamId": "e27d2b54-46ca-43g6-ba65-08426e46e23d",
    "siteId": "1dq21e23-1234-5578-9a83-2afdae0d4ba1",
    "skillProfileId": "f53c8b54-46ca-43f6-ba05-08426a46e23d",
    "subscriptionId": "04d0bdf6-6d6a-4aae-8a8a-71c9152e6478",
    "teamIds": "[\"f53c8b54-46ca-43f6-ba05-08426a46e23d\",\"a53c8b54-46ca-43f6-ba05-08426a46e23f\"]",
    "timezone": "America/New_York",
    "userProfileId": "1dq21e23-1234-5578-9a83-2afdae0d4ba1",
    "version": 1,
    "workPhone": "1234567890",
    "xspVersion": "xsp-24.0"
  }
]
Again, you will find many other Contact Center API endpoints that require the orgID and this is just one example. Having that value right from the start will make things more efficient.
Questions? We Got You Covered!
We are continually updating our developer platform with new features, tools, and documentation for building powerful Contact Center integrations. If you need help along the way, our Webex Developer Support Team is standing by and ready to assist. You can also start or join a conversation on the Webex Contact Center API Developer Community forum.

