Give Your Webex Bot some $uperpowers
December 13, 2021

What we're going to do is extend the marvelous Node WebEx Bot Framework with some advanced features (some "$uperpowers!") to make handling file-uploads, integrating with 3rd-party services, and other advanced user interaction simple and speedy to build.
Long story short, when we're done here, you'll have your very own "starter" bot that will:
- accept a spreadsheet (*.xlsx) file-upload from users
- convert that spreadsheet data into html (with the help of the sheetjs library (CE))
- display a prettified and easy to copy+paste snippet
- generate an html file and send it to the user for them to download
- have access to various conversation design patterns like setting/clearing "contexts", saving/retrieving user data, adding variation to responses, etc
The steps below require virtually zero prior knowledge of WebEx bots.
Pre-requisites
First things first-- there are two important items you'll need:
Node v12+ installed on your system (see here for details)
WebEx account (see here for details)
Step 1: Get a Bot Access Token
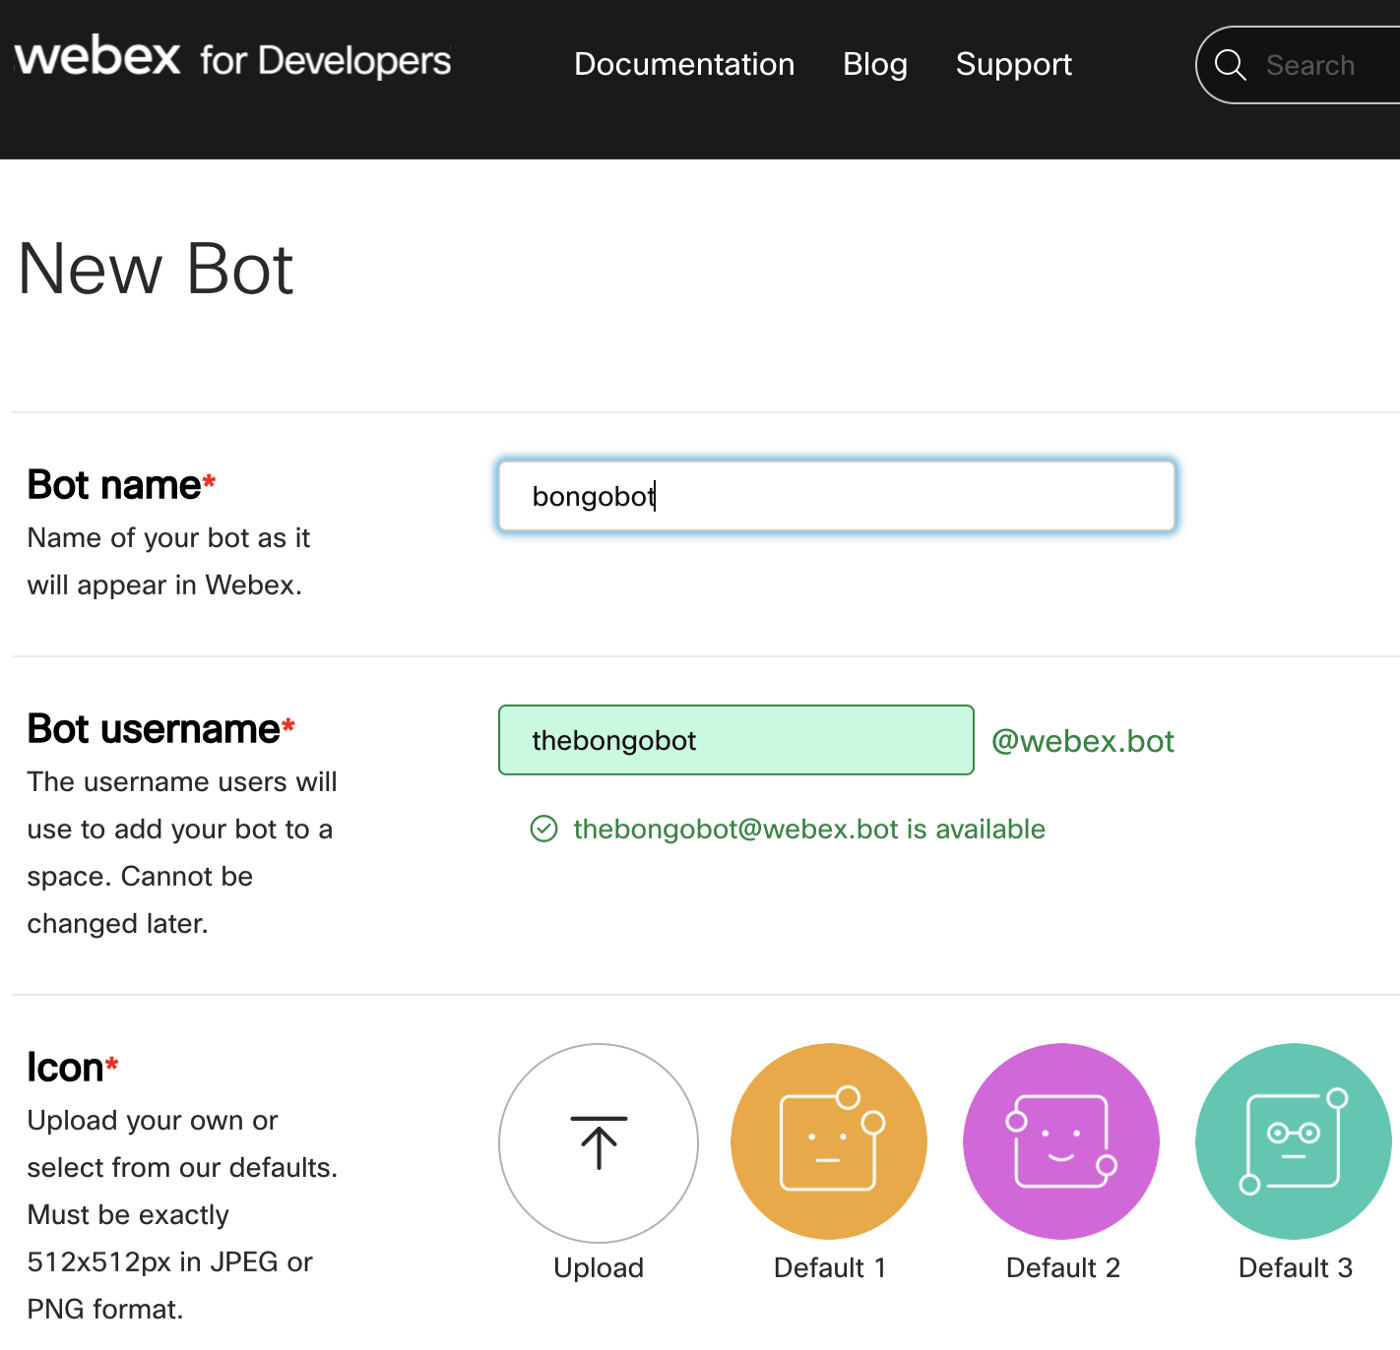
Create a bot & write down the "Bot Access Token"-- you’ll need it in a minute
Create a new bot here: https://developer.webex.com/my-apps/new/bot
Provide a name, description & save the token someplace safe for use in the next step
Step 2: Config + Boot the Bot
Scaffold a starter bot, pass in token & boot it
- Open a terminal and use the speedyhelper CLI tool to scaffold a project (you’ll be asked for your token from step 1):
npx speedyhelper setup
From the next menu, select the second option and return-- "🌟 speedybot-superpowers"
? Choose a starter template
  🚀 speedybot-starter (default)
❯ 🌟 speedybot-superpowers (give your bot $uperpowers like processing *.xlsx)
  📡 speedybot-serverless (easy-to-deploy serverless lambda function [EXPERIMENTAL])
Enter your token and pick a directory and hit ENTER to boot your bot.
If all went well, you should see something that looks like this:

If you encounter any trouble, see here for detailed instructions
Step 3: Take it for a spin
Verify everything is wired up and working properly
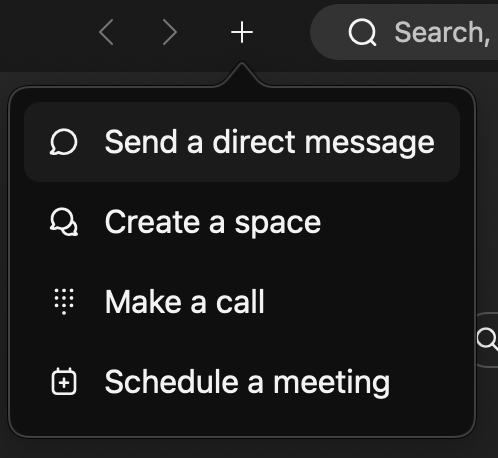
- Your bot's username will be something like
bot_name@webex.bot, select the + icon on your WebEx client and send a direct message to your bot's username to start a 1-1 chat session
- Verify all is working well by asking the bot “healthcheck”, "help", "ping", "pong", "sendfile", "hi", etc
Step 4: Test out spreadsheets
The
handlers.tsfile in the settings directory is like a central "list" of functions which are invoked depending on user activity or inputsEx. if the user enters text that matches a registered keyword (ie the user says "hi" or "healthcheck") the registered handler will fire
Ex. if the user performs one of a few "special" actions like <@submit> (where the user submits data from an adaptive card) or <@fileupload>
Using $uperpowers, we can quickly add powerful functionality to these handler functions
To illustrate, If the user asks the agent can convert a spreadsheet for me?, the agent will respond with a randomized acknowledgement message and will set a "context" expecting an XLSX file the next time the user sends a file.
import { $, BotHandler } from 'speedybot'
import pretty from 'pretty'
import { XlsHelper } from './../src/util/xlsx'

const handlers: BotHandler[] = [
	{
		keyword: /convert/gi,
		handler(bot,trigger) {
				const utterances = [`Ok, I'm waiting for your xlsx file`, `Sure-- just upload your *.xlsx file`, `Upload an *.xlsx`]
				$(bot).sendRandom(utterances)

				// Set the context
				$(bot).saveContext('expectXlxsfile')
		},
		helpText: `A 'primer' intent which will set context. The user can use any variation of "convert" and this intent will fire`
	},
	{
		keyword: '<@fileupload>',
		async handler(bot, trigger) {
        const $bot = $(bot)
				// take 1st file uploaded, note this is just a URL which requires auth to retrieve
				const [file] = trigger.message.files

				// check if the 'expectXlxsfile' context is active
				const expectXlxsfile = await $bot.contextActive('expectXlxsfile')
				if (expectXlxsfile) {
					// Retrieve file data, note responseType is arraybufffer
					// arraybuffer: https://developer.mozilla.org/en-US/docs/Web/JavaScript/Reference/Global_Objects/ArrayBuffer
					const fileData = await $(bot).getFile(file, {responseType: 'arraybuffer'})
					const {extension} = fileData
					if (extension === 'xlsx') {
						// If it's a *.xlsx file, convert the 1st sheet to html
						const inst = new XlsHelper(fileData.data)
						const sheet = inst.getFirstSheet()
						const html = inst.getHTML(sheet)

						// Return copy/paste'able HTML snippet
						const prettyed = pretty(html)
						bot.say({markdown: $(bot).htmlSnippet(prettyed)})

						// Send an actual html file (uses createReadStream)
						$(bot).sendDataAsFile(html, 'table_preview.html')
					} else {
						bot.say('Expected a file in *.xlsx format')
					}

					// Clear the 'expectXlxsfile' context
					$(bot).deleteContext('expectXlxsfile')
				} else {
					const fileData = await $(bot).getFile(file)
					const {extension, type} = fileData
					const supportedFiles = ['json', 'txt', 'csv']
					if (supportedFiles.includes(extension)) {
						const { data } = fileData
						// bot.snippet will format json or text data into markdown format
						bot.say({markdown: $(bot).snippet(data)})
					} else {
						if (extension === 'xlsx') {
							$(bot).sendRandom([`If you want to convert that spreadsheet to an HTML preview say 'convert to html' & attach the file`,
											   `If you want that spreadsheet converted to html, say 'convert this file' & attach it to your message`,
											   `To start the conversion process (xlsx to html), say 'convert this spreadsheet' and attach the file`,
												`Say something like "convert this to html" and attach the spreadsheet file to have it converted`])
						} else {
							bot.say(`Sorrdy, somebody needs to add support for *.${extension} (${type}) files`)
						}
					}
				}
		},
		helpText: `Special handler that's fired when the user uploads a file to your bot (by default supports json/csv/txt.) If you use the word "convert", it will convert a spreadsheet (.xlsx) file to an html preview`
	}
]
Wrap Up
This is a bit of a contrived example but a good starting point-- you now have a very basic agent which can be extended to do whatever you want. There’s a lot of implementation details that can distract builders from the important parts of a conversational agent — namely the conversation.
Hopefully these $uperpowers can hide uninteresting implementation details, and let conversation designer experts quickly prototype and build conversations flows and experiences that actually solve user problems.
$uperpower samples (non file-upload)
{
	keyword: ['hi', 'yo', 'hey'],
	async handler(bot, trigger) {
		const $bot = $(bot)

		// 1) Set/clear conversational "contexts"
		await $bot.saveContext('mycontext1')
        // Contexts: list active contexts
        const allContexts = await $bot.getAllContexts()
        $bot.log(`Contexts: ${JSON.stringify(allContexts)}`) // ['mycontext1']
        // Contexts: check if context is active
        const isActive = await $bot.contextActive('mycontext1')
        $bot.log(`mycontext1 is active, ${isActive}`) // 'mycontext1 is active, true'
        // Contexts: remove context
        await $bot.deleteContext('mycontext1')

		// 2) Quickly add variation
		$bot.sendRandom(['Hey!','Hello!!','Hiya!'])

		const utterances = ['Hey how are you $[name]?', `$[name]! How's it going?`, 'Hiya $[name]']
		const template = { name: trigger.person.displayName }
		$bot.sendTemplate(utterances, template)

		// 3) sendURL: Sends a URL in a clickable card
		$bot.sendURL('https://www.youtube.com/watch?v=3GwjfUFyY6M', 'Go Celebrate')

		// 4) snippet: Generate a snippet that will render data in markdown-friendly format
		const JSONData = {a: 1, b:2, c:3, d:4}
		$bot.sendSnippet(JSONData, `**Here's some JSON**`) // send to room

		// 5) 3rd-parties
		const res = await $bot.get('https://randomuser.me/api/')
		$bot.sendSnippet(res, 'Here is some random data')

		// 6) Conversation "chips" or suggestions
		// on tap, the system will react as if the user wrote the phrase)
		// Send chip with custom handler
		const customChip = {
			label: 'custom chip',
			handler(bot:BotInst, trigger: Trigger) {
				$bot.sendSnippet(trigger, `**The 'custom chip' was tapped**	`)
				$bot.$trigger('chips', trigger) // re-render chips
			}
		}
		// Add optional title to chips
		$bot.sendChips(['hey', 'ping', '$', 'pong', customChip], 'These chips will disappear on tap')
	}
}