Creating a Meeting Scheduler as a Webex Service App
November 20, 2024

Webex Service Apps are machine accounts that can access the Webex APIs on behalf of an organization instead of individual users. This makes them optimal for running mission-critical integrations and long-term tasks for a Webex org. Many popular Webex Service Apps are administrative integrations, such as automated provisioning and active reporting use cases. They are also commonly used for Compliance Officer integrations that continuously maintain regulatory policies, eDiscovery, and other security tasks inside of Webex Messaging, Meetings, and Calling.
Another great way some of our largest enterprise customers are leveraging Service Apps is to automate the scheduling of Webex meetings for anyone within an organization. For example, a Human Resources Management (HRM) tool that streamlines the scheduling of job interview and onboarding sessions in Webex Meetings. With a Service App, these meetings are scheduled on behalf of the organization, which eliminates the need for a specific administrator to authorize the HRM integration on their own account to schedule meetings across the organization. This scenario is also an ideal fit for Service Apps because the meeting scheduler integration is a critical component of the HRM tool and used on a full-time basis.
Getting Started with the Demo
To get familiarized with how the basic parts come together, this blog will take you through a step-by-step demo for creating a Webex Service App meeting scheduler using a sample Python application. When trying these steps on your own, you will need to have few things to start:
- Admin access to Webex (Control Hub). You can get this with a Webex Developer Sandbox.
- Make a couple test user accounts in the sandbox org that the Service App will schedule meetings for. The easiest way is to manually add users.
- Python 3.x installed on your machine.
Step 1: Create a Webex Service App
To start, a Service App needs to be created in the developer portal. Have the credentials ready your sandbox admin and test users:
- Login to developer.webex.com using credentials from one of your (non-administrator) sandbox test users.
- Up on the top right corner of the page, click your avatar and then select My Webex Apps.
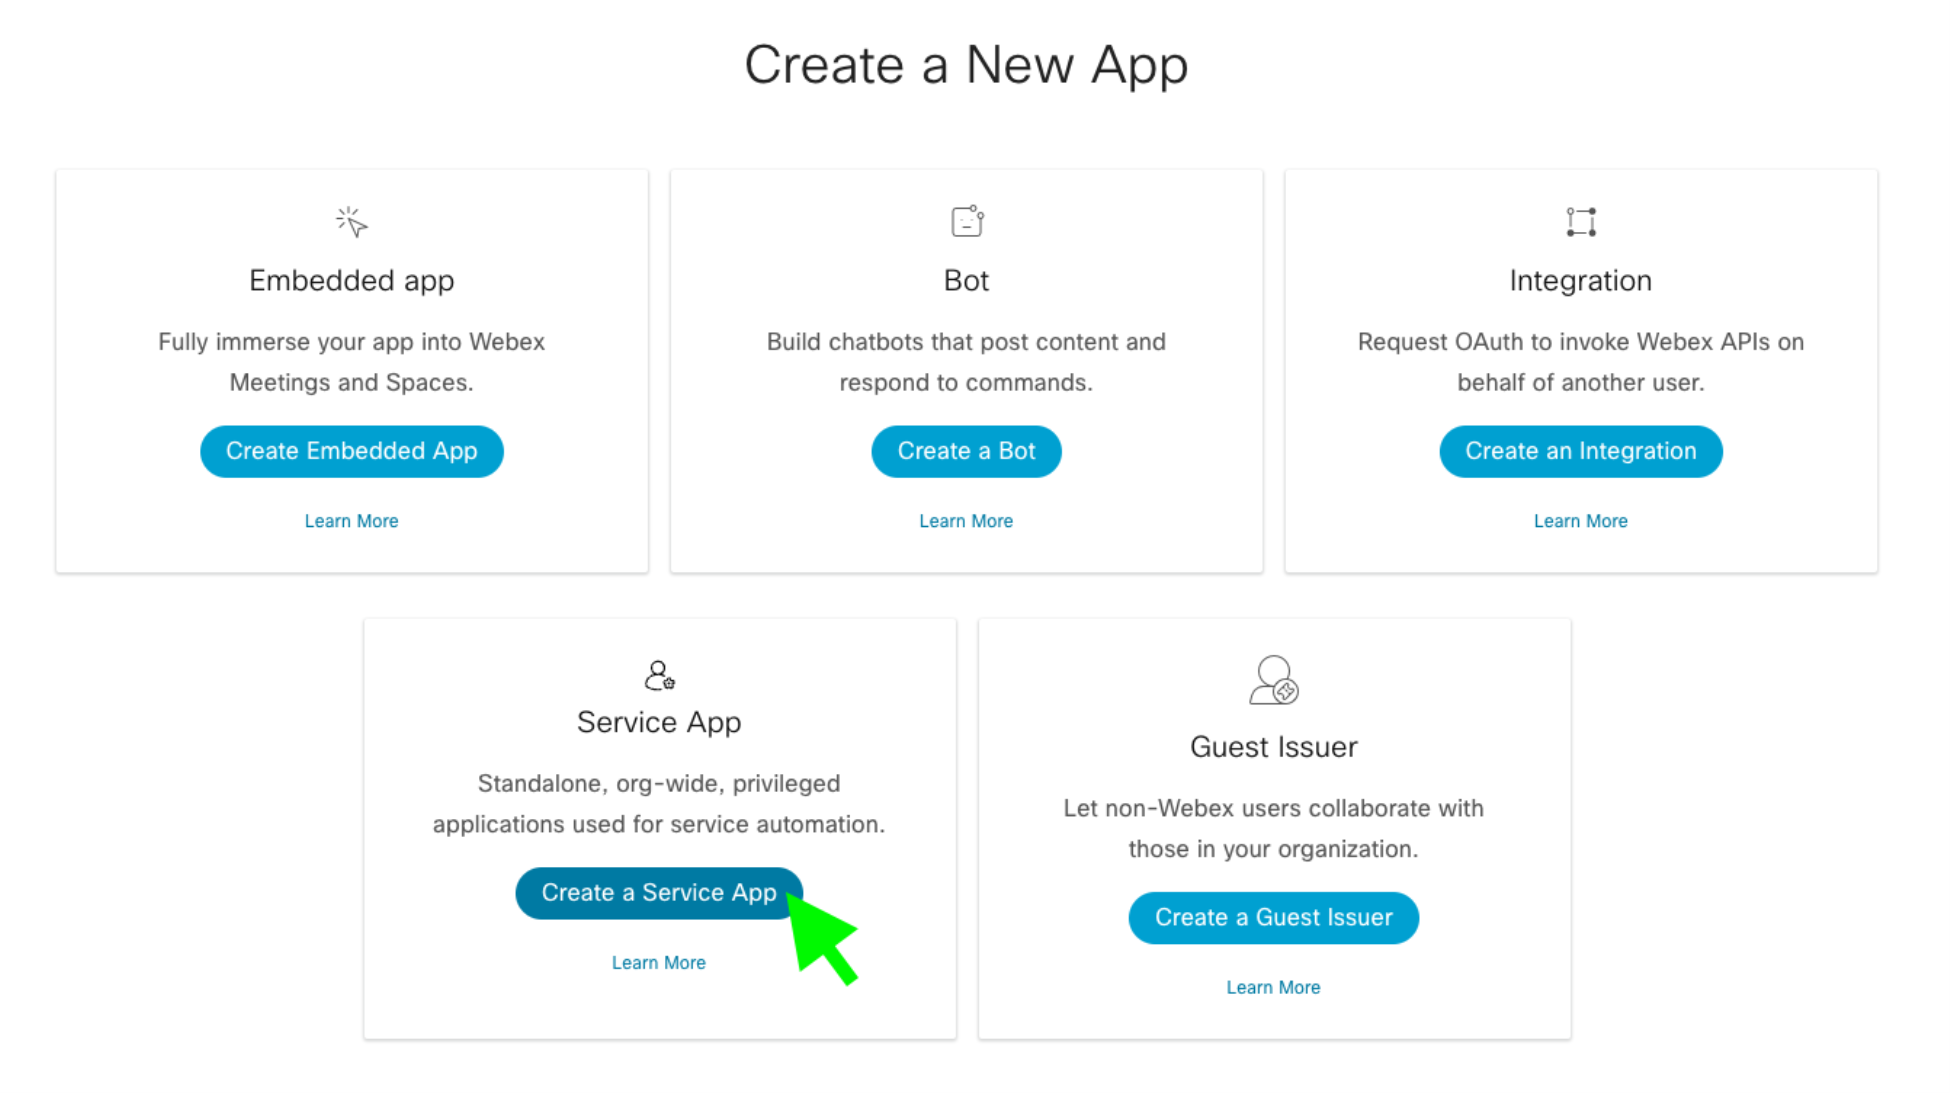
- On the Create a New App page, find the Service App card and click Create a Service App:
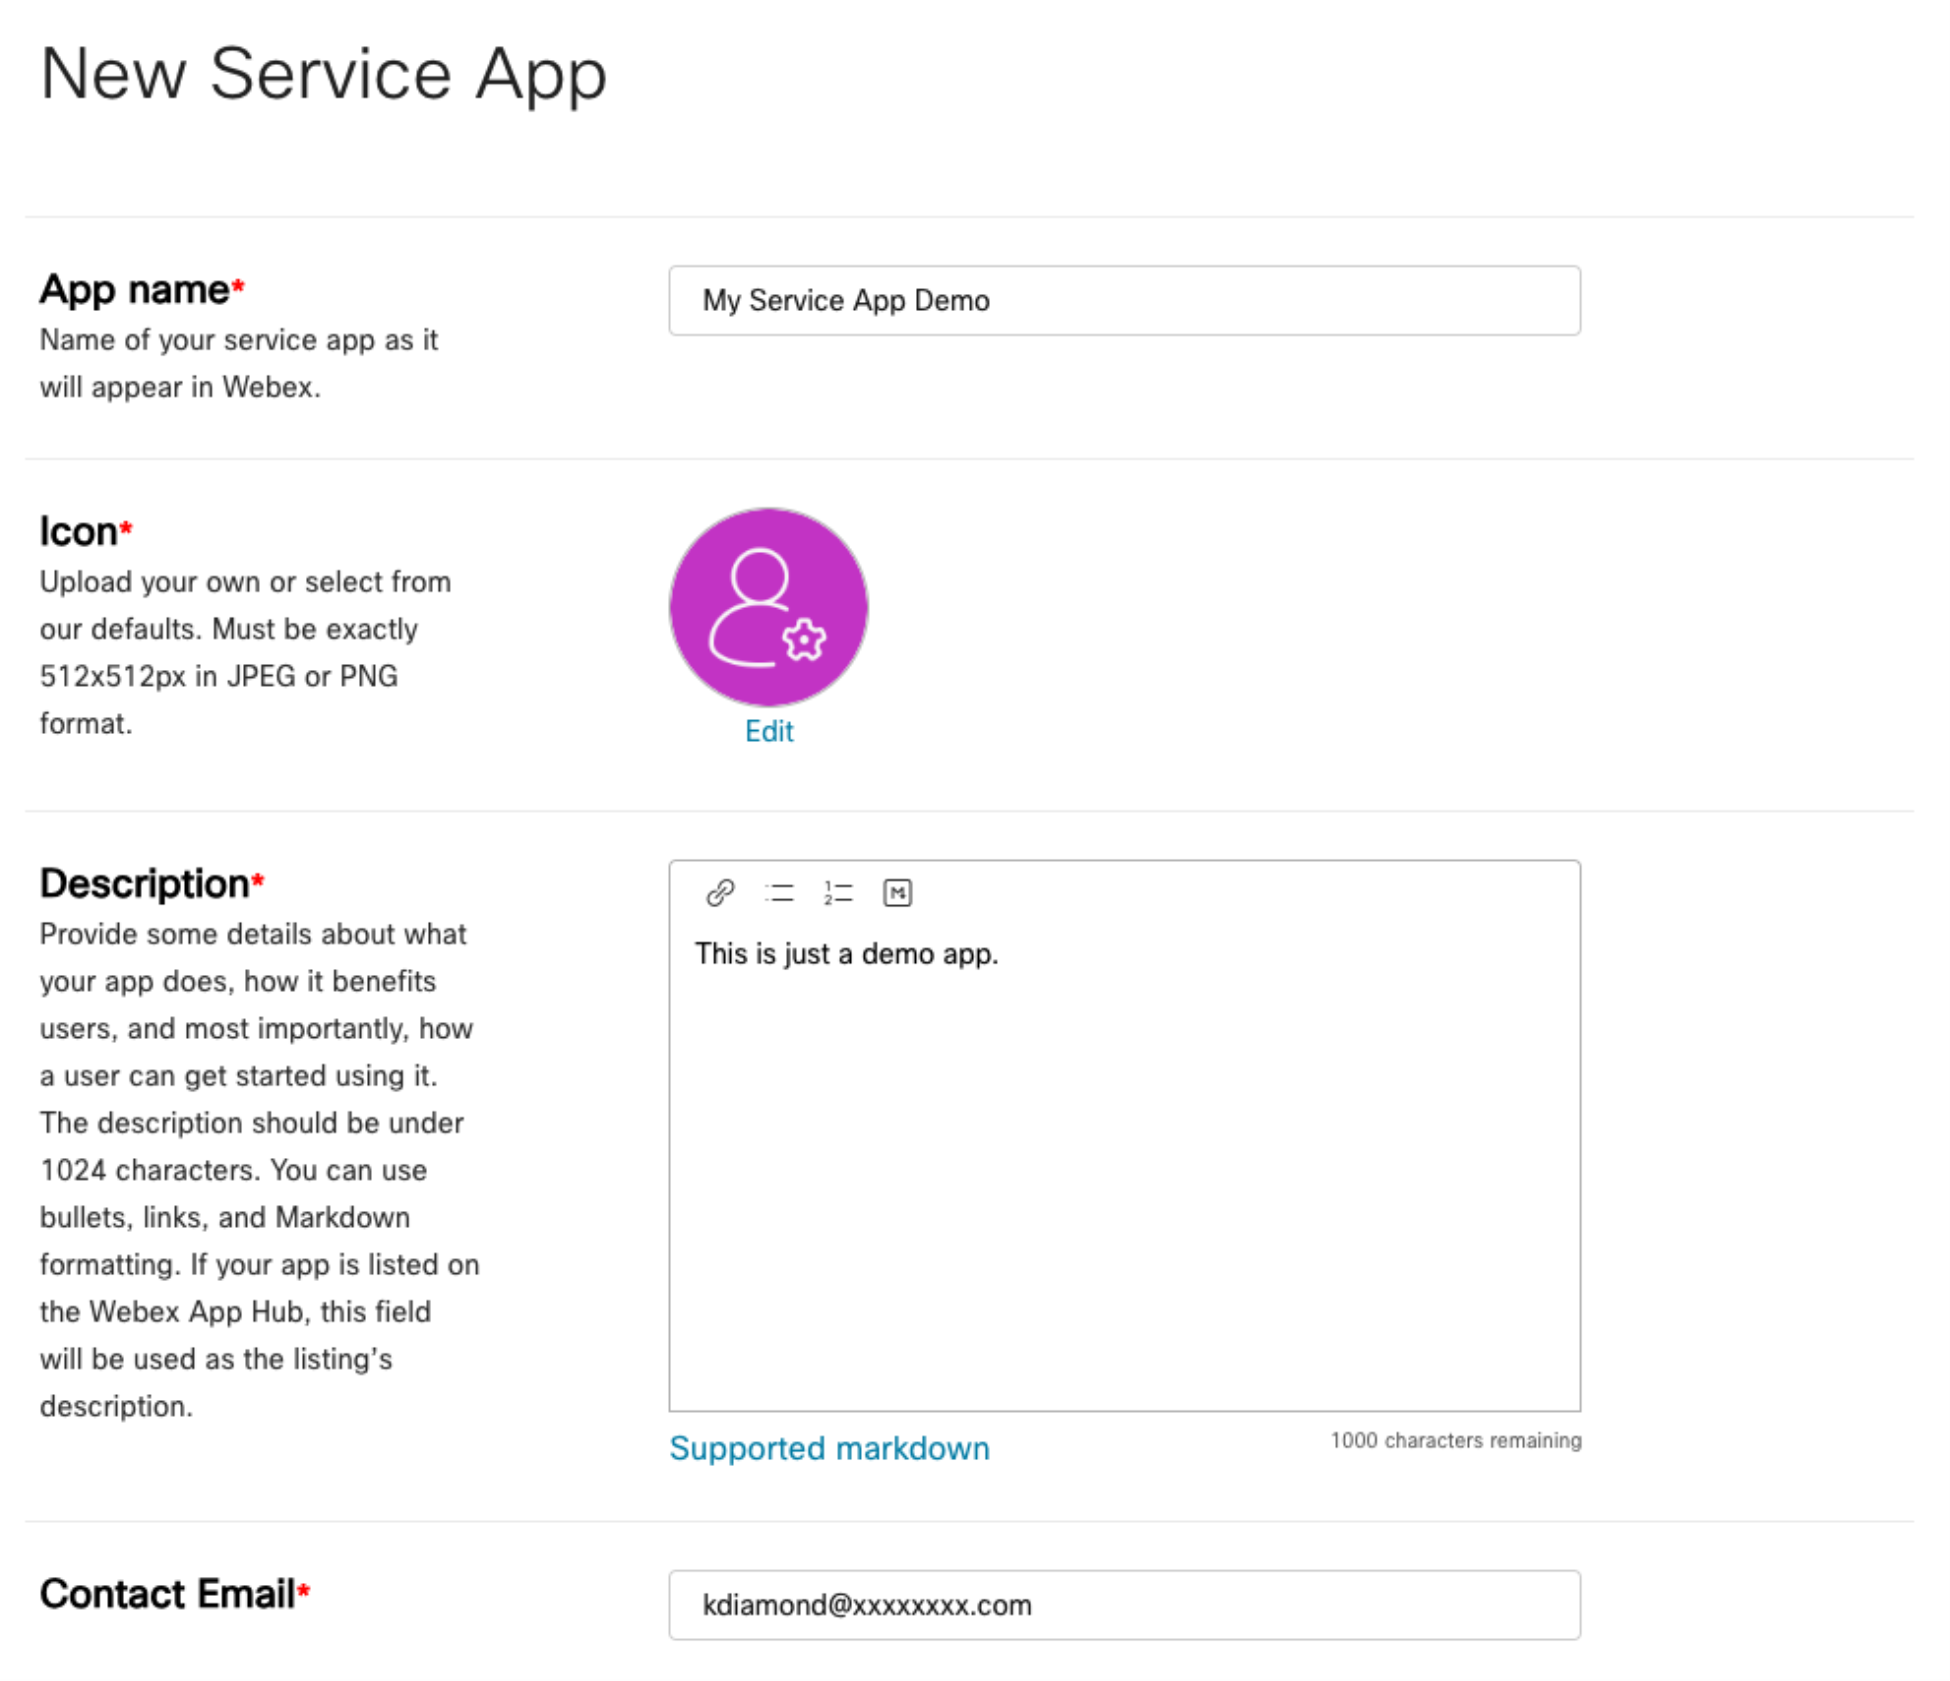
- Fill out the webform to register a new service app. Pay extra attention to the scopes section to ensure the app has admin permission to schedule meetings:
- App Name: meeting-scheduler-demo
- Icon: Select any color icon.
- Description: “Demo app only”
- Contact Email: Use the email from the test user login.
- Scopes: For this demo app, we only need to select the
meeting:admin_schedule_writescope. In a real-world scenario, the meeting scheduler app would likely require thereadscope and potentially other scopes.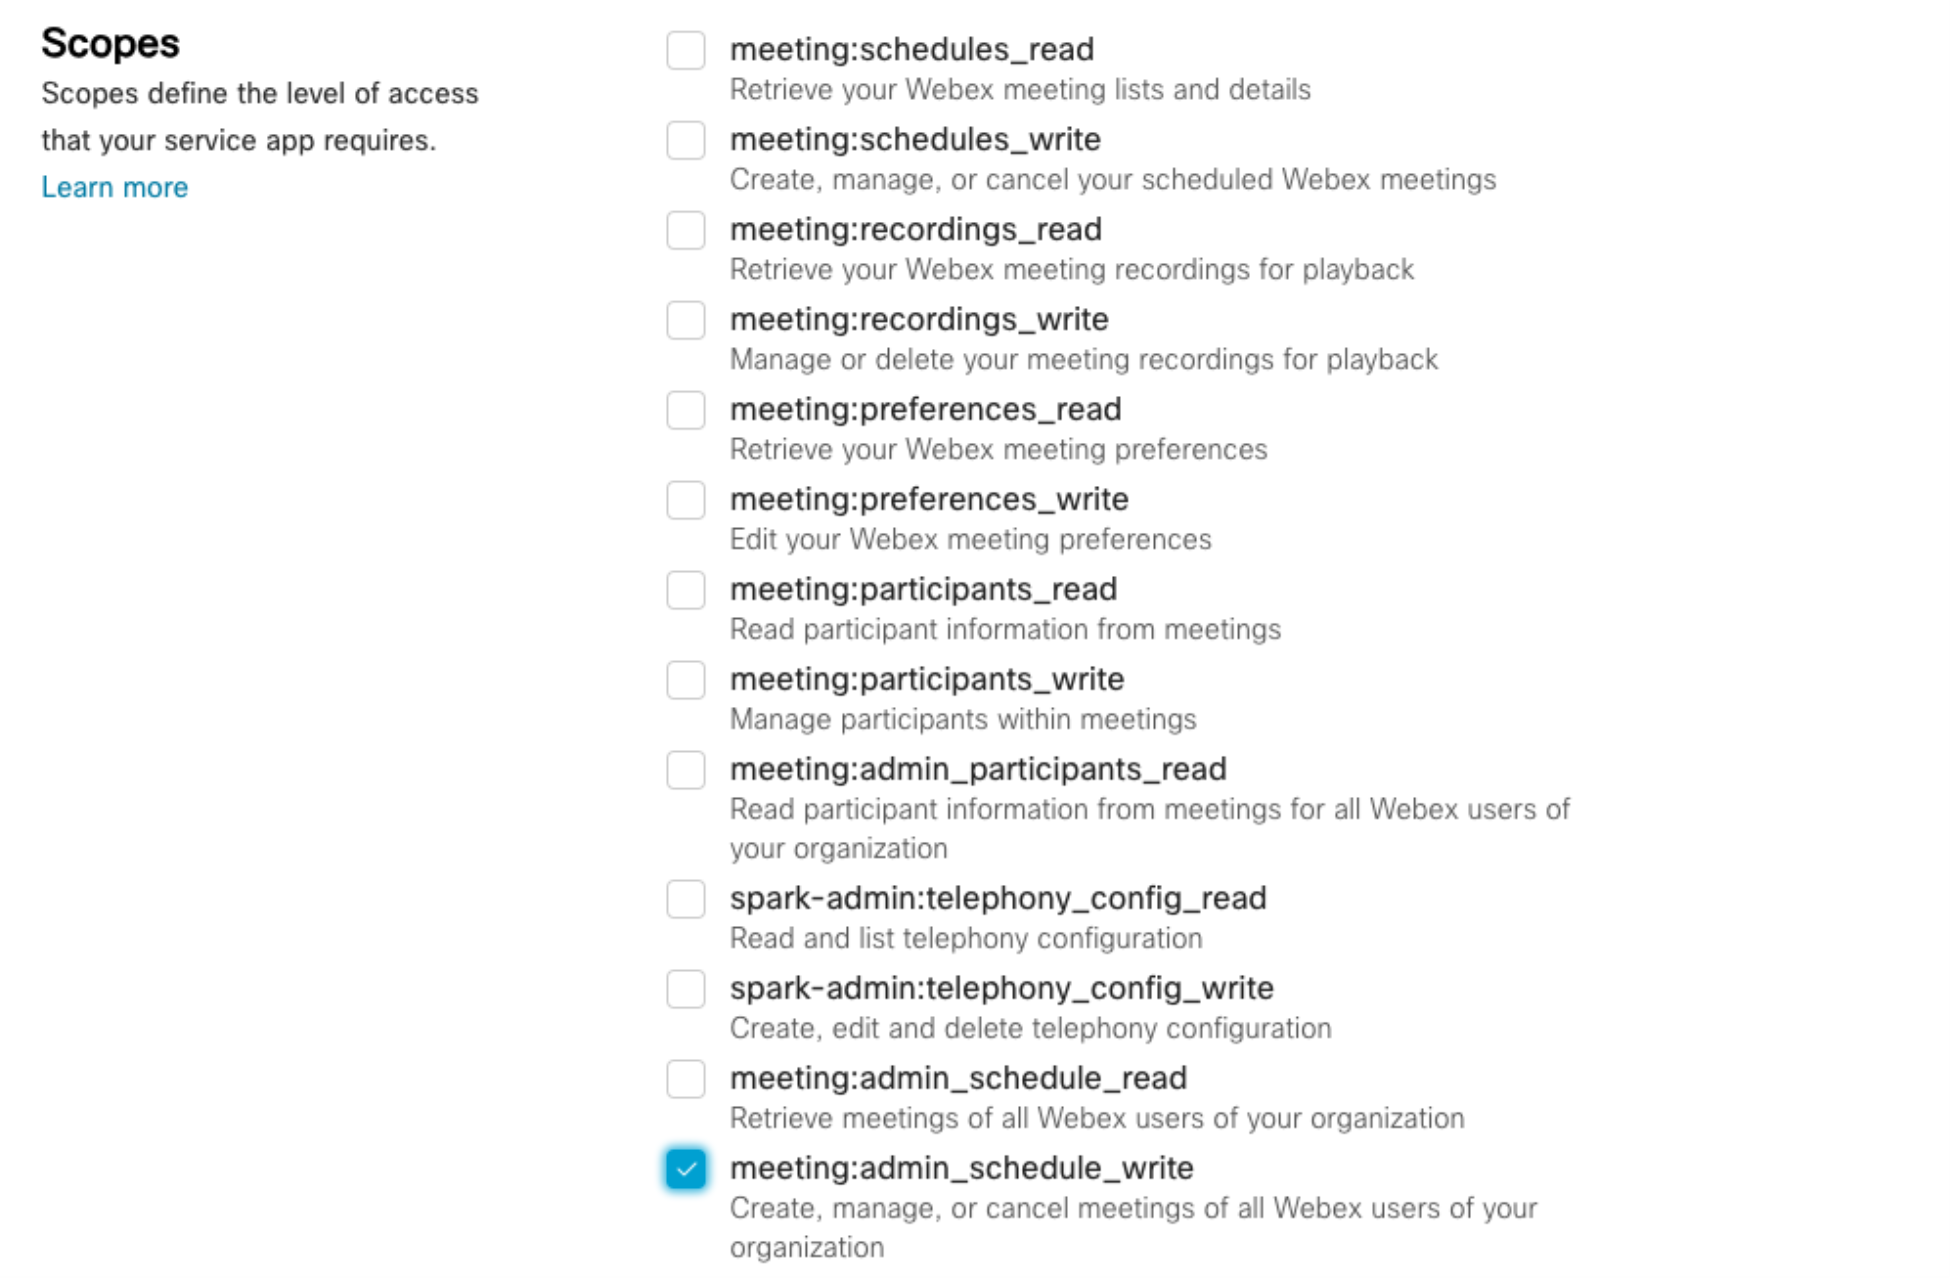
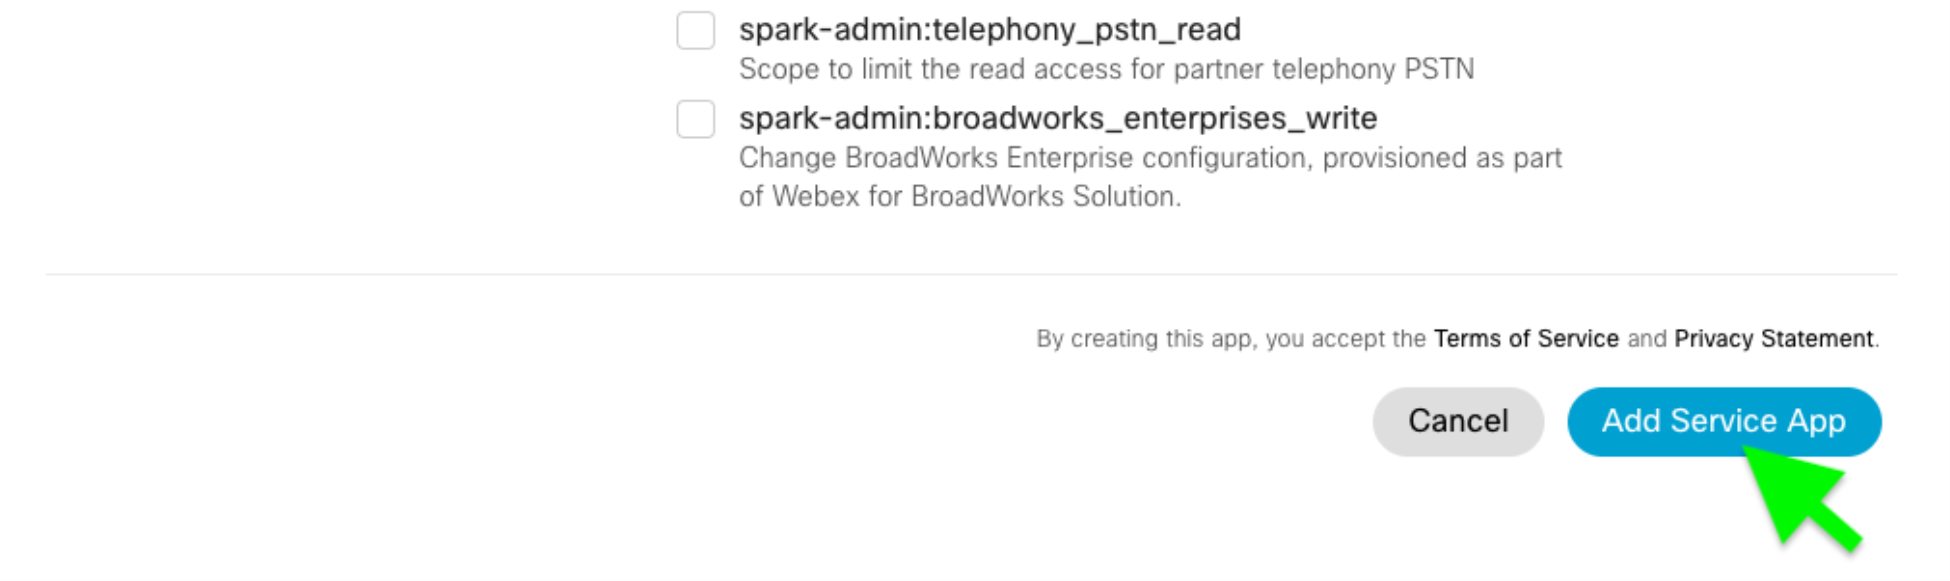
- Click the Add Service App button to finish registration:
Step 2: Service App Authorization
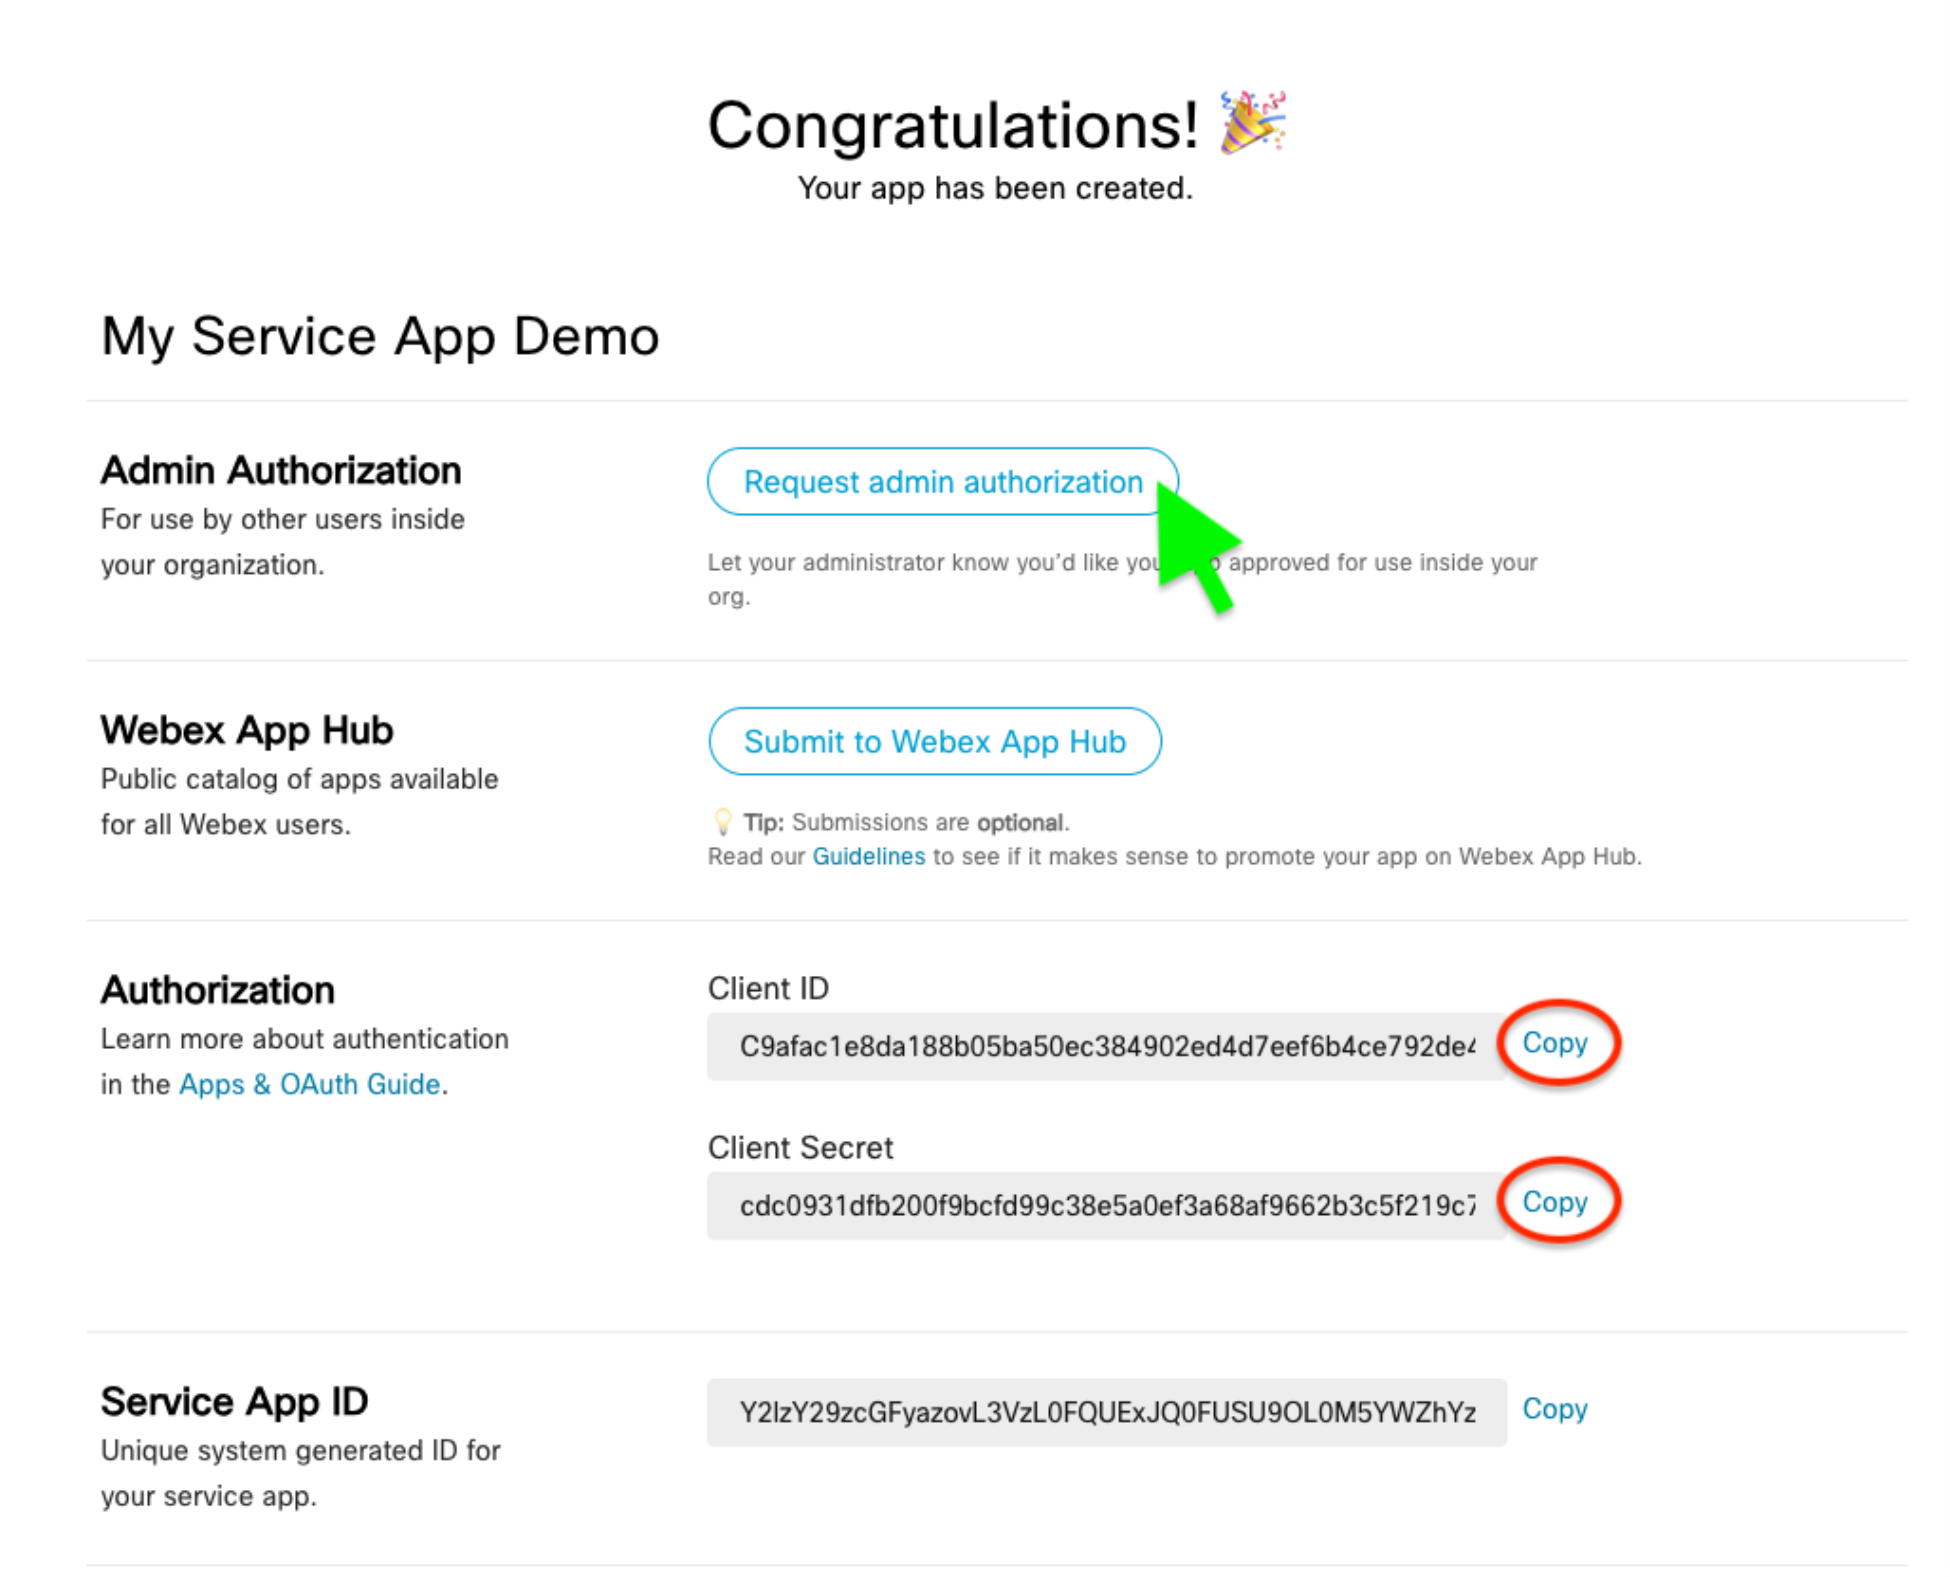
After successfully registering the Service App, you are taken to a page that contains a Client ID and Client Secret, which are required for all Service Apps. This is also where you request an admin to authorize the Service App in Control Hub:
- Copy & paste the Client ID and Client Secret values into a notepad for later use. Do note, this client secret is only shown once.
- Click Request admin authorization. Keep this tab open, as we will be going back to it.
For this demo, we also need to act as the administrator inside Control Hub to authorize the Service App that was just created:
- Open an incognito browser tab and login to admin.webex.com using the administrator credentials for your sandbox.
- On the left navigation pane in Control Hub, look under the Management section and select Apps.
- On top of the Apps page, select the Service Apps tab.
- Click the meeting-scheduler-demo app, which will open the details on the far right. The details include the description and scopes that were entered when the Service App was created.
- Slide the thumb button to enable Authorize then click Save at the bottom.
Step 3: Retrieve the Access and the Refresh Token
After the admin authorizes the Service App registration, the test user can now retrieve the access tokens for the APIs. The tokens are used like a traditional integration and the same token expiration policies apply - 14 days for the access token and 90 days for the refresh token:
- Refresh the tab that displayed the Client ID and Client Secret.
- In the Org Authorizations section, select the name of your sandbox org from the dropdown menu.
- Paste in the Client Secret value from your notepad in the field below, then click Generate tokens.
- Copy & paste the
refresh_tokenandaccess_tokenvalues in your notepad for later use in the demo app. Both values are only shown once.
Step 4: Install and Configure the Sample Python App
Now that the access and refresh tokens are ready, we can download the sample app and using a code editor, insert the tokens into the Python code and configure the meeting. When complete, the app will automatically schedule a meeting for the next day with your test user host and no attendees:
- Download simple_service_app from GitHub and unzip the file to install it.
- Open a command line window and navigate to the
simple_service_app-maindirectory that was just installed. Keep this window open.cd simple_service_app-main
- Now open the
serviceapp.pyfile in an external code editor (such as VS Code):- Go to line 25 of the code and replace the text with the
clientIDvalue from your notepad. - On line 26, replace the text with the
secretIDvalue from your notepad. - On line 27, replace the text with the
access_tokenvalue from your notepad. - On line 28, replace the text with the
refresh_tokenvalue from your notepad. - Scroll to line 67, after
'title':replace the text and give your meeting a unique name. - On line 70, after
'hostEmail':replace the text with the email address of a test account from your sandbox, which does not necessarily have to be the same account that created the Service App. This will tell the Service App to schedule the meeting with your test user as the host. - Save the
serviceapp.pyfile.
- Go to line 25 of the code and replace the text with the
Step 5: Run the Sample Service App
With all the Service App components added to the Python code, the sample app is now ready to be initialized:
- Go back to the command line window in the
simple_service_app-maindirectory. - Install Requests library for Python (if needed) with the following command,
pip install requests. - Launch the
serviceapp.pyfile from that location with this command,python3 serviceapp.py.
A successful launch will return a statusCode 200 along with the newly created meeting details in JSON format:
{'id': '7f36776aa9034d6091ef00dcee83ced2','meetingNumber': '26607444195','title': 'My Service App Meeting,'password':…,…}
Step 6: Verify the Scheduled Meeting
You can quickly confirm that the Service App scheduled the meeting for the test user with one more API call.
- Go back to the browser and login to developer.webex.comas the test user that is the meeting host.
- Navigate to the List Meetings API reference page.
- Make an API call to list meetings for the test user by clicking the orange Run button (scroll down, along the right side).
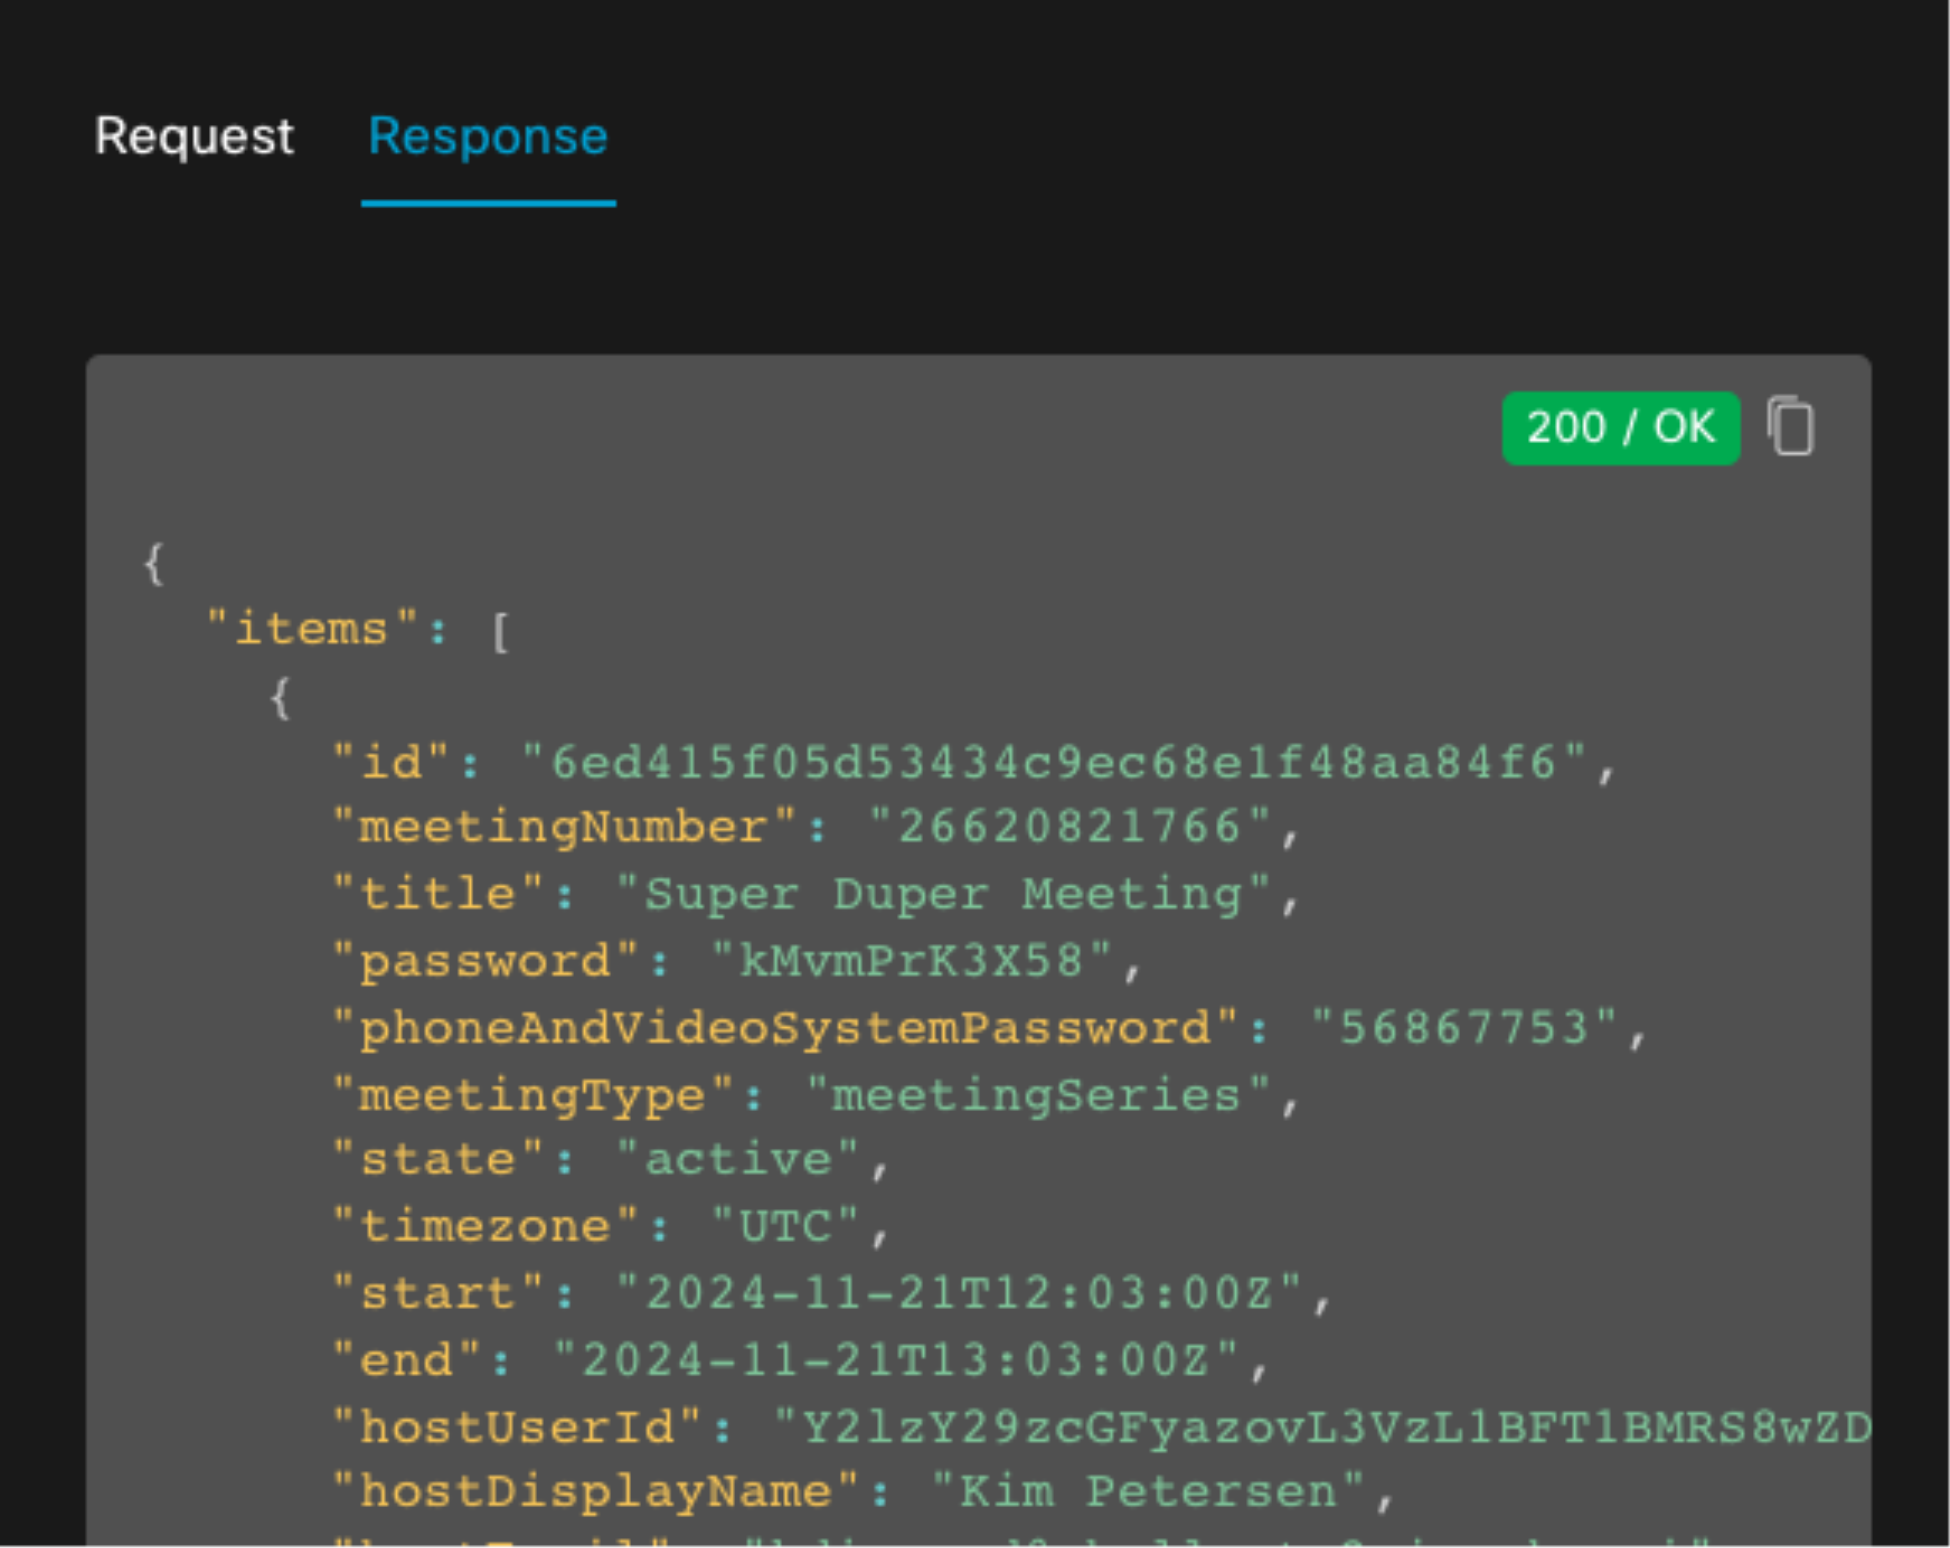
The response should return a 200/OK and provide the meeting information that was scheduled by the Service App for the test user:
Conclusion
As this demo showed, Webex Service Apps can act as a Webex administrator to schedule meetings for users within an organization. There are countless ways automated meeting scheduling functionality can be incorporated into larger organizational applications, such as virtual training, remote consultations, and wellness programs. With Service Apps, they can safely run on a long-term basis independent of any individual users.
Need Some Help? No Problem!
We are happy to provide you with support for any of the features in this article. If you need help or have any questions, the Webex Developer Support Team is standing by and happy to assist. You can also start or join a conversation on the Webex for Developers Community Forum. Until next time, happy developing!